How to download Windows XP from Microsoft for free
Microsoft still offers Windows XP Mode - a full version of XP running inside Windows 7. In this article, TipsMake.com will show you how to download Windows XP, extract and install it in a virtual machine..
Over the years, Windows XP is now an outdated operating system and is no longer supported. However, that doesn't mean we can't go back to the Windows XP era. Microsoft still offers Windows XP Mode - a full version of XP running inside Windows 7. In this article, TipsMake.com will show you how to download Windows XP, extract and install it in a virtual machine.
- Here's how to create a Virtual Hard Disk on Windows 10
- Create clone virtual machine for current Windows hard drive
Link to download Windows XP SP2 from Microsoft
This is SP2 version for Windows XP Pro, 64bit version, with this version you can use up to 3GB of RAM.
Download SP2 for Windows XP
Download Windows XP Mode and extract the virtual drive
Download Windows XP Mode for free
First, you need to access the link above to download Microsoft Windows XP Mode. Select Download. On the next page, select WindowsXPMode_en-us.exe , then click Next, the Windows XP installation file will automatically download.
When the download is complete, do not install it yet!
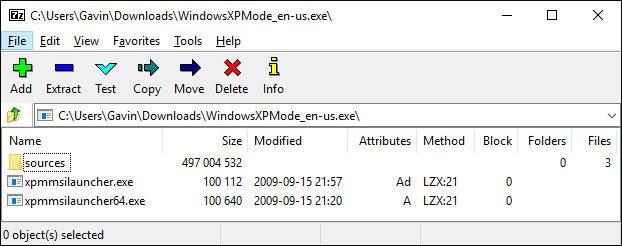
Instead, browse the executable file, then right-click and choose 7-Zip> Open archive> cab from the menu.

This will open the executable file in 7-Zip, you can see 3 files here.
Select Sources to display 3 other files.
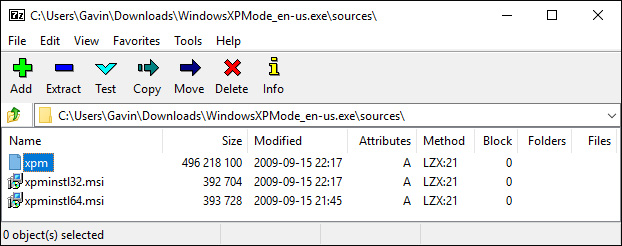
Double click on xpm. This is the virtual hard drive directory of XP Mode. It looks like the image below.

These are the files needed to create the XP Mode virtual hard drive. However, they are just an Archive (archive file), meaning they are Read-only.
We need to extract these files into a new folder. Select Extract from the toolbar, then click the ellipsis icon next to the address bar. Browse to where you want to extract the files, but it's best to select drive C, then select Make New Folder . Click OK and click OK again to start the extraction process. This process may take a minute or two.
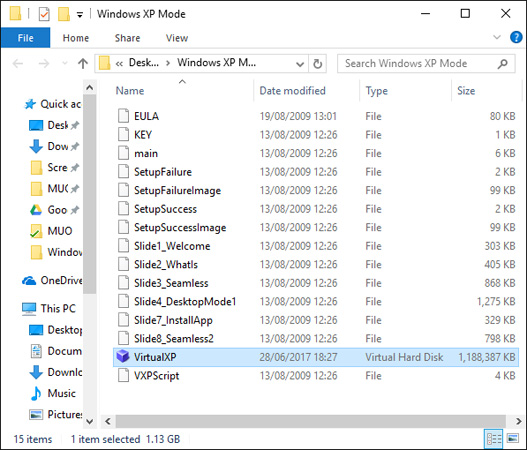
Go to the directory you created when the extraction process is complete. You will see a list of the same files. The difference is that we can edit these files when we see fit.
Select the file named "VirtualXPVHD", then press F2 to rename. Insert a space between "P" and "V", then press Enter. This file will immediately change to a virtual hard drive and display the icon to boot.
Install Windows XP Mode virtual drive in VirtualBox.
First of all, you need to download and install VirtualBox.
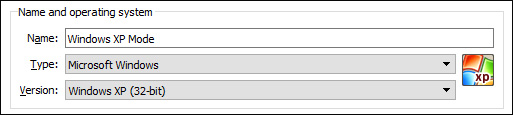
Open VirtualBox. Select New. At the bottom of the Create Virtual Machine window, select Expert Mode (if the options window shows Guided Mode, you are using Expert Mode). Now give the virtual machine an appropriate name. If you want to give "XP" in the virtual machine name, Version will automatically change to reflect that. However, please check that the Version is Windows XP (32-bit).
Specify a virtual machine with some memory. Memory is a shared resource, meaning that the server (PC) and client (virtual machine) use it simultaneously. Fortunately, Windows XP is an old version and doesn't require too much RAM to run. You should use a minimum memory size of 512 MB but will not need more than 2048 MB.

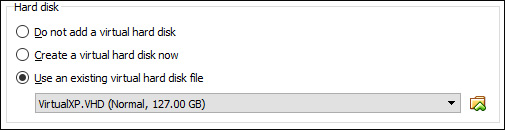
Finally, we need to assign a hard drive - a virtual hard drive extracted from the previous Windows XP Mode. In Hard disk, select Use an existing virtual hard disk file . Then, click on the folder with the green arrow. Browse to the folder where we extracted the files, select VirtualXP, then select Open.
When finished, setting up your new virtual machine will look like the image below:
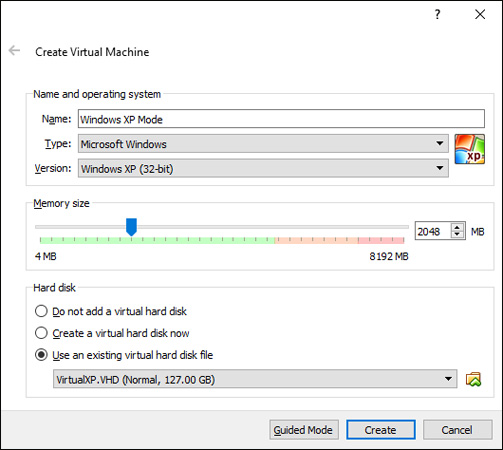
Click Create.
Windows XP Mode virtual machine hard drive settings
Before starting a new Windows XP virtual machine, we need to change some settings.
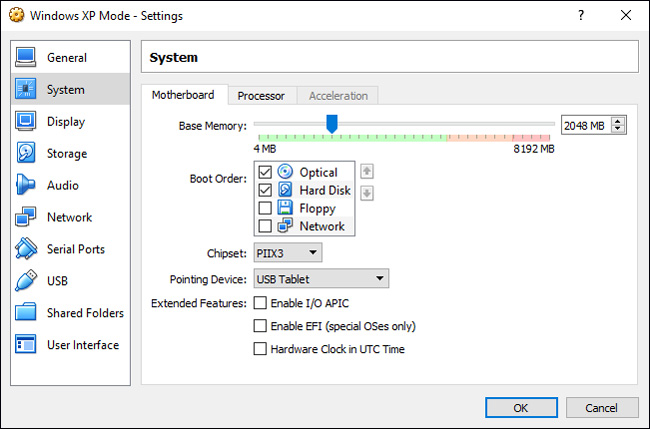
On the VirtualBox toolbar, click Settings. Go to System. Look at the Boot Order. Uncheck Floppy and move it to the bottom of the list. Push Hard Disk to the top. Like the server, the virtual machine has a specific boot order. We want the virtual hard drive just created at the top, so it will boot first.
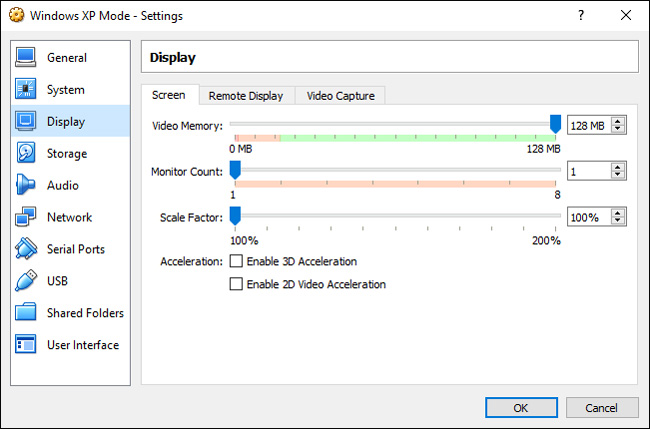
In the Display section, increase Video Memory to 128 MB.
Network settings: Default
Check the Network settings. Older versions of VirtualBox rely on manually importing network configurations. This software is a bit smarter (automatic reading) and often selects network settings without prompting.
Windows XP Mode virtual machine uses the default configuration. That is, use NAT, VirtualBox's specific adapter and make sure the Cable Connected is checked.
Network settings: Host-only Adapter

If the default configuration does not work, you can use the alternate configuration:
- Attached to : Host-only Adapter
- Name : VirtualBox Host-Only Ethernet Adapter
- Promiscuous Mode : Deny
- Select Cable connected
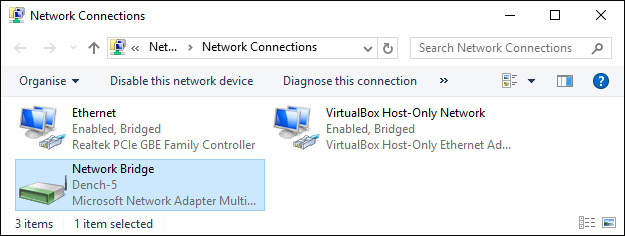
Using the Start Menu search bar, type "network" and select Network and Sharing Center . In the left column, select Change adapter settings . Hold down CTRL and select both Ethernet / wireless cards and VirtualBox Host-Only Network. Then, right-click and select Bridge Connection .
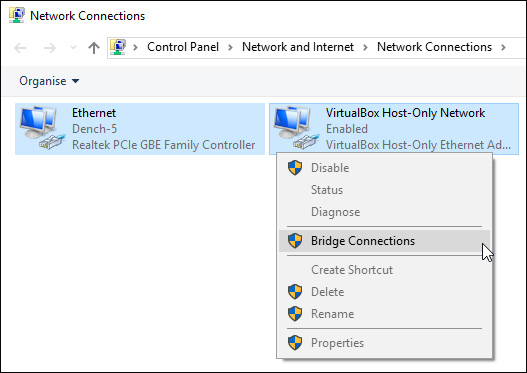
This creates a network bridge, allowing the virtual machine to connect to the network even if it does not have direct access to the router (or replacement switch).
When you enter the virtual machine, you will have to update your network adapter settings
- Go to Control Panel> Network and internet Connections> Network Connections .
- Then, right-click Local Area Connection and select Properties. Select Internet Protocol (TCP / IP) , then select Properties.
- Select Use the following IP address and enter the available IP address for the network. For example, you will enter 192.168.1.10. Then enter the Subnet mask and Default gateway .
- If you don't know what they are, on your server, press Windows + R Key, then type "CMD" and press Enter. Now type "ipconfig / all". You will find the information you need in the list of Ethernet or wireless network adapter names.
- Enter DNS addresses as servers. I use Google DNS, so I should enter 8.8.8.8 and 8.8.4.4 .
- Click OK.

Start up
We extracted the virtual hard drive, created a virtual machine and changed the settings. Now Windows XP Mode is ready to work.
Highlight Windows XP Mode virtual machine on VirtualBox main window. Double click on it and wait.

It is possible that your mouse will not work immediately with the Windows XP Mode virtual machine. Navigate operating system settings pages using the TAB key, arrow keys, spacebar and Enter key.
So, complete the installation. You will come to the screen completely black. Don't worry, press Ctrl (right) + R to restart the virtual machine. Go to Devices> Install Guest Additions CD Image . Use the default installation location and wait for the installation to complete.

You may encounter a warning that you are trying to install software or drivers that are not supported. Please select Continue Anyway . When the Guest Additions setting is complete, select Reboot now . In case of no restart. Please start the virtual machine again.

So, complete the installation process, now you can use Windows XP with full functionality on your computer.
Note: This setting will expire in 30 days. If you have an old Windows XP key, you can import it to keep the virtual machine running. If not, you will have to reinstall.
So thanks to VirtualBox and Microsoft offering free Windows XP Mode, we can watch and keep Windows XP forever.