Table of Contents
This practical guide walks through how to 360 Camera. It organizes the required steps, settings, and checks so you can complete the task with fewer mistakes.
This method will help you: - Get the 360 Camera official download source - How to use the 360-degree Camera effectively
Today I will guide you to take and create effects for your photos using Camera360 Software. the current Camera360 Ultimate version with many beautiful and unique effects, readers can download the camera360 version for Android, iOS, and Winphone operating systems. * Download Camera 360 for Android phones: Camera360 for Android * Download Camera 360 for iPhone: Camera360 for iPhone * Download Camera 360 for WinPhone phones: Camera360 for Winphone After installing Camera360 Ultimate, the interface will be as follows, To start the program, select START

This article TipsMake walks you through two adjustment functions of the Camera 360 application, which are the photo taking feature and the photo editing feature, to help make photos taken on your phone more "sparkling" than ever. run out of.
Take Photos with Camera 360
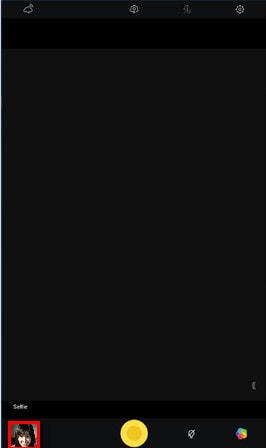
We will have the image preparation interface as follows:
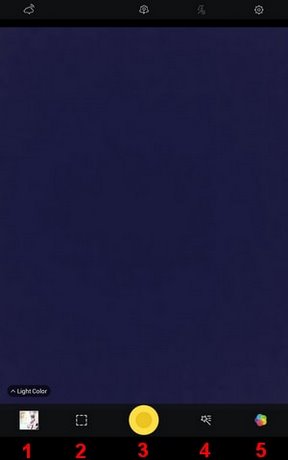
Here you will have 5 optional tabs that I will number from 1 to 5. - Tab 1 will help you review photos and edit them (I will explain more in part 2 of the article). - Tab 2 will help you adjust the frame for the photo under the ratios: 16:9, 4:9, 1:1 depending on the frame you want to capture. - Tab 3 is the photography key. - Tab 4 is to adjust effects when taking photos. The default when initially entering will be Effects.Effects Is this option that helps you add effects to make your photos more vivid.
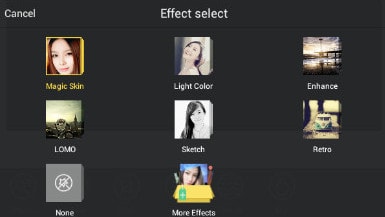
Tip One of the most appreciated and used effects is Sketch And Retro
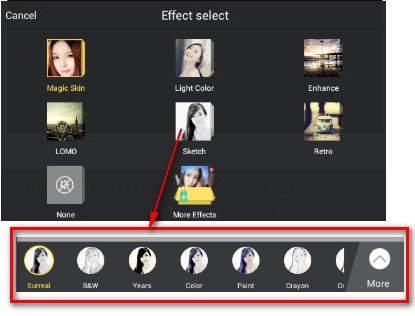
Sketch Allows us to create an image effect that resembles a pencil drawing as if someone drew it for us. There will be many options depending on your preferences in this section such as Surreal, B&W, Year.
Retro Is the part that I personally like. You can make your photos have an antique, rustic look.
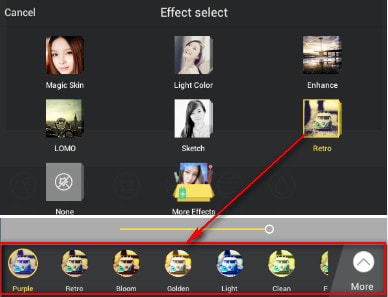
Tip To add more effects, select More Effects, then the "Effects Store" interface appears. Here you can add effects.
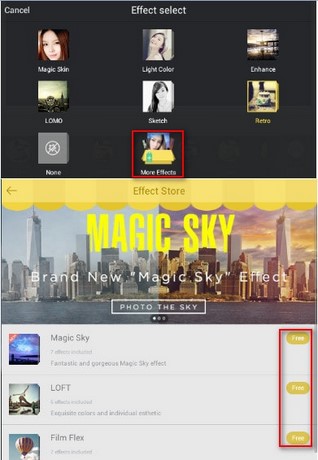
Tab 5 is where you can select more shooting modes or get more effects.
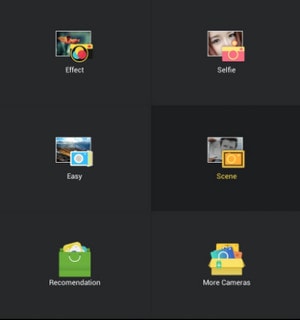
In this section there will be options such as: - Effects I introduced above. - Selfie Is taken with the front camera. - Easy Is to take a simple photo under the default settings of Camera 360. - Scene Is to take a photo using a frame.
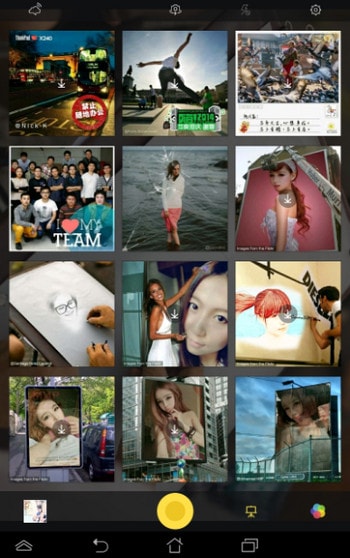
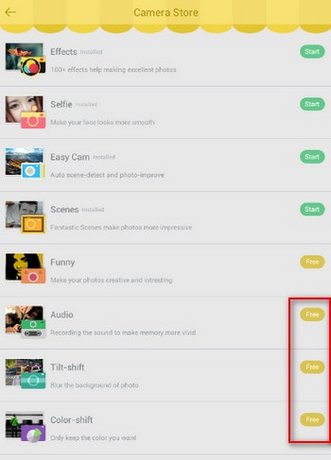
Tip In this section, by default there is only 1 frame for you. To make your collection richer, you can select the icon as shown in the picture.
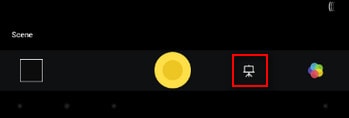
After selecting, there will be many beautiful and vivid frames appearing for you to choose from. To download and use, just select the icon you like and they will automatically download.
You don't need to pay attention to this Recommendation Section, it's just an introduction to other software. More camera Is a section for you to get more shooting styles. Tilt-shift: Create a Tilt-shift effect for the photo. Funny: Create some fun effects such as Fish Eye, parallel mirror effect. Color-shift: Create a black and white photo effect with any color in the photo. Audio: Take pictures with sound.
Edit and Add Effects to Photos with 360 Camera
To review, edit or share your photos, select the icon in the bottom left corner as shown in the picture:
Inside, the following items appears

My Album Is the photos you took with Camera 360 Ultimate. Other Album Is where photos are stored on your device.
The last icon will help us retrieve photos you save on social networking sites or Camera360 Ultimate's cloud data itself. After selecting photos, new tabs appears.

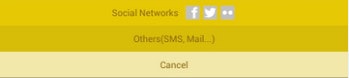
Share Is the tab where you can share your photos on popular social networking sites like Facebook, Twitter. or you can also send SMS, Mail, Bluetooth. very conveniently and quickly.
Delete Is to delete the photo. Edit Is a photo editing section in a variety of styles, making your photos richer. After entering the Edit Section, there will be 6 editing and effect tabs including: Effects , Rotate , Crop , Adjust , Texture , Blur..
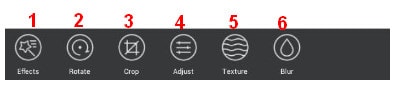
I will go deeper into each part as follows: 1. Effects: I have provided instructions on this option, you can use part I of the article.
2. Rotate: You want your photo to be vivid and seen from a different perspective. Options will help you do it easily. Rotate helps you rotate left, right, reverse left and right viewing angle (like looking into a mirror), reverse up and down (like looking at the water surface)

3. Crop: Of course, when taking photos, we cannot avoid having redundant scenes around us that we do not want. Camera360 Ultimate also helps us remove them easily

4. Adjust: This option is also quite important. You can adjust your photos to make them more harmonious with the sharpness, brightness, saturation adjustment tabs.

5. Texture: This item allows us to create surrounding effects to create emphasis for the main character of the photo. You can also choose this section under your personal preferences

6. Blur: This option of Camera 360 allows you to blur your photo, like your photo was taken in foggy weather. There are 3 options in this section: circular blur, top and bottom blur, and left and right blur. Depending on each case, you can adjust accordingly.

Below are images before and after editing withCamera 360
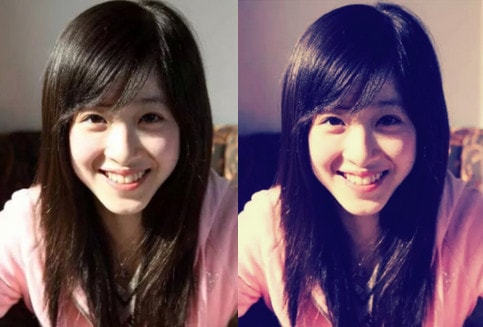
So I have finished instructing you to take and edit effects for your photos using Camera 360 Ultimate software. However, for each image, you choose the most suitable effects and photo frames. Whether the photo is beautiful or not depends a lot on your options. Hope you get the best photos.
If you want to take photos with date and time so that you can preserve the moment and when you look back, you can know what day that photo was born, you can use the article on tips for Taking photos with date and time , you will quickly Quickly get the photo you like.
FAQ
What do I need before I 360 Camera?
Prepare the required device, software, account access, and any files mentioned in the steps. Back up important data before changing system settings.
Why does the process look different on my device?
Menus and options can vary by operating system, app version, device model, or region. Use the closest matching setting and check the official documentation when needed.
What should I do if a step does not work?
Restart the app or device, confirm permissions and connectivity, update the software, and repeat the step carefully. Avoid unofficial downloads or tools.
Related Articles
 How to Download Photos from Google Photos to iPhone and Android Phones3 minutes read
 How to Edit Photos with Camera360 on the Computer3 minutes read
 How to Download SPSS on Android Phones, iPhone/iPad for Free4 minutes read
 5 Android Camera Features Only Available on Foldable Phones6 minutes read
 8 iPhone Camera Features Android Phones Need to Learn: What You Need to Know7 minutes read
 WhatsApp Will Stop Working on These Android Phones and iPhones from June 13 minutes read
Reader Comments 0
Sign in with email or Google to join the discussion.