Table of Contents
Hard Disk Sentinel monitors HDDs and SSDs by reading SMART attributes, temperatures, error counters, and other device information. Download it only from the developer or its official Microsoft Store listing, verify the installer, and review each detected drive after setup. A healthy score is useful monitoring evidence, but it is not a guarantee against sudden failure and does not replace a tested backup.
Choose the correct edition
The official Hard Disk Sentinel download page lists current Windows installers, portable packages, trial/unregistered options, and other platform editions. Features and license terms differ, so compare the editions on that page rather than relying on an old mirror's description.
- Installer: best when you want automatic startup, continuous monitoring, and normal Windows integration.
- Portable package: useful for a one-time check without a conventional installation; automatic monitoring may require extra setup.
- Microsoft Store version: provides a signed Store delivery route where it is offered.
- Linux or DOS edition: separate products with different interfaces and capabilities; they are not interchangeable with the Windows installer below.
Some USB enclosures, RAID controllers, and storage drivers do not pass complete SMART data to monitoring software. Check the developer's hardware-compatibility information if a drive is missing or shows limited fields.
Download safely
- Open the official download page and select the Windows edition you intend to use.
- Save the file to Downloads. Do not use a repackaged archive from a third-party download portal.
- Right-click the installer, open Properties > Digital Signatures, and confirm that Windows reports a valid signature from the expected publisher. Scan the file with Windows Security.
- Create or confirm a current backup before running any extended or write-based disk test.
Install Hard Disk Sentinel on Windows
-
Run the official installer. Approve the User Account Control prompt only if the publisher and file source match what you verified.
-
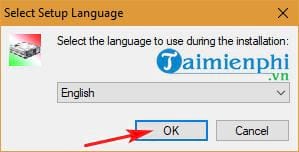
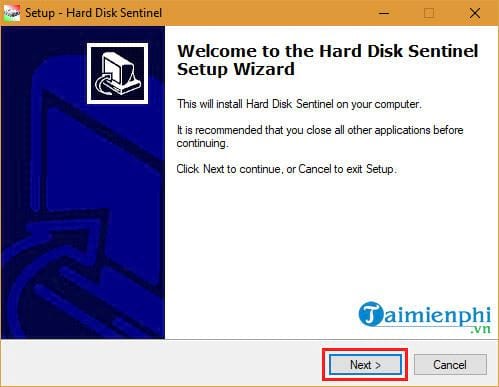
Select the setup language and choose OK, then read the welcome screen and continue.
-
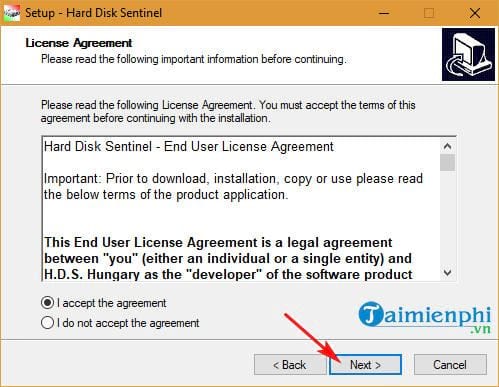
Read the license agreement. Select the acceptance option only if you agree to its terms.
-
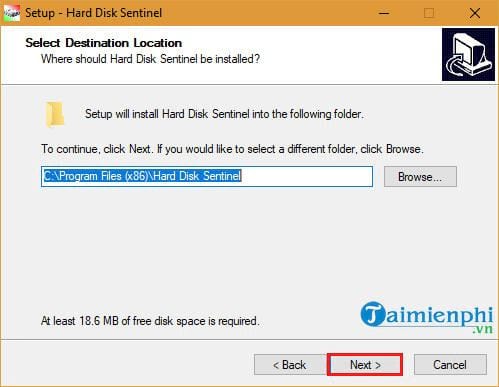
Review the destination folder, shortcuts, startup behavior, and other tasks. The current installer may not look exactly like these older screenshots.
-
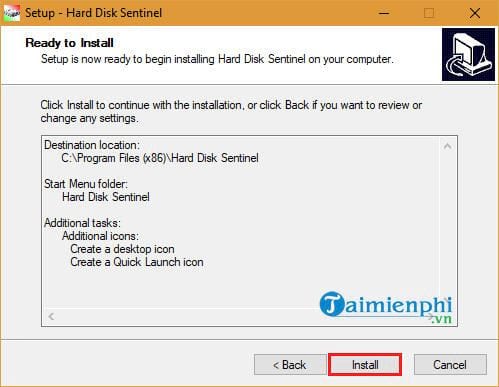
Inspect the summary and choose Install.
-
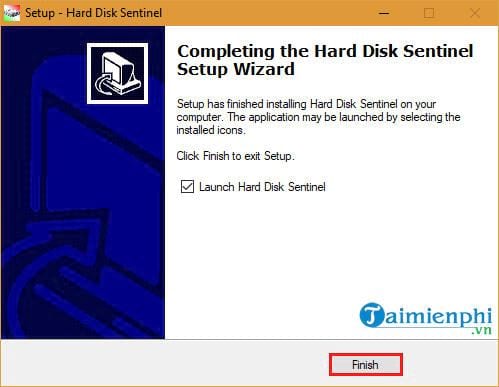
When setup finishes, leave the launch option selected if you want to inspect the disks immediately, then choose Finish.
Activate a license or use the available evaluation mode
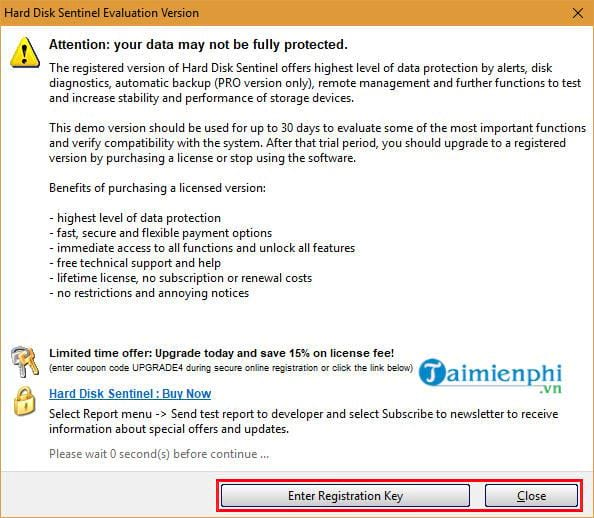
On first launch, the program may ask for a registration key or show that it is running unregistered. Enter a key only if it came from the developer or an authorized seller. Otherwise, close the registration dialog and use the evaluation or unregistered features currently offered by the installed edition.
Do not use key generators, patched executables, or shared license files. Besides violating the license, modified monitoring software is especially risky because it runs with hardware access and may start with Windows.
Review the first health report
The main window lists detected drives and summarizes health, performance, temperature, interface, power-on time, and reported problems.
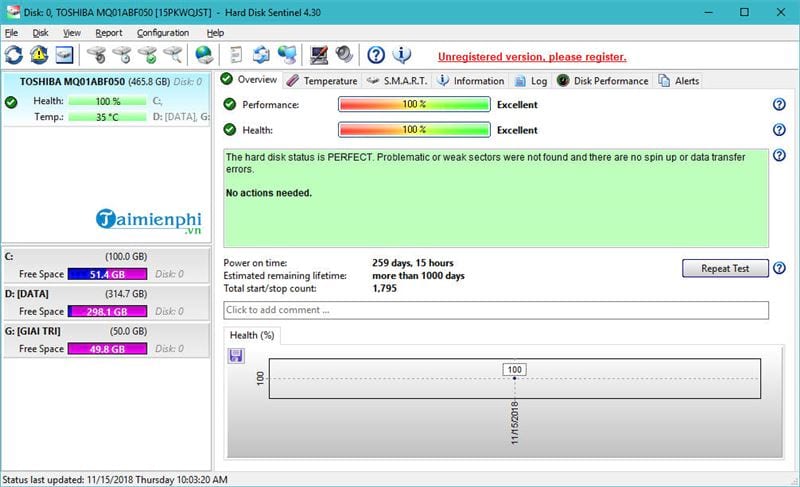
Work through the report in this order:
- Confirm drive identity: match the model and capacity to Disk Management. Avoid acting on the wrong disk.
- Read the text description: it explains which attributes affected the health estimate.
- Review SMART attributes: focus on reported changes and errors, not only the overall percentage.
- Check temperature trends: a single reading needs context from the drive model, workload, airflow, and manufacturer guidance.
- Save a report: a baseline makes later changes easier to spot.
TipsMake's guide to checking drive health in Windows explains how to corroborate the result with other tools. If the drive is an SSD, record its model, serial, firmware, total writes, and remaining warranty; the SSD warranty guide lists official support routes.
Set useful alerts without creating noise
- Enable startup monitoring only if you want continuous health and temperature history.
- Configure alerts for health changes, critical errors, missing drives, and sustained abnormal temperatures.
- Choose an alert method you will actually notice, then test it.
- Keep logs on a healthy disk; a log stored only on the failing device may disappear with it.
- Avoid aggressive polling on unusual USB bridges or controllers if it causes disconnects or prevents safe removal.
What to do when Hard Disk Sentinel reports a problem
Back up important data before running more tests. Confirm the warning with the drive manufacturer's diagnostic and inspect cables, power, enclosure, and controller logs. A declining health score, rising unreadable-sector count, failed self-test, repeated disconnects, or abnormal mechanical sounds is a reason to plan replacement—not to keep stress-testing the device.
Write tests, surface reinitialization, and repair functions can alter data. Read the exact test description, work from a verified backup, and use a read-only test first. For data that cannot be replaced, stop using a mechanically failing or intermittently detected drive and consider professional recovery.
Hard Disk Sentinel is a monitoring and diagnostic aid. Its most valuable role is detecting changes early enough to create or verify a backup before the storage device becomes unusable.
Related Articles
 Hard Disk Sentinel - Hard Disk Sentinel Download and4 minutes read
 To Download Hard Disk Sentinel, the Hard Drive Temperature Checker4 minutes read
 How to Install Kali Linux on Your Computer6 minutes read
 The Baisvik Disk Cleaner Hard Disk Cleaning Software Is Available4 minutes read
 What Is a Disk Signature? Fix Disk Signature Conflict Error10 minutes read
 How to Create Disk Images with Disk Utility (Mac Os)4 minutes read
Reader Comments 0
Sign in with email or Google to join the discussion.