Table of Contents
Formatting a volume creates a new file system and removes access to the files currently stored on that volume. In Windows, use Disk Management when you need to see the physical-disk layout, or File Explorer for a straightforward removable or data drive. Back up everything you need and verify the target by capacity, label, and disk number before selecting Format.
Formatting is destructive. It removes the existing file-system structure from the selected volume. It is not a reliable secure-erasure method, and it does not repair failing hardware. Stop if the drive contains the only copy of important files.
Choose the right file system
| File system | Best use | Important limitation |
|---|---|---|
| NTFS | Windows system and internal data volumes | macOS normally reads NTFS but does not write to it without additional software. |
| exFAT | External SSDs and flash drives shared between current Windows and macOS systems | Not suitable as a Windows system-volume file system; older devices may not support it. |
| FAT32 | Small removable media and devices that specifically require broad legacy compatibility | Individual files cannot exceed 4 GiB, and Windows' graphical formatter limits the FAT32 sizes it offers. |
Leave Allocation unit size at Default unless an application or storage administrator specifies otherwise. A volume label should describe the drive's purpose, such as Photos or Backup-2026.
Quick Format or full format?
- Quick Format: creates a fresh file-system structure without scanning every sector. It is appropriate for a known-good drive when speed matters.
- Full format: takes much longer and checks the volume for bad sectors while formatting. It still is not a secure wipe and should not be used as a stress test for a drive that may be failing.
Neither option guarantees that old data is unrecoverable. For an SSD, use the manufacturer's supported secure-erase/sanitize method when preparing the device for disposal, and keep encryption and recovery-key implications in mind.
Method 1: Format with Disk Management
Disk Management is preferable when the PC has several disks because it displays each device's partition map.
-
Press Windows + R, type
diskmgmt.msc, and press Enter.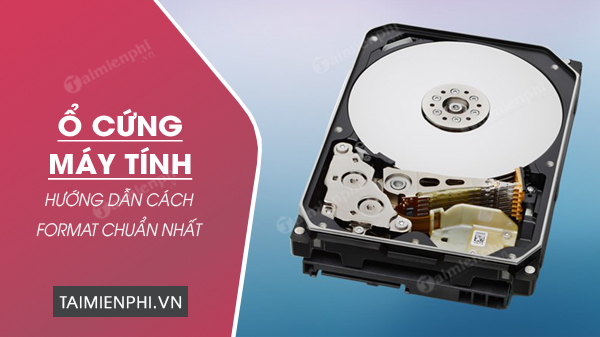
-
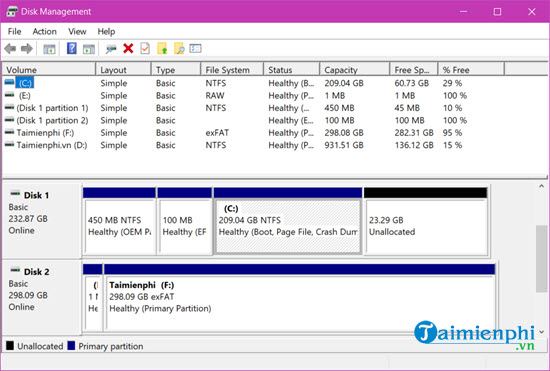
In the lower pane, find the intended physical disk by number and total capacity, then locate the volume by drive letter, size, and label. Do not select an EFI System, Recovery, OEM, or Microsoft Reserved partition.
-
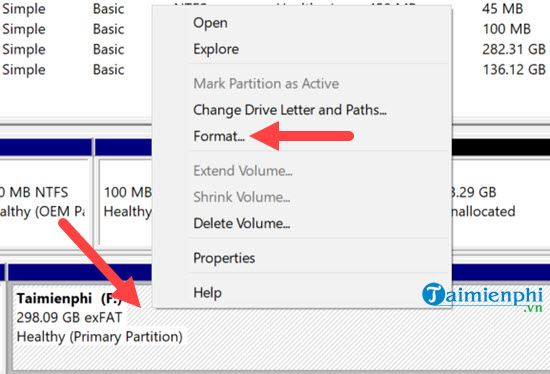
Right-click the target data volume and choose Format.
-
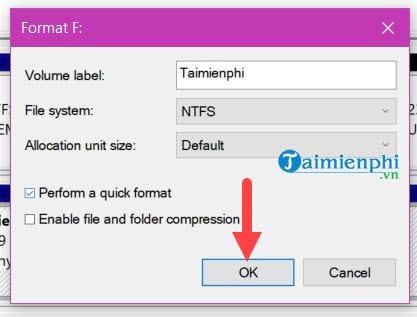
Enter a volume label, choose the required file system, and leave allocation unit size at Default. Select Perform a quick format for a healthy drive unless you specifically need the slower sector scan.
-
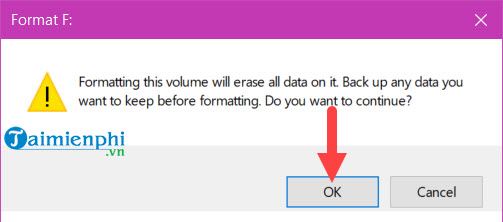
Read the warning. Confirm only if you have backed up the volume and the displayed drive is the intended target.
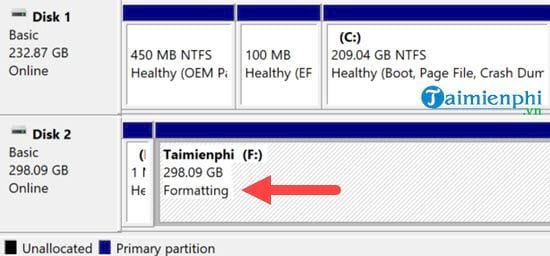
Disk Management displays Formatting while the operation runs. Do not disconnect an external drive or power off the PC.
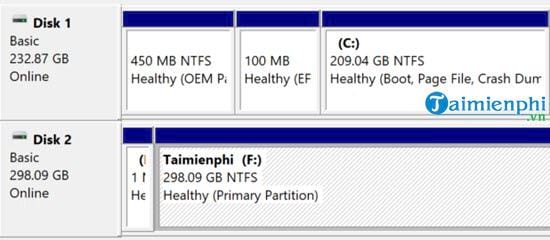
Afterward, the volume should show the new file system and a Healthy status. Open it in File Explorer, create a test folder, and safely eject it if it is removable.
Method 2: Format with File Explorer
This is convenient for a USB drive, memory card, or ordinary data volume whose identity is already clear.
-
Open This PC, compare the drive letter, volume label, and capacity with the device you intend to erase.
-
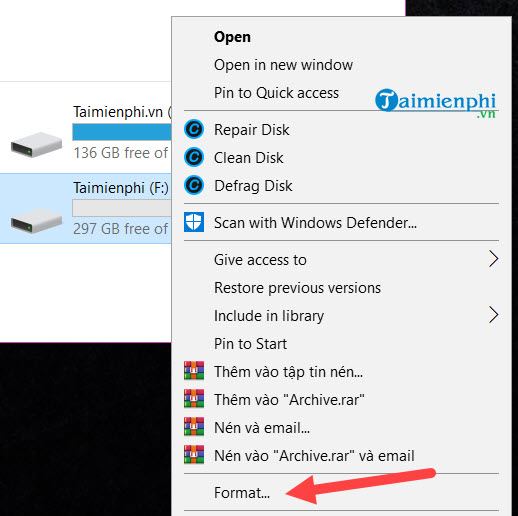
Right-click the correct drive and select Format.
-
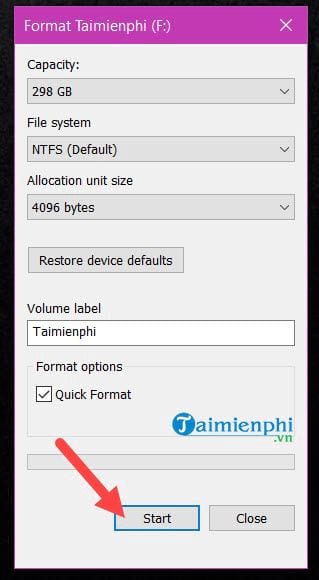
Select the file system, allocation unit size, label, and Quick Format setting. Review the capacity at the top of the dialog to catch a wrong selection.
-
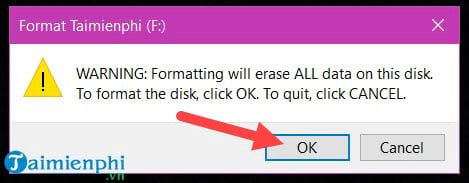
Choose Start, read the data-loss warning, and confirm only when the target is correct.
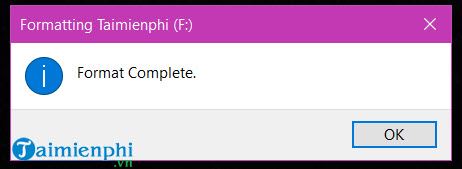
Wait for the completion message before closing the dialog or removing the device.
Why the C: drive cannot be formatted from normal Windows
Windows cannot format the volume it is actively running from. To erase the system volume for a clean installation, boot from official Windows installation media, choose the correct disk in Setup, and delete or format only the intended partitions. The process removes Windows, applications, settings, recovery data, and personal files on those partitions.
Review the steps to create Windows installation media and the warning-heavy guide to managing the target disk during Windows Setup before beginning. There is no need to use an unofficial rescue image merely to format C:.
If Format is unavailable or fails
- The volume is in use: close open files and applications, then retry. A system or page-file volume cannot be formatted this way.
- The drive is write-protected: check a physical lock switch and the device's documented protection settings. Do not clear read-only flags until the target is verified.
- The file system shows RAW: if data matters, stop and recover or image it before formatting.
- The drive disconnects or reports I/O errors: test the cable and enclosure, back up readable files, and check hardware health. Formatting does not fix unstable storage.
- The desired file system is missing: the volume size or device type may not be supported by Windows' graphical formatter.
Formatting versus partitioning
Partitioning defines regions of a physical disk; formatting creates a file system inside a volume. If the goal is to divide one large volume into two, do not format it. Shrink the existing volume and create a new one by following the guide to partitioning a drive with Disk Management.
Keep the backup until the newly formatted volume has been mounted, written to, safely ejected where applicable, and tested on every device that needs to use it.
Related Articles
 How to Format the Hard Drive on Windows10 minutes read
 How to Format a Hard Drive into Ntfs in Linux5 minutes read
 Click: How to Format a Hard Drive7 minutes read
 How to Format a Hard Drive with the CMD Command5 minutes read
 How to Format Hard Drive on Windows, Mac Computer Simply10 minutes read
 Drive: How to Format a Hard Disk16 minutes read
Reader Comments 0
Sign in with email or Google to join the discussion.