How to customize the interface of lectures by Player in iSpring Suite
A lecture with a friendly interface will help students easily absorb knowledge, thereby improving the quality of teaching.
Therefore, in the scope of this article, I will guide you how to customize the interface of e-lessons with the Player feature of iSpring Suite 9. With the Player feature you can customize the templates, layout, color, language… very easily.
There are 2 ways to get into Player:
+ Option 1: Go to iSpring Suite 9 => select Player

+ Method 2: Go to iSpring Suite 9 => select Publish => select Universal (Full - Modified)
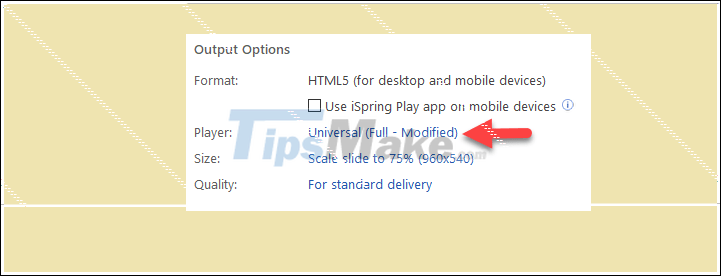
Note that method one is only available in version 9 and up and the second method can be applied to other versions only. If you are using version 8 or below then choose the second option .
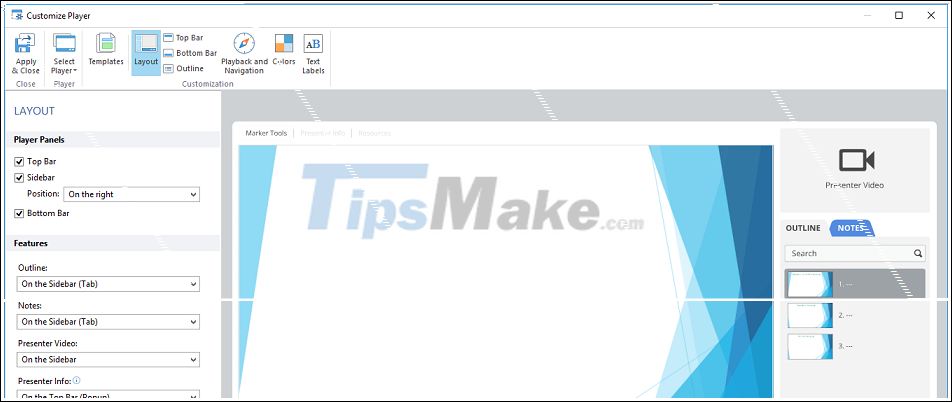
After doing one of the two ways above, a new window called Customize Player appears with the interface as shown below. I will briefly introduce and guide you to customize all of these parts and there are seven parts in total, specifically:
- Select Player
- Templates
- Layout
- Top bar
- Bottom bar
- Color
- Text Labels
Select Player
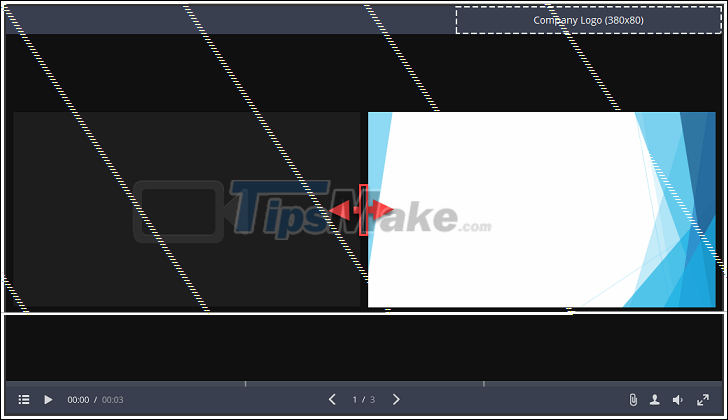
The Select Player section gives us two options, Unversal and Video Lecture, depending on the content of the lesson that you will choose accordingly.
- Unversal: Suitable for lectures that are only recorded but not recorded by the teacher.
- Video Lecture: Suitable for lecture with teacher video.
This is the interface of Video Lecture and you can drag and drop the vertical bar in the middle to customize the size accordingly.
Templates
The Templates section contains pre-designed iSpring interface templates and if you like you can immediately choose these interface templates to use without redesign.
In total, we have eight templates and Full template is selected by default. For details on the interface template names, please see the image below and select the template you want to see its interface.
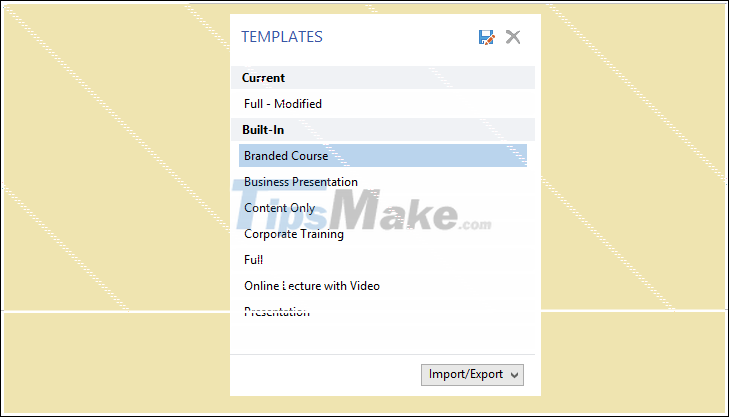
In addition, if you design and customize a beautiful interface template and want to share either friends or colleagues . or you have a beautiful theme template, you can use two features: Import template to import. or Export template to export.
Note that the interface template must have a format of * .isplayer before you can import it.
Layout
The Layout section allows you to customize the layout of the lesson, mainly we will customize the layout so that it is student-friendly, whether it is still beautiful or not because of your aesthetic eye.
The first is the Player tab that allows you to show or hide the Top Bar, Slidebar, Bottom Bar and the position of Slidebar is On the right or On the left.
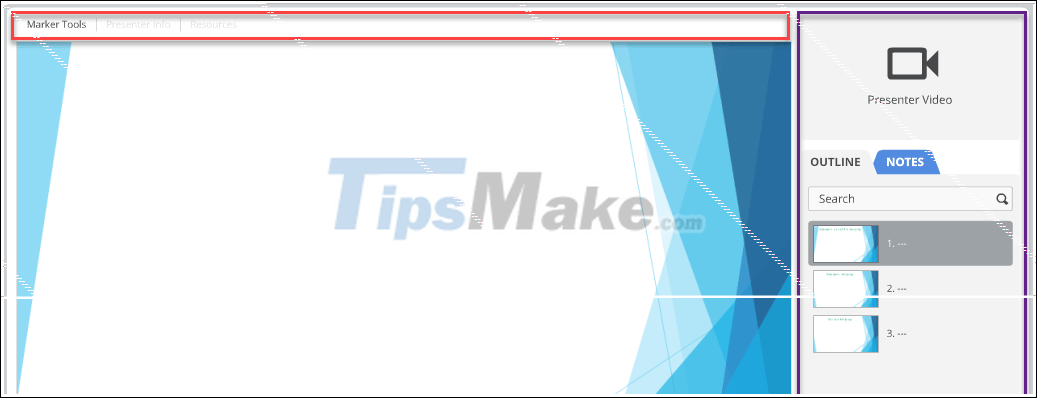
The second is the Features tab, this tab allows you to customize the display position of Outline, Notes, Presenter Video, Presenter Info, Company Logo.
. If you want to display it anywhere, you can choose correspondingly there. If you do not want to display, choose None
Note that when you want to display Presenter Info, at Presenter Info, choose On the Slidebar and at Presenter Video you choose None.
Top bar
The Top bar section allows you to customize the buttons that show or do not show on the Top bar (choose to show and vice versa), specifically:
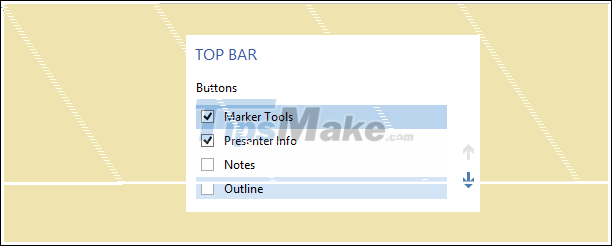
- Marker Tools: A marker.
- Presenter Info: Teacher information.
- Notes: Notes.
- Outline: Outline .
- Resources: Resources.
Bottom bar
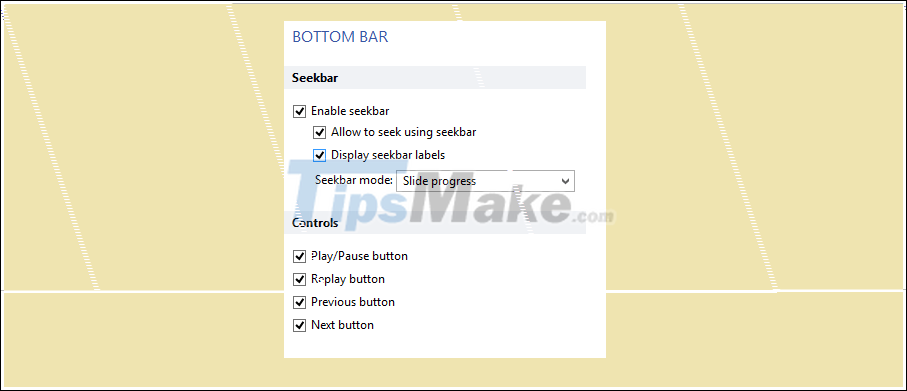
The Bottom bar is similar to the Top bar.
The bottom bar allows you to customize show or hide buttons on it. It also allows you to further customize the Seekbar card, but in my opinion it is better to leave it as default.
Colors
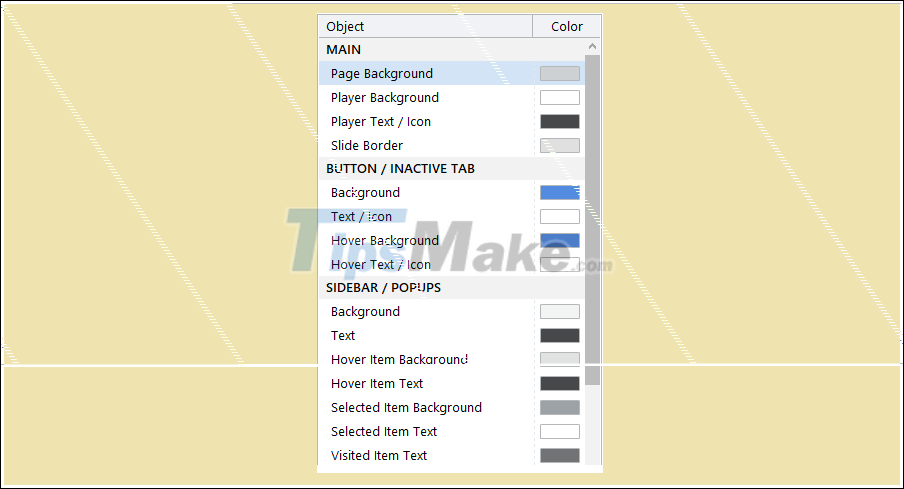
The Colors section allows you to customize the colors of the lecture interface. You can customize yourself or immediately choose the templates that the program is designed for. In total we have all 15 templates and the Light Blue template is the default.
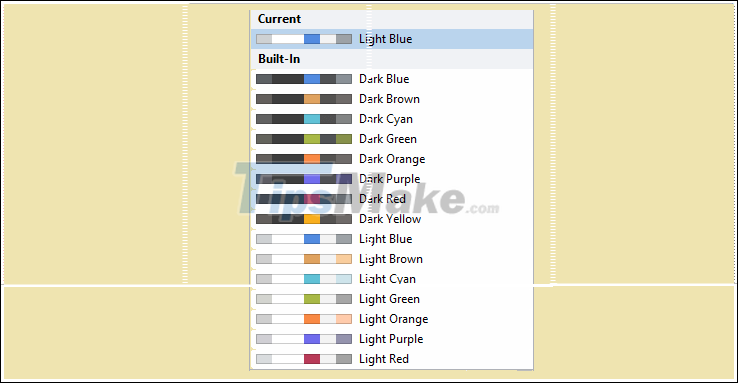
To reselect the desired color, please select the cards in turn and then select the color. Feel free to choose the program will automatically update immediately so you can preview and change if not right.
Text Labels
This is the language customization of the interface and is probably the most important part of the Player. The other sections you have tags to default do not need to be customized, but if you leave them as default, it will cause many difficulties for learners.
Currently iSpring Suite 9 program supports only five languages below and English is the default language.

Conclude
Above, I have introduced and instructed you how to customize the interface of lectures with the Player in iSpring Suite program. You do not have to customize the interface to look beautiful and vivid, but just your lesson has a student-friendly interface.
As for whether it is beautiful or not or how to adjust it to beauty, I do not discuss in this article, it is due to the aesthetic eye of each person.
Good luck. See you in the next posts!