How to create iPhone ringtones with iTunes
You were too bored with the iPhone's default ringtone and would love to own the melody of the hottest songs today. Or simply just want to create a personal ringtone, suitable for your personal taste. So how to create ringtones on iPhone?
Perhaps many people have the same concerns as you. Therefore, we will help you to design your personal favorite ringtone with iTunes extremely quickly. Please refer to the article below.
Steps to create iPhone ringtones
Step 1 : First start iTunes
In iTunes, find the song you want to cut as a ringtone, then right-click the song and choose Get Info .
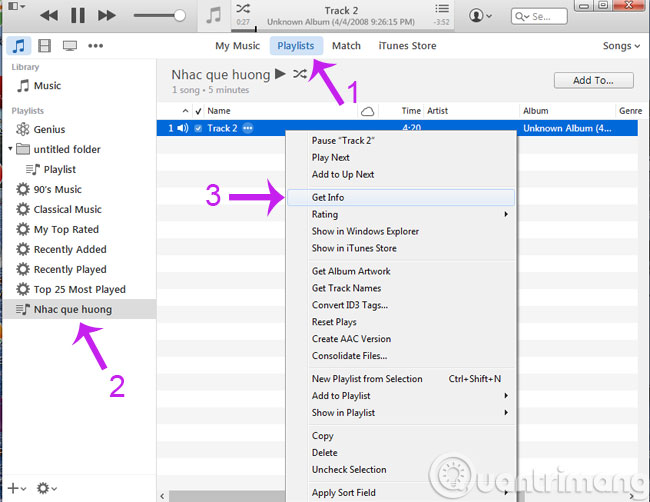
Step 2 : Select the Options tab in the window that appears
Here select the start and end time for Start and Stop to cut the ringback tone in that song, it's best to listen to the song first to know how many seconds to cut. Then, press the OK button. Note : The total time is not more than 40 seconds .

Step 3 : Create an AAC version for the song
After step 2, iTunes will switch to the song list screen, right-click on the medium file and select Create AAC Version .

Step 4 : Display music files in Windows Explorer
After step 3, there will be an additional piece of music just below the original song you just selected, corresponding to the time you cut. Continue to right-click the file just cut, select Show in Windows Explorer to open the folder containing the file.
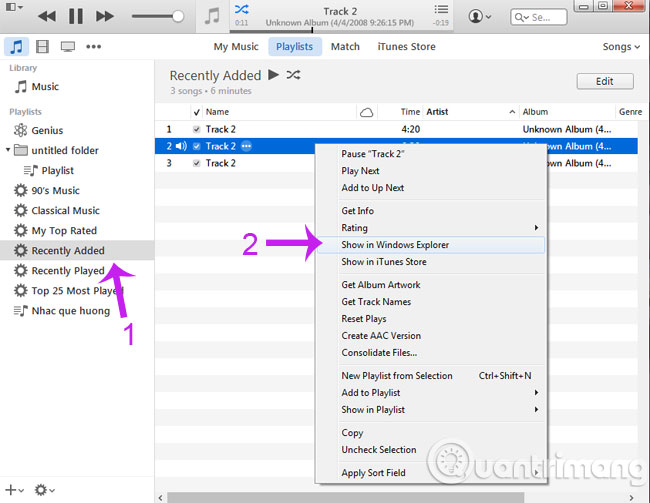
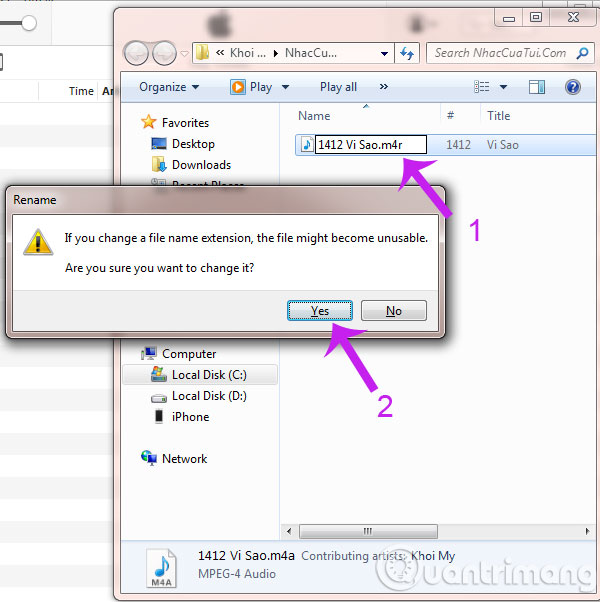
Step 5 : Change tail m4a to m4r
At this point, the folder containing the created file will open. However, this file is in m4a format, while the format for making iPhone ringtones is m4r . Therefore, it is necessary to change the m4a tail to m4r accordingly.
Note: If you do not see the file extension, go to Control Panel >> Folder Options. In the Folder Options window, select the View tab and then uncheck the Hide extensions box for known file types.
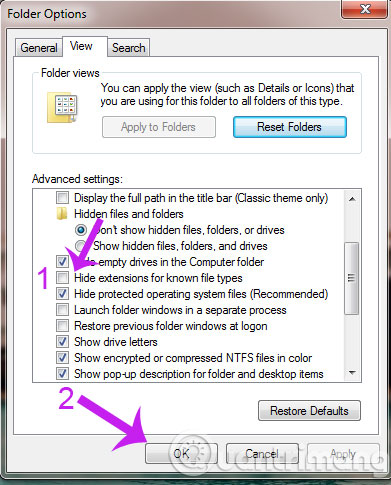
Step 6 : Add files to the Tones library
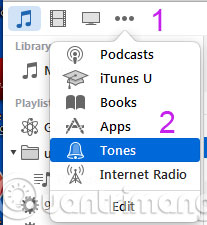
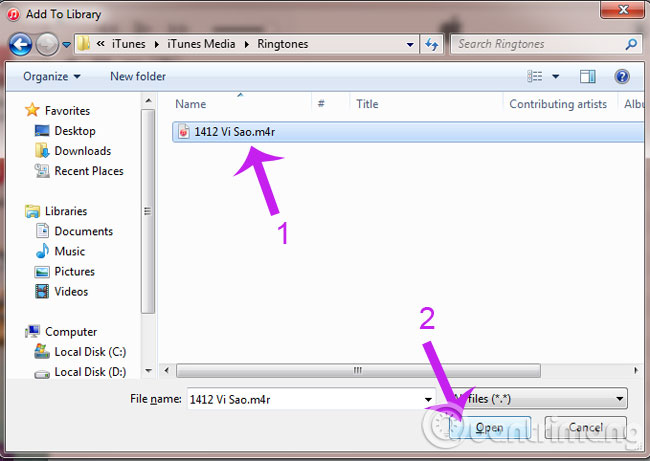
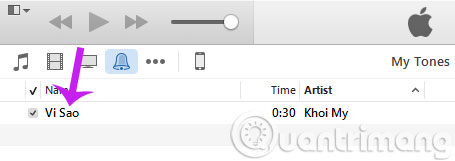
Now just drag the file into iTunes to add it to the Tones library. At the Tones section interface, press Ctrl + O, select the file m4r tail just created and click Open.
Step 7 : Sync ringtones on iPhone and iTunes
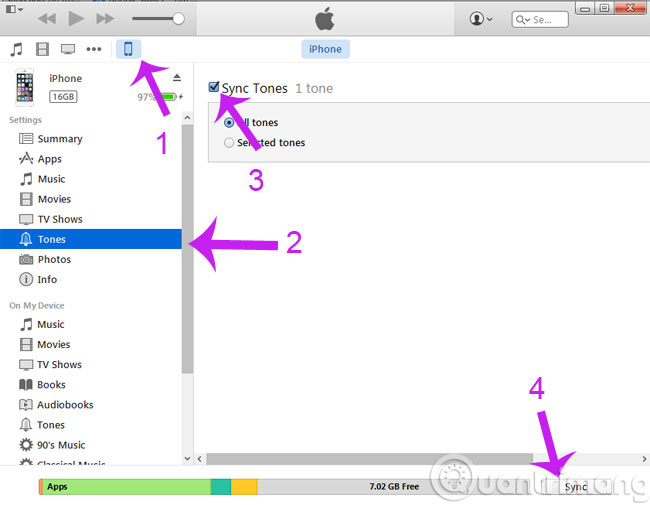
Here you must proceed to connect the device to the computer to synchronize the ringtone. On the main interface of iTunes click the phone icon as shown below, select Tones on the menu on the left of the screen. Then, in the right column, select Sync Tones , then select the next to All tones . Finally click Sync to sync the ringtone.
Step 8 : Set the song as a ringtone
Now switch to your iPhone, select Setting and go to Sound.
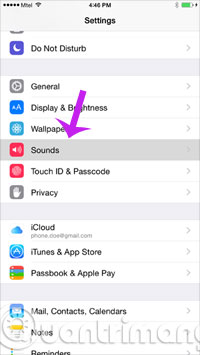
Step 9 : Complete installing ringtones on iPhone
In the Sound section, select the Ringtone section, you will see the ringtone you just created, select it as a ringtone for the upcoming calls.
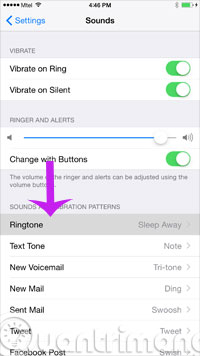
So we have just introduced you how to create ringtones for iPhone with iTunes. Now you can freely use your favorite songs to make music for your "mobile phone" already.
Hopefully the article will help you!
You should read it
- ★ Is it possible to set a ringtone from Zing MP3 for iPhone?
- ★ How to create iPhone ringtones does not need iTunes, the computer is free of GarageBand
- ★ How to fix the error does not appear item Tones ringtone on iTunes
- ★ Create iPhone ringtones with iTools
- ★ How to create ringtones on Android as you like with Ringtone Maker