How to create chalk drawings in Photoshop
From color photos you can turn into chalk drawings in Photoshop with a very simple implementation.
Table of Contents
From ordinary color photos, Photoshop gives you a lot of tools to convert into different types of photos such as turning photos into paintings on Photoshop, or creating wall paintings in Photoshop . And in this article, users will know how to turn a color image into a chalk painting on a blackboard. The operation of switching from regular drawings to chalk drawing photos on Photoshop is very simple, and will be instructed in the article below.
Instructions to convert a color image into a brush stroke
Step 1:
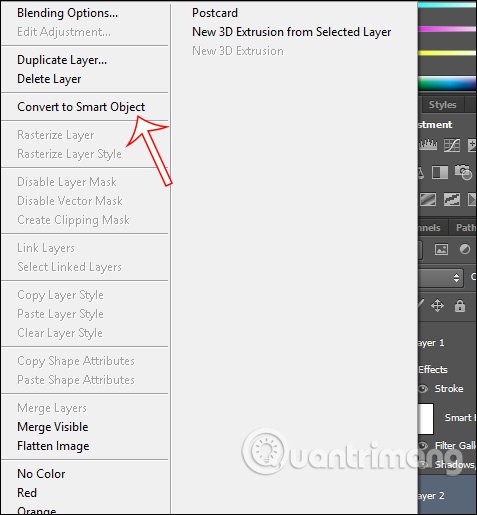
First of all, you need to prepare a photo of the blackboard to combine photos later. Then we need to separate the image background in Photoshop. Refer to how to delete the background in the article How to remove photos from the background in Photoshop. Once the background has been extracted successfully, right-click on the lyer and select Convert to Smart Object .

Step 2:
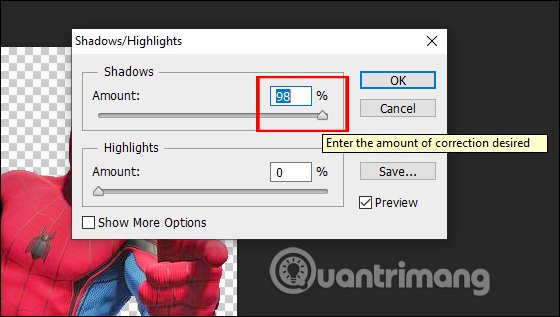
Next, click on Image and then Adjustments , then Shadows / Highlights .

Now show the interface so we can increase the shadows to the maximum to brighten the image.
Step 3:
Press the D and X keys to invert the white , then click Filter> Filter Gallery….

In this interface, click on Sketch and select the Copying effect below. Look to adjust the Detail and Darkness to make the brush stroke type, depending on how your current image looks.

Step 4:
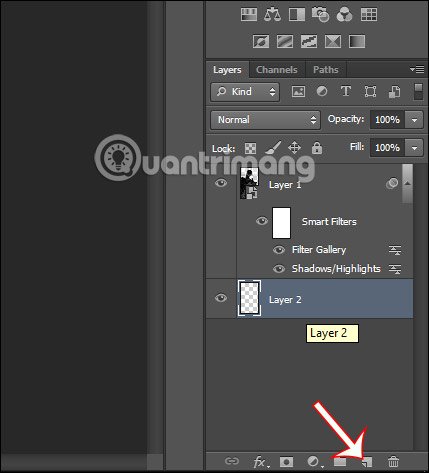
You create a new layer under the old layer by pressing Ctrl and clicking the Create a New Layer icon .
Now be a new layer , then press Ctrl + Delete to fill the background with black .
Step 5:
Continue right- clicking on the original layer and selecting Blending Options . to create the outline of the chalk for the character.

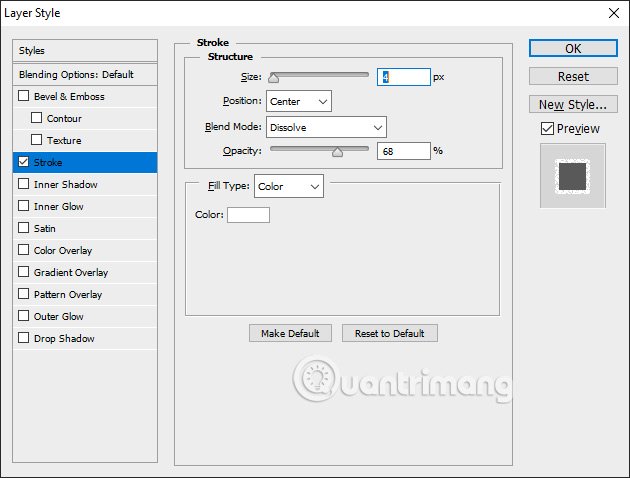
In this interface, users click on Stroke and then proceed to the settings as shown below.
- Position: To be Center.
- Blend Mode: To be Dissolve.
- Opacity: Leave at about 70% or less.
- Size: Choose the density of chalk brush strokes, just adjust and look at the image will be clearer.
- Color: Choose white.
Then click OK to set as above for the image.
Step 6:
Press the Shift key and then click on the 2 layers and then right-click Convert to Smart Object . Now 2 layers have merged into 1.
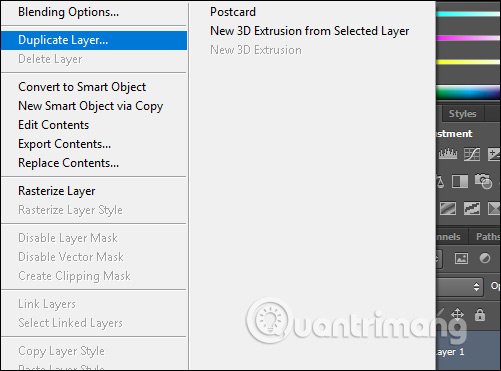
Right-click on the duplicated layer and choose Duplicate Layer .
Step 7:
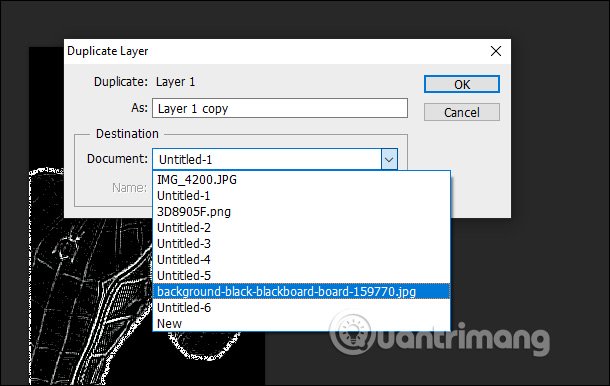
Display a dialog box, in Document, click the triangle to select the blackboard file open in Photoshop, and click OK.
Step 8:
Now that the image has been merged into the blackboard, hold down Shift and drag to the position you want and press Enter to apply.

Step 9:
Finally, click on the character layer , then click on Normal and select the Screen effect to remove the black background, leaving only the white stroke.

The final result is as shown below.

Was this article helpful?
Your feedback helps us improve.
Related Articles
 Create cute drawings from photos using AI.7 minutes read
 How to create GIF animations in Photoshop5 minutes read
 How to create a snowman in Photoshop2 minutes read
 How to create SVG from PNG or JPG in Photoshop3 minutes read
 How to create texture in Photoshop CC9 minutes read
 Word 2013 Complete Guide (Part 17): Drawings and how to create effects for drawings10 minutes read
Reader Comments 0
Sign in with email or Google to join the discussion.