Use Disk Utility to copy the drive on Mac
With OS X El Capitan and newer versions of Mac OS, Apple changed the process using Disk Utility to copy Mac drives.
With OS X El Capitan and newer versions of Mac OS, Apple changed the process using Disk Utility to copy Mac drives. Although it is still possible to make an exact copy of any drive directly connected to the Mac, the changes made to Disk Utility means there are additional steps involved, if you want. Use the Disk Utility's Restore function to copy the boot drive.
But don't let these extra steps falter, the process is still quite simple and the extra steps really help ensure a more accurate copy of the boot drive.
Copy function of Disk Utility
Disk Utility can always make copies, although the application refers to the Restore process, such as restoring data from the source drive to the destination drive. For clarity, the Restore function is not limited to drives. It will actually work with any storage device that can be attached to a Mac, including disk image, hard drive, SSD and USB drive.
How does Restore function work?
The Restore function in Disk Utility uses the block copy function, which can speed up the copy process. It also creates an exact close copy of the source device. "Nearly accurate" here does not imply that useful data may be left behind. That means a copy of the block copies everything in a block of data from one device to another. The results are almost an exact copy of the original. On the other hand, a file copy will copy the data to the file and keep the content in that file, but the location of the file on the source and destination device may be very different.
Using block copying is faster, but there are some limitations when using, the most important thing is that copying each block requires that both source and destination devices must first be disconnected from the Mac. This ensures that block data does not change during copying. Even so, don't worry, you won't have to disconnect the device. Disk Utility's Restore function will take care of that for you. But that means both source and destination devices cannot be used when you use the Restore function.
The drawback is that you cannot use the Restore function on the current boot drive or any drive with the file in use. If you need to copy the boot drive, you can use the Mac's Volume Recovery HD or any drive with a bootable copy of OS X installed.TipsMake.com will provide information on how to use the Volume Recovery HD to copy the following boot drive, but first, we will look at the steps to copy the non-boot drive that is attached to the Mac.
Restore non-boot drive
1. Launch Disk Utility, located at / Applications / Utilities.
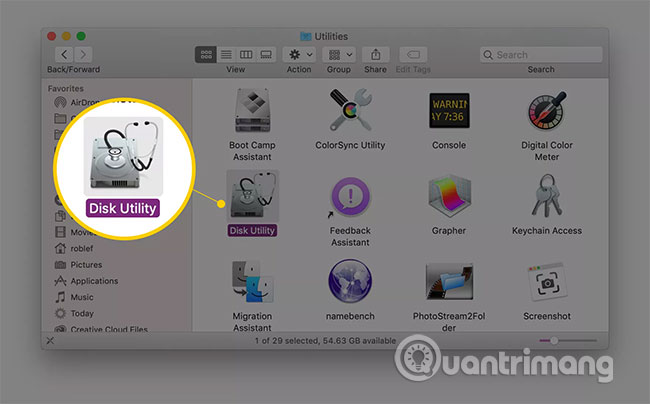
2. The Disk Utility application will open, displaying a single window divided into three spaces: Toolbar, sidebar showing the currently installed drives and volumes, along with an information pane, displaying information. Information about the device currently selected in the sidebar. If the Disk Utility application looks different from this description, you may be using an older version of Mac OS. You can find the drive cloning instructions for the older version of Disk Utility in the tutorial: Back up the boot drive using Disk Utility.
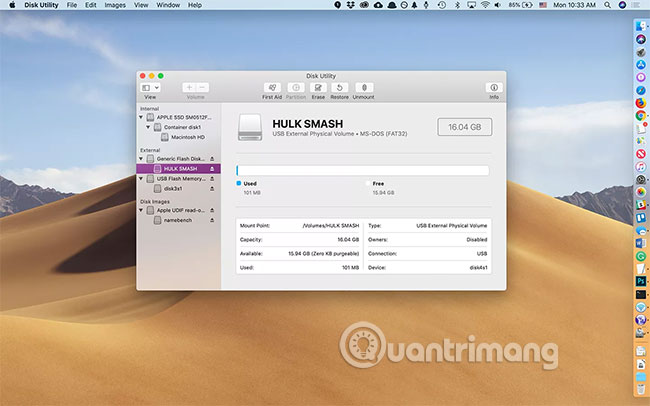
3. In the sidebar, select the volume you want to copy data to. The volume you choose will be the destination drive for the Restore operation.
4. Select Restore from Disk Utility's Edit menu.

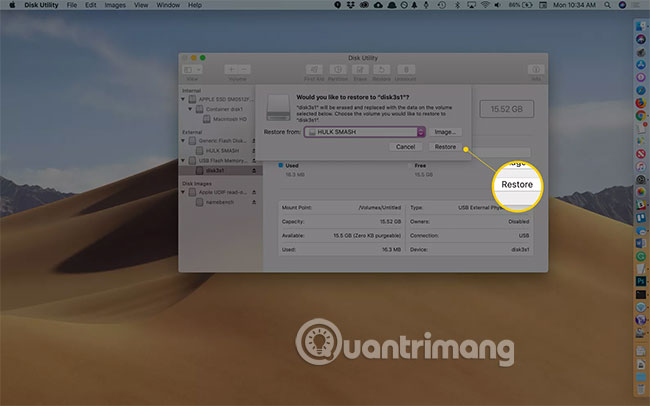
5. A table will appear, asking you to select the source device from the drop-down menu that will be used for the Restore process. This table will also warn you that the volume you selected as the destination will be deleted and its data will be replaced by data from the source volume.
6. Use the drop-down menu next to Restore from to select the source volume, then click the Restore button .
7. The Restore process will begin. A new drop-down table will display a status bar indicating where you are in the Restore process. You can also view detailed information by clicking on the Show Details triangle.
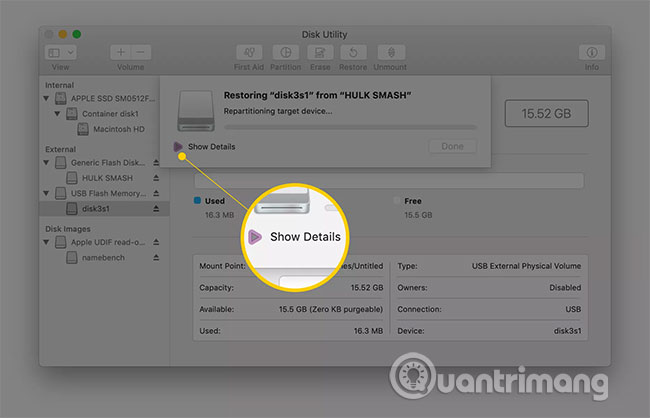
8. When the Restore process is complete, the Done button in the drop-down table will appear. Click Done to close the Restore panel .
Restore using the boot drive
When you use the Restore function, both the target device and the source must be disconnected. This means you cannot be booted into the normal boot drive. Instead, you can boot your Mac from another volume that contains a bootable version of Mac OS. This can be any volume mounted to a Mac, including a USB drive, an external hard drive, or a Volume Recovery HD as in the example.
A complete step-by-step guide on how to do it in the article: Use volume HD Recovery to reinstall or troubleshoot OS X.
After you boot from Volume Recovery and use the step-by-step instructions to launch Disk Utility, come back here and use the boot volume restore guide above, starting from step two.
Why should I use Disk Utility's Restore function?
You may have noticed that over the years, there have been many humanized applications, such as Carbon Copy Cloner and SuperDuper, to create bootable copies as part of a backup system.
So if the application replicates better, why do we use Disk Utility? There are many reasons, but one of them is because Disk Utility is free and included in every Mac OS version. And although different cloning applications have more features, but if you don't have access to third-party applications, using Disk Utility will create a fully usable copy. It may take a few more steps to use Disk Utility and this tool lacks some interesting features, such as automation and scheduling, but this is also a great consideration if you need a good backup. restore drives on Mac.
Hope you are succesful!.
- How to use Disk Utility to repair the hard drive and decentralize the drive
- How to Create Disk Images with Disk Utility (Mac OS)
- Fix Mac hard drive with Disk Utility's First Aid feature
- Back up the boot drive using Disk Utility
- How to delete a drive cannot be deleted with Disk Management
- Activate Disk Utility's Debug menu
- Try Disk Usage, a new tool to analyze hard drive space on Windows 10
- What is RAM Disk? How does it work?
- How to Delete a Drive Partition on PC or Mac
- Instructions for using Clonezilla to copy Windows hard drives
- How to mount and access Ext4 partitions on Mac
- Increase Virtual Memory for Mac applications
- How to download the macOS 12 Monterey installer with gibMacOS
- Create a bootable copy of the OS X Mountain Lion installer
- 10 best macOS screenshot apps 2021
- How to adjust screen brightness from Terminal in macOS
- Use Terminal on Mac as FTP or SFTP Client
- Fixed a bug where FileVault cannot be enabled on Mac
- How to add PDF watermark with Quick Actions in macOS
- 5 ways to run multiple copies of applications on a Mac
-
 How to enable or disable System Restore on Windows
-
How to enable Windows 11 point-in-time restore
-
How to delete old Windows restore points to free up space
-
How to delete individual system restore points in Windows
-
How to Recover Deleted Apps on Windows 11 Computer
-
How to restore old version of Google Sheets without losing data
 How to enable or disable System Restore on Windows
 How to enable Windows 11 point-in-time restore
 How to delete old Windows restore points to free up space
 How to delete individual system restore points in Windows
 How to Recover Deleted Apps on Windows 11 Computer
 How to restore old version of Google Sheets without losing data