Table of Contents
This guide explains how to create a Google Docs Password When Sharing, with clear steps, practical tips, and important checks before you begin.
Instructions for creating a shared Docs password
Step 1:
We install the Passify utility on Chrome browser by following the link below.
Download the Passify extension on Chrome
Then open the document you want to share, Google Docs, Google Slides or Google Sheets and click on the Passify utility icon.
Note , for the first-time accounts to use the Passify utility, the utility will send a verification code to the email address for you to fill in the utility's interface to use.

Step 2:
Then display the interface for you to enter the password for the document file . Maximum password has 20 characters, including lowercase, uppercase and numbers, then press Submit .

Step 3:
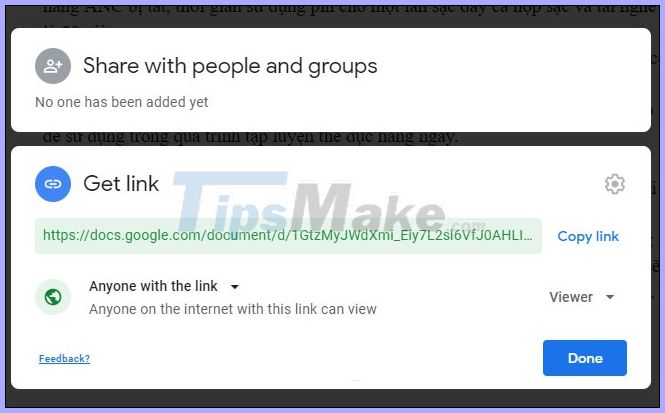
Before sharing, we need to change the file sharing mode Anyone with a link , anyone can view the document when there is a link.
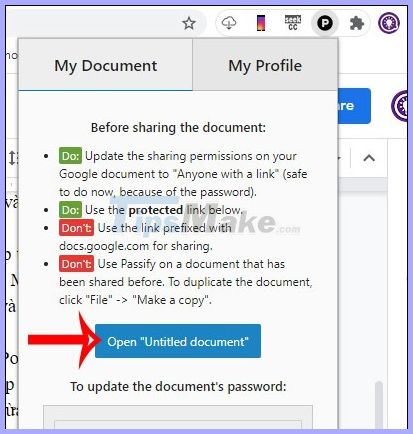
Now you click on the utility icon again and will see one of the content needs attention. You will share the document link created by Passify by clicking Open 'Untitled document' .
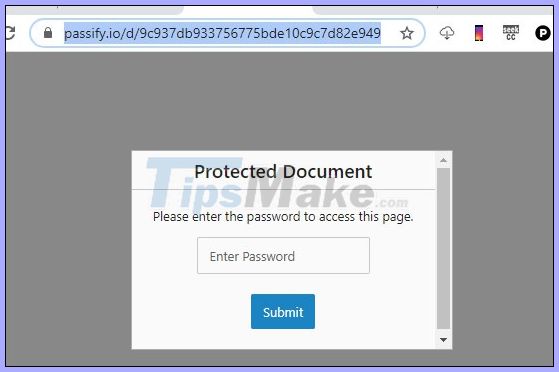
If others access this link, the password is required.
FAQ
What should I know about Create a Google Docs Password When Sharing?
Focus on the key features, requirements, limitations, and practical use cases explained in this guide.
How do I get the best results with Create a Google Docs Password When Sharing?
Follow the recommended steps, use current software or information, confirm compatibility, and review settings before major changes.
Are there any risks or limitations?
Potential limitations depend on compatibility, data quality, cost, privacy, support, and how the product or method is used.
Related Articles
 How to Create a Google Docs Icon on Your Computer4 minutes read
 Useful Tools to Know in Google Docs6 minutes read
 How to Share Links to Google Docs in PDF Format4 minutes read
 10 Tips to Create Beautiful Google Docs9 minutes read
 How to Add Frames Around Text on Google Docs11 minutes read
 How to Create an Invoice in Google Docs4 minutes read
Reader Comments 0
Sign in with email or Google to join the discussion.