How to copy data from computer to BlueStacks?
In the previous article, TipsMake.com showed you how to simulate Android to play games on your computer using BlueStack software (reference link at the end of the article). Today, we will share with you how to copy data from computers to BlueStacks . Please consult
Note : To be able to install and run this emulator software well, your computer configuration must meet the following minimum requirements:
- Operating system from Windows XP - SP3 or higher (required).
- NET Framework 2.0 SP2 .
- Although BlueStacks only requires 1GB RAM, but to ensure the machine runs stably, it is best that you have 2GB or more RAM.
- Computer graphics drivers need to be updated with the latest version for compatibility with BlueStacks.If you are not sure about this driver, you can use the tools to find and upgrade professional drivers such as 3DP Chip , DriverEasy or SlimDrivers .
- And finally, you must be granted Admin permissions to run App Player in BlueStacks.
Step 1:
Open the SharedFolder folder from the Windows search box

Step 2:
You put the data you want to copy to BlueStacks here ( only for image, text or video files )

Step 3:
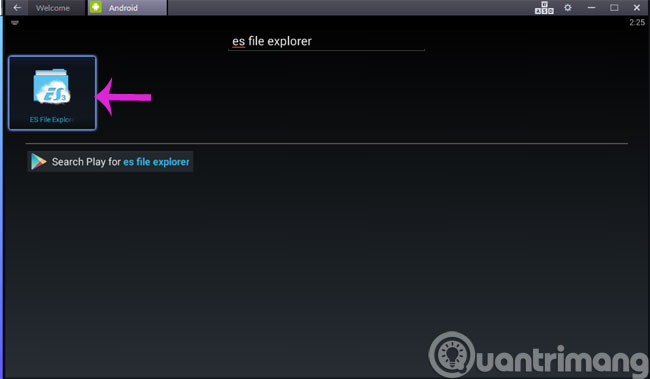
Open the BlueStacks app, enter the ES File Explorer keyword into the search box and then click on the search result
Step 4:
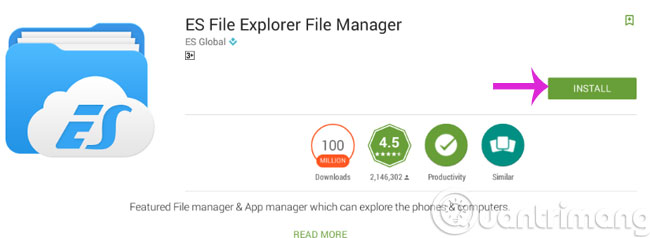
Install this application by clicking Install
Step 5:
After successful installation, click Open to run the application

Step 6
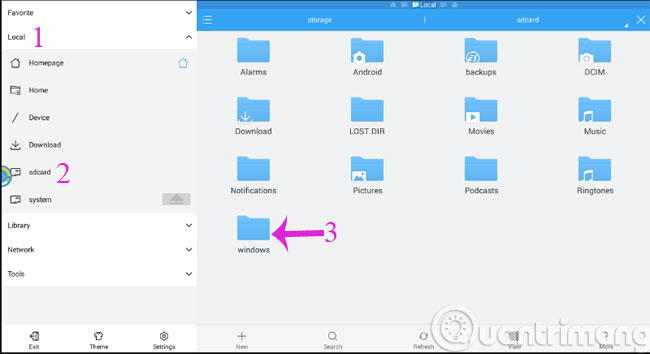
In the ES File Manager interface, click the Local > sdcard menu in the left column and select the Windows folder in the right column.
Step 7:
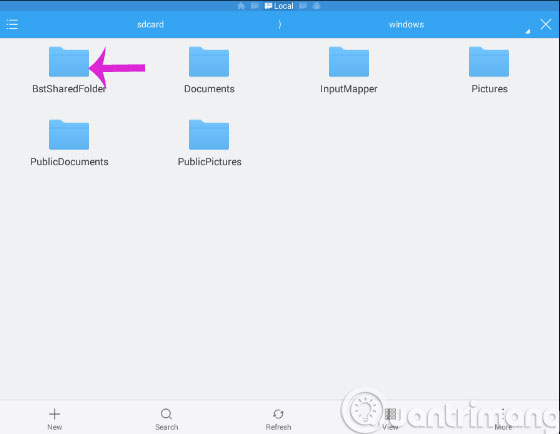
Please select BstSharedFolder
Step 8:
Here will store the data that you copied above, to see what data, you click directly on it. Here, we have an example with the image, so click View Picture
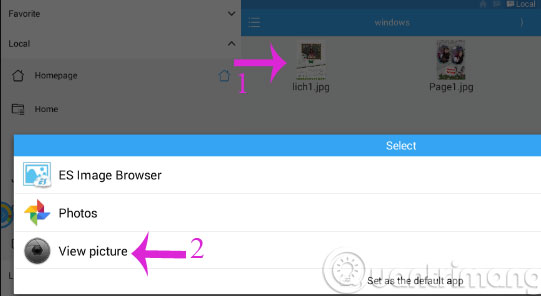
Step 9:
Click and hold the mouse button for about 3 seconds on any image to bring up a blank box next to it, then tick the photos you need. Then, click on the 3 dots mark in the lower right corner and select any option (for example, select Copy to).
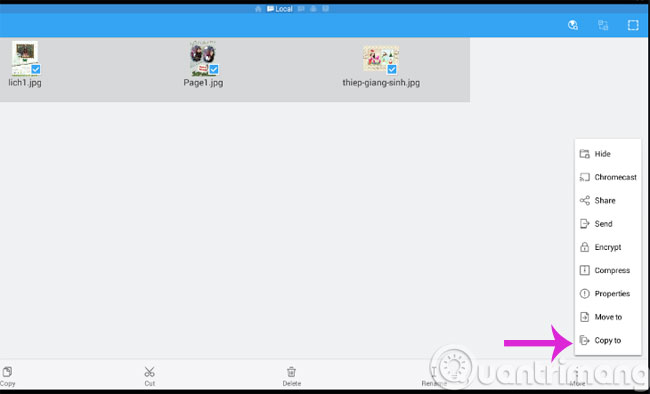
Step 10:
In the dialog box that opens, select the folder containing the image files (here we choose Picture).
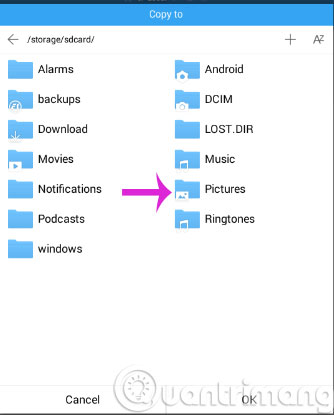
Step 11:
Finally, you just need to click OK to finish
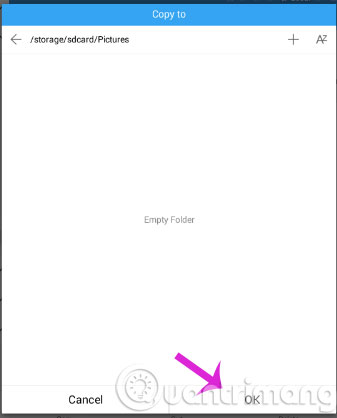
- Emulate Android on Windows with Droid4x
- Play Android games on Windows with BlueStacks
- Common errors on Bluestack and how to fix it
Good luck!