How to Convert 2D Images to 3D with Copilot
Windows 11 Copilot brings AI support directly to users. Among them, Copilot can help you create eye-catching 3D images..
Windows 11 Copilot brings AI support features directly to users. Among them, the Copilot feature can help you create eye-catching 3D images without installing additional software. We can access the Copilot website on any browser, as long as it is convenient for users. Below are instructions for converting 2D images to 3D with Copilot.
Instructions for creating 3D images on Copilot
Step 1:
First, you go to the Copilot website and log in with your Microsoft account. Then you click on the Labs icon on the left side of the interface as shown.
- Access Microsoft Copilot

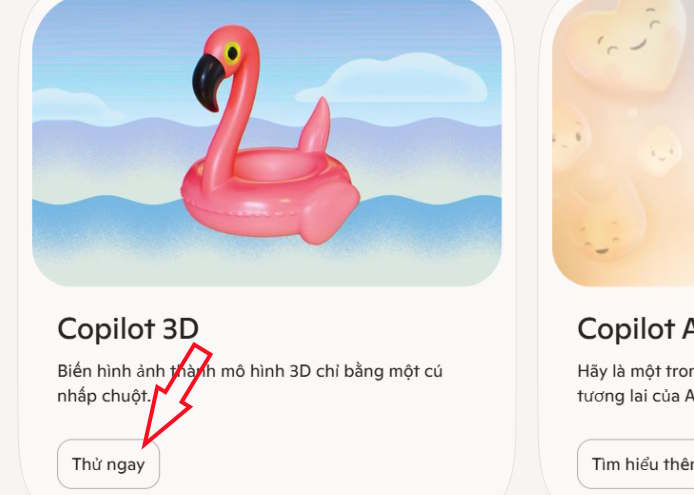
Then you will see the 3D image creation tool on Copilot, click Try Now to use the tool.
Step 2:
In the new interface, the user clicks the Upload photo button with an optional photo from you.
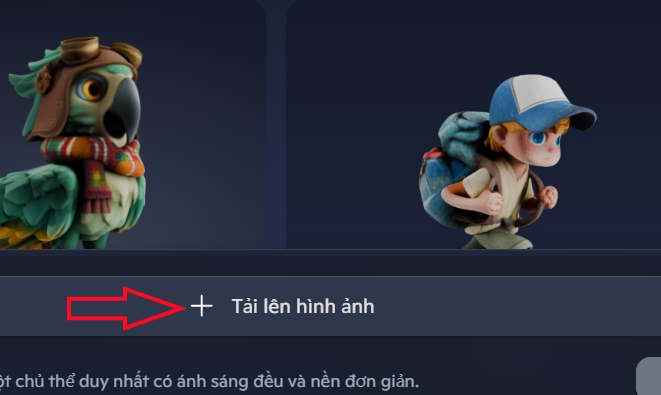
Then you click on the Create button to proceed with creating the 3D image.

Step 3:
You wait a moment for Copilot to create a 3D image from the 2D image you uploaded. This creation process is relatively long because it converts to 3D image. When the image is available, click to view it.

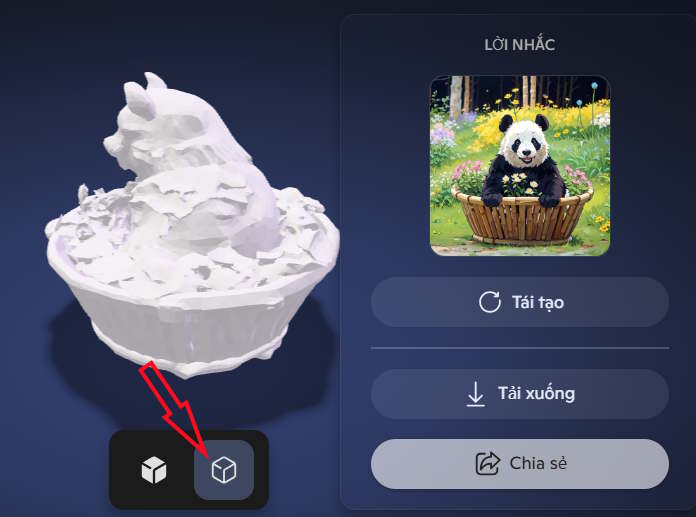
You can rotate the 3D image in different directions. To rotate, hold down the left mouse button and move the mouse in any direction. If you are not satisfied with the output, you can recreate the 3D model by clicking the Regenerate button.

You can also check the clay model by clicking on the clay model icon.
Step 4:
To download the created model, click Download. If you want to share your image, click Share then click Copy Link. Now you can share that link with anyone.
