Table of Contents
The Custom Desktop Kit application helps you customize the Windows interface, change the wallpaper, change the mouse pointer or folder icon with many rich options. Users do not need to download a separate application for each customization type, all changes are available in the Custom Desktop Kit for us to use. The article below will guide you how to use the Custom Desktop Kit application to customize the Windows interface.
Key Takeaways About Custom Desktop Kit
- The Custom Desktop Kit application helps you customize the Windows interface, change the wallpaper, change the mouse pointer or folder icon with many rich options.
- Users do not need to download a separate application for each customization type, all changes are available in the Custom Desktop Kit for us to use.
- The article below will guide you how to use the Custom Desktop Kit application to customize the Windows interface.
Instructions for Using Custom Desktop Kit
Step 1:
First, download the Custom Desktop Kit application for your computer according to the link below.
In the settings interface, click I don't want to subscribe now to use the free version.

Step 2:
Switch to the Custom Desktop Kit application interface. In the Wallpaper section you will see a selection of wallpapers for your computer. Due to using the free version, the number of wallpapers you can choose is quite limited. Or you can click Custom wallpaper to adjust the wallpaper yourself .

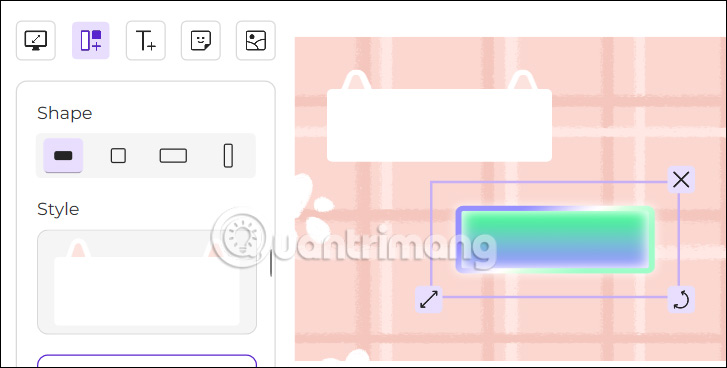
First, choose the wallpaper size according to the ratio available on the left edge of the interface.

Next, add a frame or blank panel to the wallpaper. You continue to click on the icons to insert content into the wallpaper. Once you have finished designing the wallpaper, click Set Wallpaper to set the wallpaper for your computer.
Step 3:
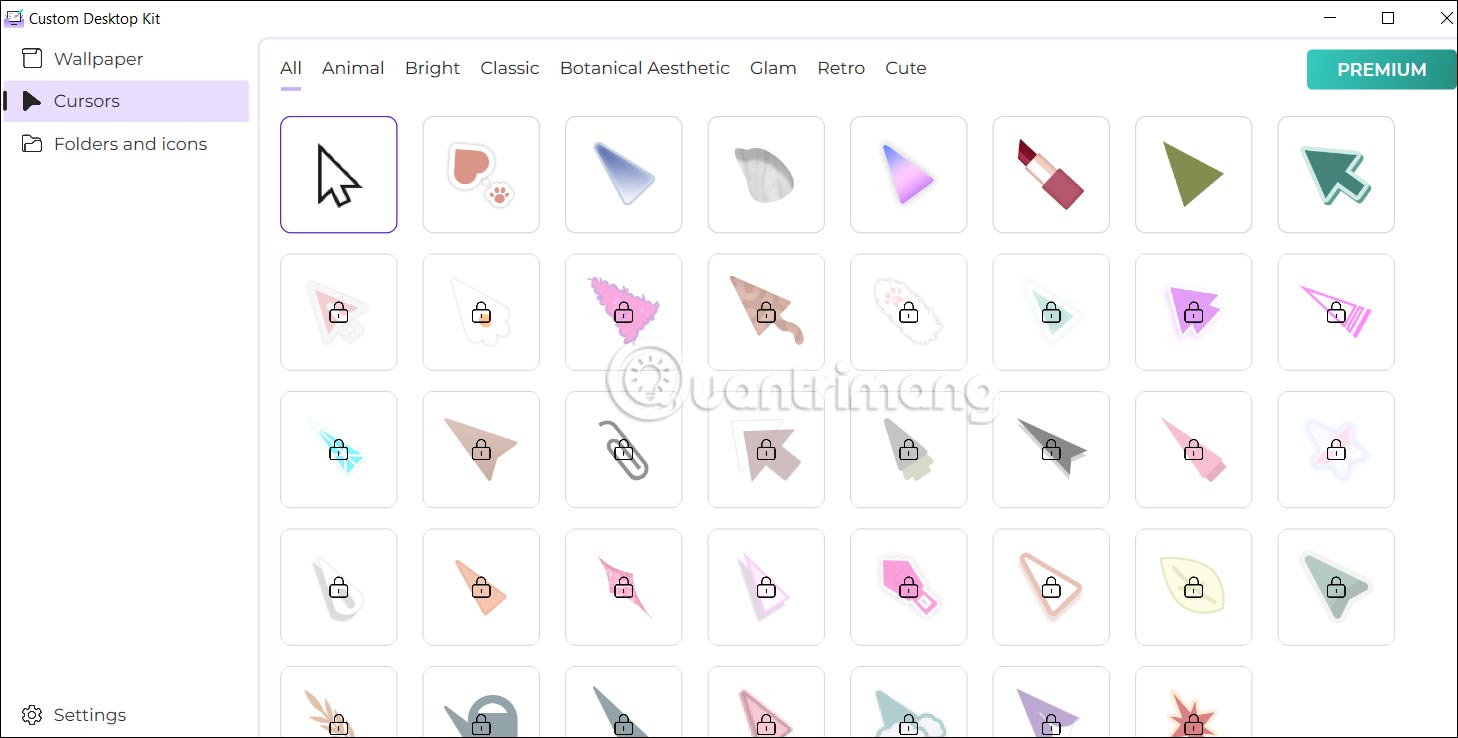
We click on Cursors to choose to change the interface of the mouse pointer on the computer. Whichever mouse pointer style you want to use, click to change. To return to the default Windows mouse pointer pattern, click on the first mouse pointer pattern in the interface.
Step 4:
Continue clicking Folders and icons to change new icons for each folder or all folders on Windows.
You select a folder icon you want to use and then click Select folder below to select a folder you want to change and then click Select Folder to apply.
If you want to use it for all folders, click Apply to all folders. If you want to return to the original folder icon, click the first yellow folder icon in the application.

FAQ
How do you customize the Windows interface using Custom Desktop Kit?
The Custom Desktop Kit application helps you customize the Windows interface, change the wallpaper, change the mouse pointer or folder icon with many rich options.
What should you check before working with Custom Desktop Kit?
Users do not need to download a separate application for each customization type, all changes are available in the Custom Desktop Kit for us to use.
What can you do if the first method does not work?
The article below will guide you how to use the Custom Desktop Kit application to customize the Windows interface.
Related Articles
 7 Ways to Customize Desktop Available in PC Settings on Windows 8.18 minutes read
 6 Best Apps to Customize Windows 118 minutes read
 Refresh the Windows 10 Interface with 11 Custom Tools11 minutes read
 How to Customize the Windows 8.1 Interface3 minutes read
 How to Completely Customize Your Windows Desktop Using Rainmeter7 minutes read
 How to Customize Windows with Winaero Tweaker9 minutes read
Reader Comments 0
Sign in with email or Google to join the discussion.