Table of Contents
This guide provides a clear overview of windows 11, including Change the Mouse Pointer in Windows 10, Change the Mouse Pointer in Windows 11. Use it to understand the topic, compare the available options, and make a more informed decision.
In addition, everyone can refer to the Guide to customizing the cursor with Custom Cursor in Google Chrome if you just want to change the cursor when browsing the web.
Change the Mouse Pointer in Windows 10
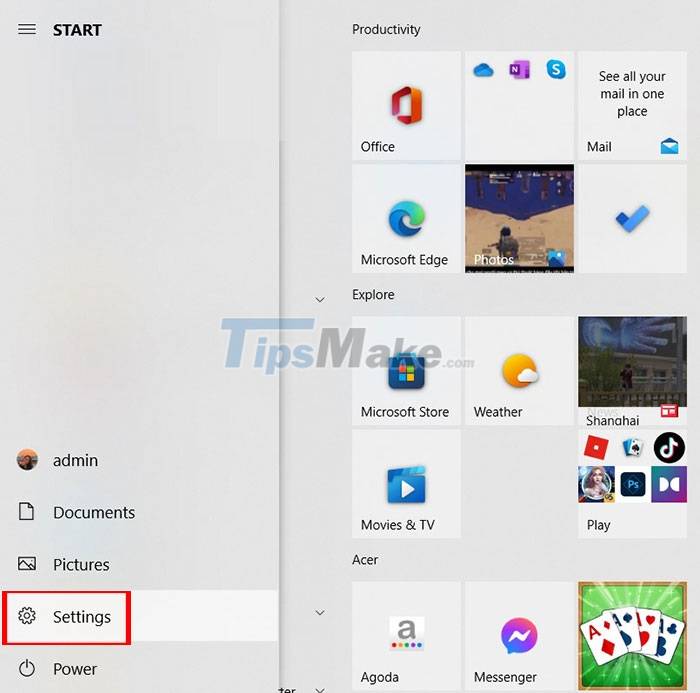
Step 1 : Open the Start menu > Settings .
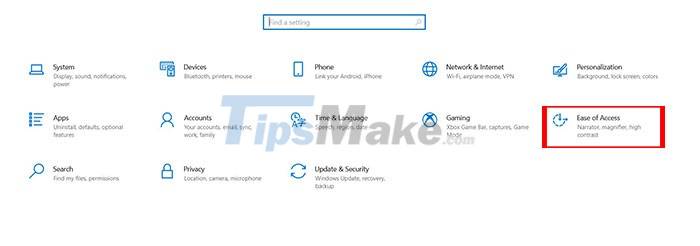
Step 2 : Select Ease of Access .
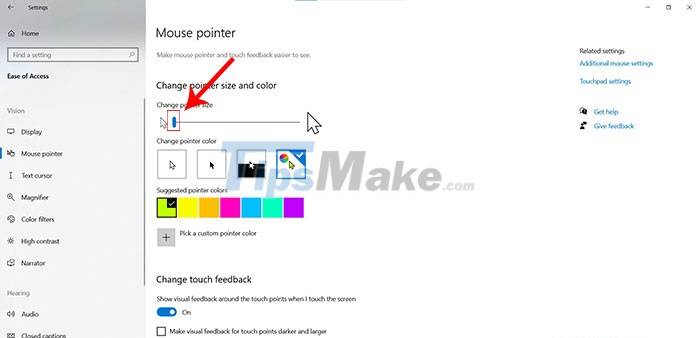
Step 3 : Click the Mouse pointer tab. Here, the user can choose 1 of 4 mouse pointer patterns. Click on each template to see how it looks and choose one that everyone likes.

Step 4 : The last type of mouse pointer allows users to change different colors depending on their preferences.

Click this option and move on the palette to choose any color.

Step 5 : If the size of the pointer is too small and hard to see, the user can change it in the Change pointer size section. Just move the slider until you find the pointer size suitable and easy to see.
Change the Mouse Pointer in Windows 11
Step 1 : Changing the mouse pointer in Windows 11 is similar to Windows 10, but it is provided with some new features. Everyone needs to open the Start menu > Settings > Accessibility .
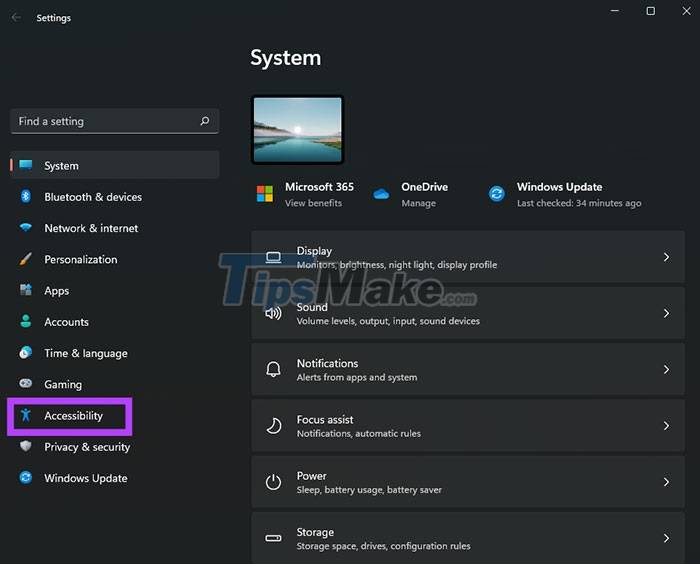
Step 2 : Select Mouse pointer and touch . Then make changes to the color and size and style like steps 4, 5, 6 when customizing the cursor on Windows 10.

Step 3 : Scroll down and click Text cursor to modify it.

Step 4 : People can turn on or off the Text cursor indicator and change the color and size.
Step 5 : There is also a slider at the bottom to adjust the thickness of the text cursor.

Instructions to Customize the Cursor to Any Icon
If the 4 built-in Windows options don't satisfy everyone, or want a more unique and outstanding mouse pointer, use custom icons to create a whole new look for the pointer.
Step 1 : Download a custom cursor template or an icon you want to use as a pointer. If you do not want to download options on the internet, you can use some of the default icons that Windows provides.
Step 2 : Open Start > Settings .
Step 3 : Navigate to Bluetooth & devices (or Devices ).

Step 4 : Scroll down and select Mouse on the right and click Additional mouse settings .
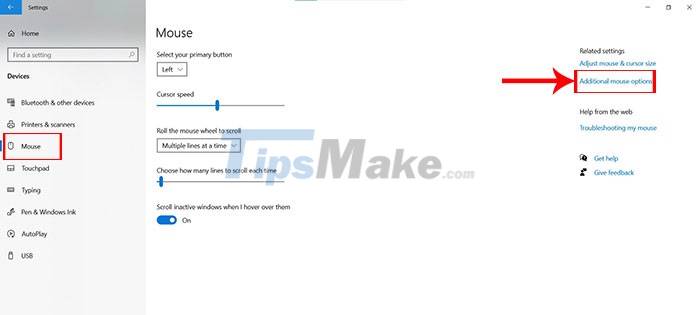
Step 5: This will bring up the Mouse Properties window. Users can change advanced settings related to the mouse pointer from here. Click the Pointers tab.
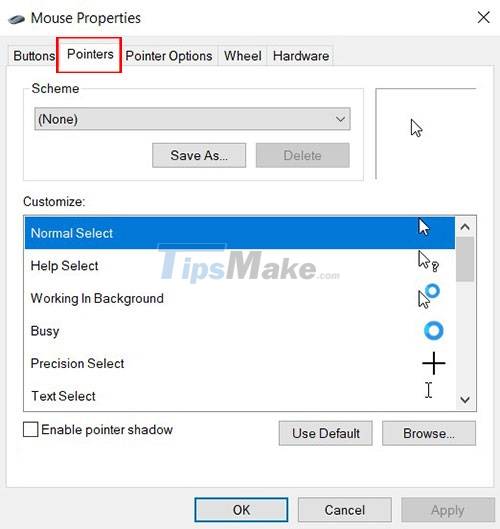
Step 6 : In the Customize section, click the type of cursor you want to change.
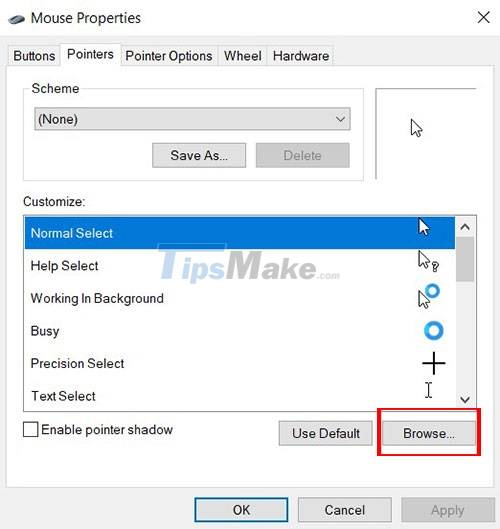
Step 7 : Once you have selected the cursor to change, click Browse . A file window will open. If the cursor has been downloaded, navigate to the folder where it was saved. Alternatively, the user can use the cursor options listed by default.
Step 8 : Select the mouse pointer you want to use, then click Open .
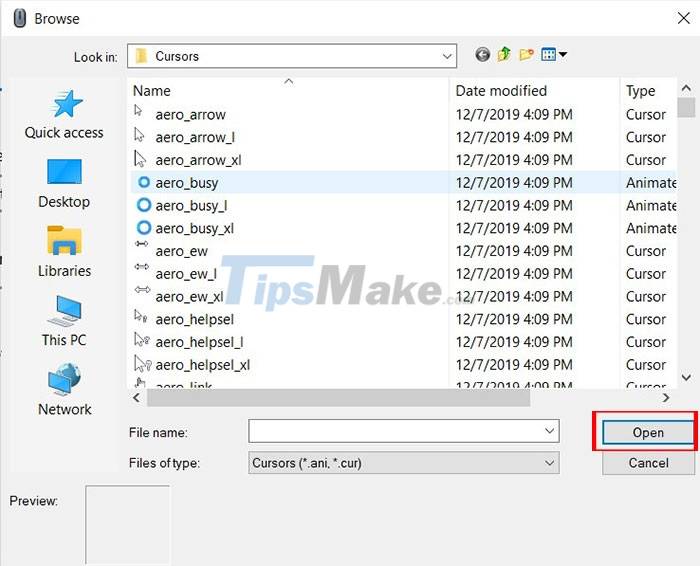
Step 9 : Windows will change the mouse pointer according to the user's selection. After changing all desired cursors, click Apply > OK .

Conclusion
Understanding Windows 11 makes it easier to compare options, avoid common mistakes, and apply the information in this guide more effectively. Review the relevant requirements before making changes or choosing a solution.
FAQ
What is Windows 11?
Step 4: The last type of mouse pointer allows users to change different colors depending on their preferences.
Why is Windows 11 important?
Understanding Windows 11 helps you evaluate features, compatibility, performance, and potential limitations before you choose a product or follow a procedure.
What should you consider when using or choosing Windows 11?
Consider your specific goal, compatibility requirements, available features, cost, security, and the practical recommendations described in this guide.
Related Articles
 How to Change the Mouse Pointer on Windows 11 with Many3 minutes read
 How to Create a Yellow Circle Around the Mouse Cursor on Windows6 minutes read
 Instructions to Change Mouse Cursor on Windows 113 minutes read
 How to Fix the Mouse Pointer Disappearing on Windows 105 minutes read
 How to Change the Mouse Pointer Size and Style in Windows 114 minutes read
 The Basic Steps of Fixing Cursor Cursors Flutter in Windows8 minutes read
Reader Comments 0
Sign in with email or Google to join the discussion.