Table of Contents
The strongest Wi-Fi network is the one with the best received signal at your device, but the largest signal reading does not guarantee the fastest internet. Channel congestion, band, security, access-point load, internet capacity, and the route to a service also affect performance.
How to read Wi-Fi scan results
- SSID: the network name shown to users.
- BSSID: the radio's MAC address. One mesh or business SSID may have several BSSIDs.
- Signal or RSSI: received strength. Higher percentages are stronger; for dBm, values closer to zero are stronger, so -50 dBm is stronger than -75 dBm.
- Channel and frequency: identify the band and overlapping radios.
- Security: prefer WPA2 or WPA3 on a trusted network.
- Radio type or rate: describes link capability, not guaranteed internet speed.
Signal percentages are vendor-defined and should not be compared directly with dBm readings from another tool. Scan from the exact desk, room, or floor where the device will be used and repeat because people, doors, and neighboring networks can change the result.
Windows 10 and Windows 11
Use the built-in netsh command
- Open Windows Terminal or Command Prompt.
- Run:
netsh wlan show networks mode=bssidThe output lists each visible SSID and BSSID with signal percentage, channel, and radio information. Microsoft's netsh wlan documentation covers the supported commands.
To inspect the current connection, run:
netsh wlan show interfacesIf Windows says location permission is required for WLAN information, enable the appropriate Location setting under Settings > Privacy & security > Location, run the scan, then review the permission again afterward.
Use a graphical scanner when you need a chart
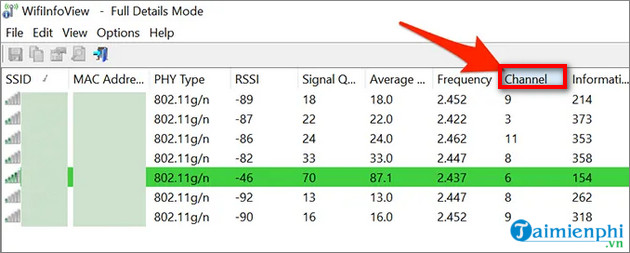
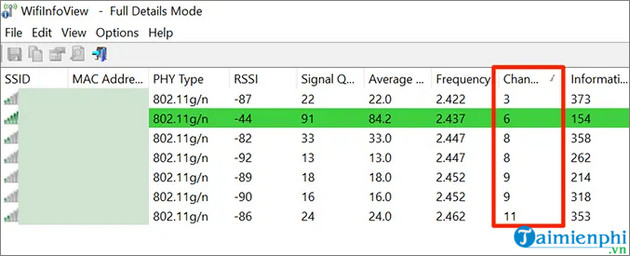
WiFi Analyzer and WifiInfoView are examples of tools that can display nearby BSSIDs, signal, band, and channel use. The screenshots below show older versions, so current interfaces may differ. Obtain any scanner from its official publisher or the Microsoft Store, review its permissions, and keep it updated.
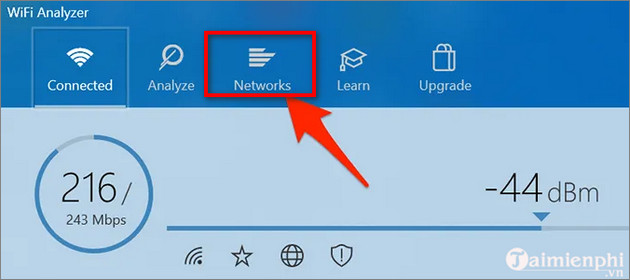
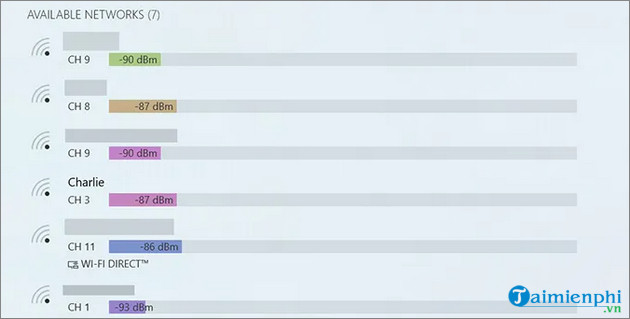
Sort by signal to find the strongest BSSID at the current location. Use the channel graph to spot overlapping radios, but do not assume that the channel with the fewest listed networks is automatically fastest. A weak idle network may matter less than one busy network, and wide channels can overlap several channel numbers.
macOS
View the current connection
Hold Option and click the Wi-Fi status menu. macOS displays details for the connected network, including channel, frequency or band, security, and other link information. Apple documents this in its Wi-Fi status menu guide.
Scan nearby networks with Wireless Diagnostics
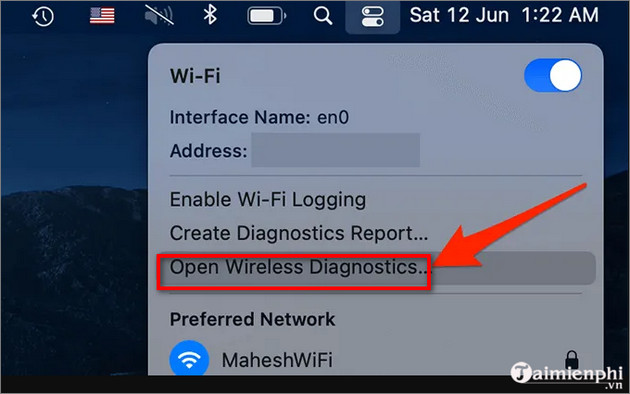
- Hold Option, click the Wi-Fi menu, and choose Open Wireless Diagnostics.
- Do not start the diagnostic wizard if you only need a scan. From the menu bar, choose Window > Scan.
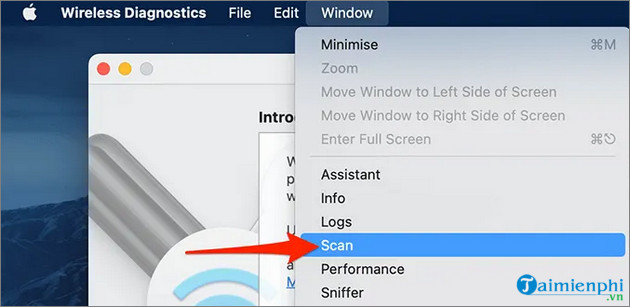
- Select Scan Now to refresh the list.
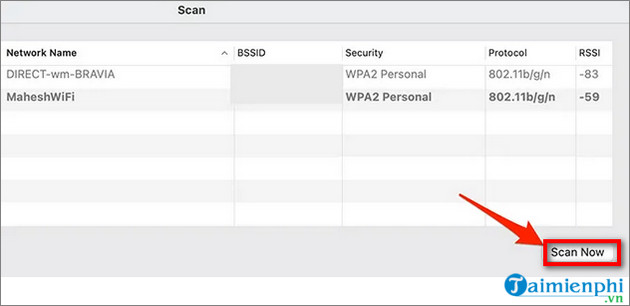
- Compare RSSI, noise, channel, width, band, and security. With negative dBm values, a number closer to zero is stronger.
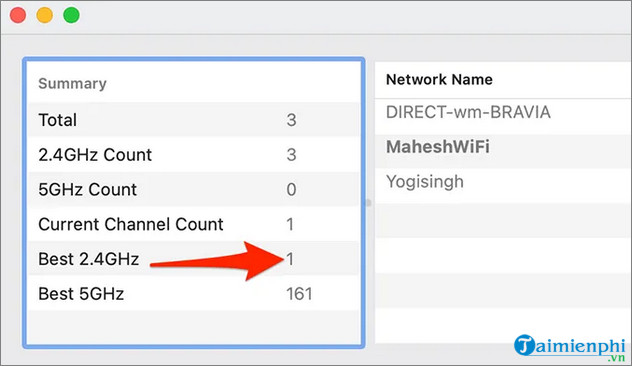
The recommended 2.4 GHz or 5 GHz channels in the Scan window apply to your own router configuration; they are not instructions to join a neighbor's network. Apple's Wireless Diagnostics guide explains the broader diagnostic workflow.
Linux with NetworkManager
On Ubuntu, Fedora, and many desktop distributions that use NetworkManager, open Terminal and run:
nmcli -f IN-USE,SSID,BSSID,CHAN,FREQ,RATE,SIGNAL,SECURITY device wifi list --rescan yesThe SIGNAL column is a relative percentage-like value: larger is stronger. IN-USE marks the current connection. The same SSID may appear more than once because multiple access points or mesh nodes advertise it.
If the list is narrow or a field is unsupported, use:
nmcli -f all device wifi listThe official nmcli reference describes the available fields and commands. The original command in this article used iwlist with an unmatched parenthesis and searched only channel text, so it neither identified the strongest network nor worked reliably on current interface names.
Linux without NetworkManager
Use the wireless tooling supported by the distribution, such as iw, and first identify the interface with iw dev. Scanning may require elevated privileges. Do not assume the interface is named wlan0; predictable names such as wlp2s0 are common.
Choose between access points on your own network
For a home mesh or multiple access points sharing one SSID:
- Compare BSSID and signal at the problem location.
- Check whether the device is using 2.4, 5, or 6 GHz.
- Run a latency and throughput test after connecting; signal alone is insufficient.
- Move mesh nodes or access points if the client clings to a distant radio.
- Avoid placing wireless repeaters where the source signal is already weak.
For band tradeoffs, see how 5 GHz Wi-Fi differs from 2.4 GHz. If the signal is strong but performance is poor, follow the guide to diagnosing slow Wi-Fi and internet. The strongest authorized access point is only the starting point; low congestion, good backhaul, and a healthy internet connection determine the final experience.
Related Articles
 How to Check SSD Macbook M25 minutes read
 How to See Which Wi-Fi Network Is the Most Powerful on the iPhone6 minutes read
 See Linux Open Port: How to Check Open Ports in Linux4 minutes read
 How to Check the Origin of Macbook M1, M2, Pro...8 minutes read
 How to Check MacBook Battery Status: Clear Instructions5 minutes read
 Steps to Check Macbook Temperature4 minutes read
Reader Comments 0
Sign in with email or Google to join the discussion.