How to check if your VPN connection is actually encrypted
Recently, many users have subscribed to VPN services for personal use so that their Internet connection from their home is completely encrypted. In the context that accounts are always at risk of being hacked at any time now, regardless of the user wants to equip themselves with a security solution. Once you have installed the VPN software on your computer and connected via VPN, everything seems to work very well and users can be a little more secure.
However, for those with a bit of technological knowledge, they can't accept to let things work without actually verifying that the encryption is enabled. So many people have chosen to download a network utility that allows them to actually see the data being transferred back and forth from the computer.
Try testing by transferring some packets when not connected to the VPN and do the same when connecting, then compare. It is easy to realize that the data being transferred is actually encrypted when they are sent to the VPN. This article will show you how to verify if your VPN connection is actually encrypted.
If you don't have much technical expertise, don't worry too much. All you need to do is click the record button, scroll through the list and check some documents. You can ignore everything else because they are almost meaningless if you don't know anything about computers and networks. On Mac, we will use CocoaPacketAnalyzer and on PC, we will use Wireshark .
(Link to download CocoaPacketAnalyzer: http://www.tastycocoabytes.com/cpa/)
Verify encryption on Mac
First, download CocoaPacketAnalyzer on your Mac and run it. You will see the boot screen with four large buttons.

Capturing is what you will click to start capturing network traffic. If you are a capturing session, it will be called a trace file and you can reopen them later using the second button. However, because the purpose in this article is to just want to see if the data is actually encrypted, it will not save any capturing sessions.
Before performing a capturing operation, click Preferences to set up how the data will be captured. Click Capture at the top and the only installation that we need to check here is Capture Interface .
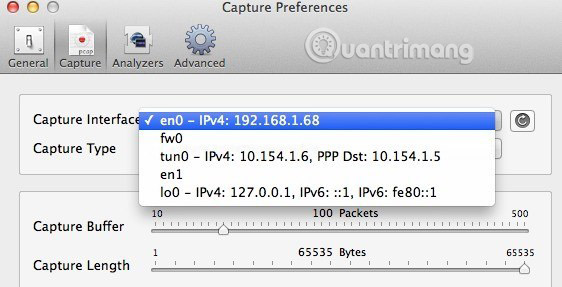
First, press the small Refresh button located to the right of the list box. When you click on this box, you will see several options, all of which look very confusing. The things you will need to choose are those options that have IPv4 listed with a later number. You do not need to select the option containing 127.0.0.1. You also need to select the IP address with the connection you are currently using. You can find out this IP address by going to System Preferences and then clicking Network .
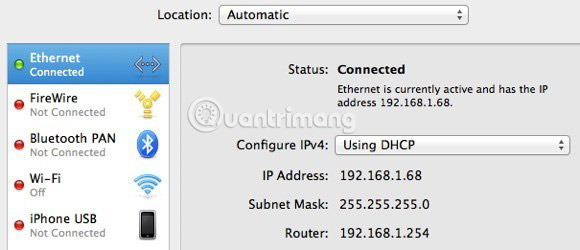
Click the link with the green dot in the list box on the left and then check the IP address field in the right-hand section. As you can see, 192.168.1.x matches the en0 option - IP4 - 192.168.1.68 in the program list. Now go ahead and close the Capture Preferences window to return to the main screen.
Continue and click Capturing and now you will see a new dialog box pop up, where you can select several settings and then start capturing activity.
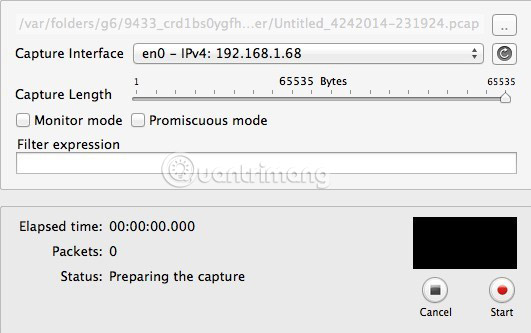
Here you don't need to change anything, so to start, you just need to press Start . However before you do this, there are some things to keep in mind. First, you should try to close all programs that are running in the taskbar and open only the browser window. Network capture records tons of data and even just a few seconds more than a thousand rows of data are recorded. So, to make things simpler, first close all unnecessary things and remove as many processes as possible in the background, then click Start .
After doing that, immediately download one or two websites and then click Stop. You can optionally choose one of the web addresses you have ever visited in your browser and then simply press Enter to load the pages when you start the capture (only a few seconds are enough).
When you click Stop , you will see a window like this:
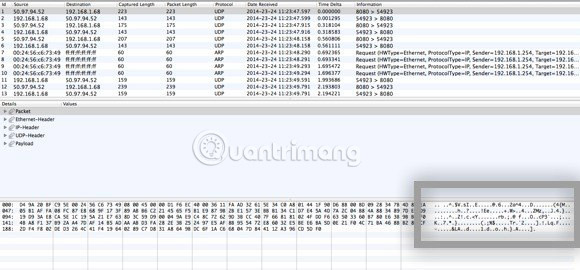
Now all you need to do is scroll through the list at the top, in the table format and see the data you see in the box at the bottom right. Now, in thousands of rows of data, you can just keep pressing down on the down arrow key and reviewing all the data changes at the bottom.
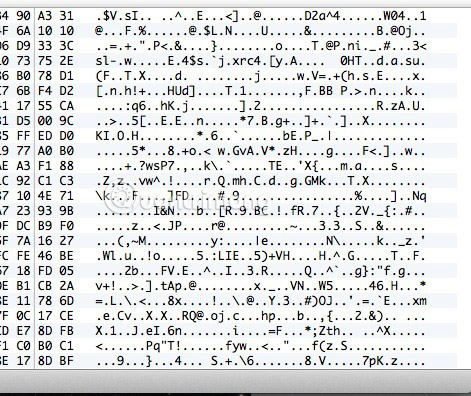
If your VPN connection is actually encrypted, every line you scroll through will display the same data as the data in the image above. If they are unreadable and just a series of random characters, your data is encrypted. With an encrypted connection, you can't read anything in thousands of data streams. Now let's compare what you can see on an unencrypted connection, such as when you are not connected to a VPN:
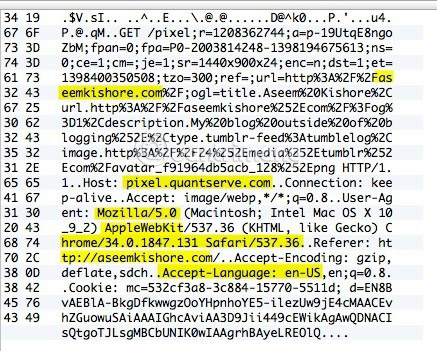
As you can see above, you can read a lot of things without coding. In the example, you can see that this user has accessed aseemkishore.com in Mac and Safari and many other data. Not all data can be read on an unencrypted connection, but for most cases, you can view real data, HTML code, protocol headers, etc. As mentioned above. , with an encrypted connection, you will not be able to read any data.
Verify encryption on PC
The PC check process is quite similar to the test procedure mentioned above, except that you have to use another program called Wireshark . After downloading, start and the main screen will look like this:
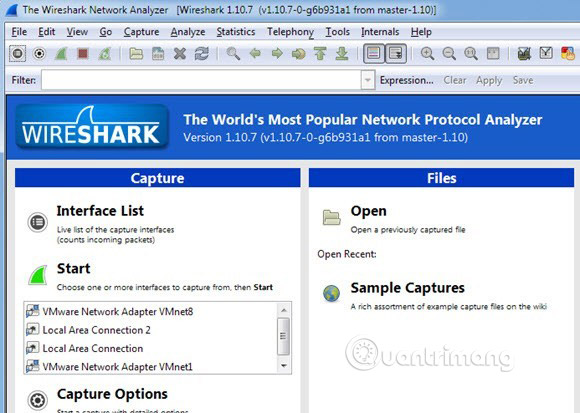
Like on a Mac, the first thing you need to do is select the Network interface that you want to capture data. Click Interface List and you will see a list of network interfaces. Wireshark may be a bit better than CocoaPacketAnalyzer, in that you can actually see how much data is being transmitted on each interface. This makes it easy to know which connection is the primary connection.

Continue and select the box next to the appropriate interface, then click Close . Now all you have to do is click the Start button (below the Interface List button) and everything will be ready to get started. You do not have to change any other options. When you finish the capture, you will see a screen like this:
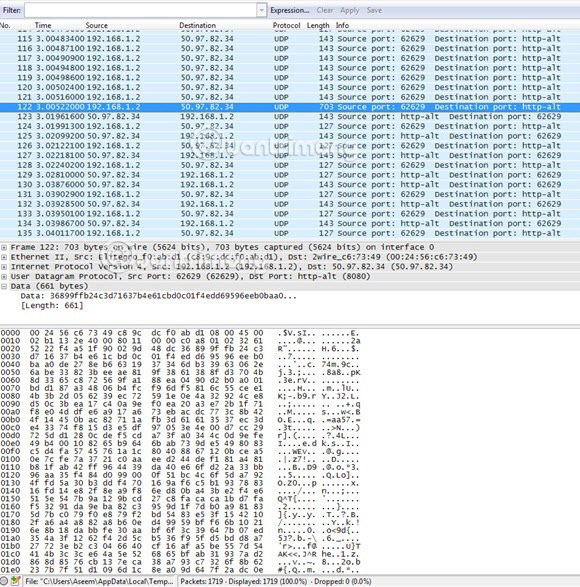
You may have to expand the full screen window and then adjust the bottom and top frames accordingly, but as you can see, the data is in the same format as in CocoaPacketAnalyzer on Mac. Scroll through the list at the top and check that the completed data is definitely unreadable, meaning your connection has been successfully encrypted. If you can read any word or text, it means that the data is not encrypted. Browse through at least a few hundred rows by using the arrow keys.
Hope this post will make you more comfortable when you know your VPN connection is really encrypted! If you have any questions or problems during the test, leave a comment in the comment section below so we can help you. Good luck!
See more:
- Use HTTPS encryption connection when browsing the web
- Instructions for encrypting and setting up password protection for USB in Windows 8
- Encrypt hard drive data to increase security on Linux
- Top VPN application for Android and iPhone phones