Configure the VPN network connection in Windows XP
If you want to create a VPN connection, you will have to use encryption to ensure that no one can access and prevent data from being lost while being transported over the Internet. Windows XP provides a level of security by using Point-to-Point Tunneling (PPTP) or Layer Two Tunneling (L2TP) protocol.
In this article, we will show you how to configure a connection to a virtual private network (VPN) using Windows XP. By creating encrypted tunnels via the Internet, your data will always be secure.
Overview of VPN
VPN is a private network created through global network. It is encrypted, so that your data will be encapsulated and secured when transferred across the network - essentially creating a 'virtual' tunnel on the network. VPN is a method of connecting to a private network by going through a common network like the Internet. Currently, an in-house internet connection is very popular and so is the home Internet connection. Through the above conditions, you can create an encrypted tunnel between the network at the company and the home network to be able to transfer data safely and more conveniently.
If you want to create a VPN connection, you will have to use encryption to ensure that no one can access and prevent data from being lost while being transported over the Internet. Windows XP provides a level of security by using Point-to-Point Tunneling (PPTP) or Layer Two Tunneling (L2TP) protocol. Both of these protocols have been carefully calculated and simply because they create virtual tunnels for exchange only, of course everything is securely encrypted.
Configure VPN with XP
If you want to configure the VPN connection from a Windows XP-based client computer, you only need to use the same functionality of this operating system, it is fully configured. To establish a connection to a VPN, follow these steps:
1. On a Windows XP-based computer, make sure that it is configured appropriately to connect to the Internet.
-
You can try opening the Internet browser
-
Ping to try an Internet address you know, like yahoo.com, or an address that is not blocked by ICMP
2. Go to Start , select Control Panel .

3. In the Control Panel, double-click Network Connections
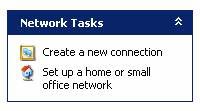
4. Click Create a new connection in the Network Tasks section

5. In the Network Connection Wizard, click Next .
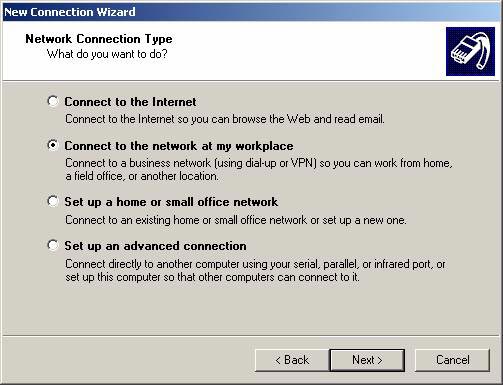
6. Select Connect to the network at my workplace , and click Next .
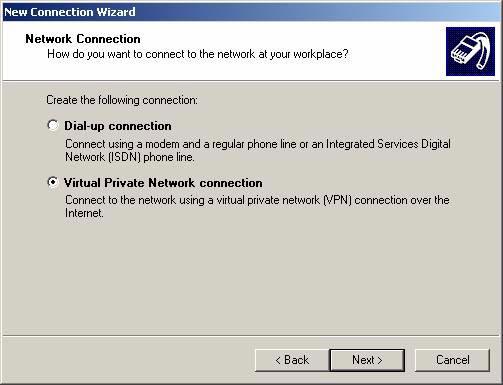
7. Select the Virtual Private Network connection section , and click Next .
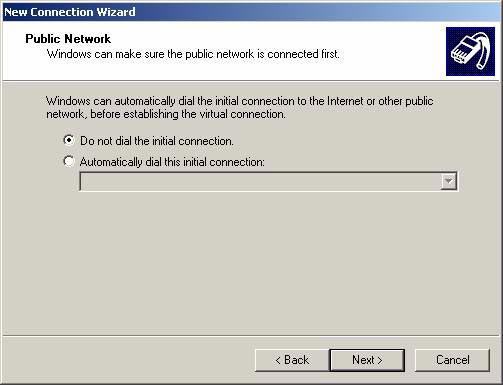
8. If you have a prompt, you need to choose an Internet connection method (either via dialup, or if on a separate line, then via Cable, DSL, T1, Satellite .) then click Next .
9. Enter the server name, IP or any other description you see in the Network Connection section. This section can be changed later if desired. Click Next .
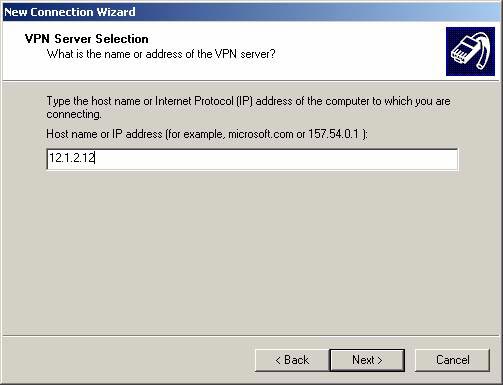
10. Enter the server name or IP address of the computer you want to connect to, and then click Next .
11. You may be asked if you want to use Smart Card.

12. Just verify again in this standby window, then click Next .
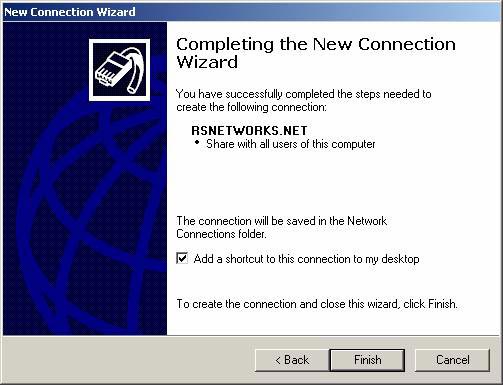
13. Click on the Add a shortcut to this connection to my desktop section (Create this connection shortcut on the desktop) if you want, otherwise uncheck and click Finish .
14. So you've created the connection, but by default you may have to try connecting. You can try connecting now if you know the valid value of the network, otherwise close it and do the following.
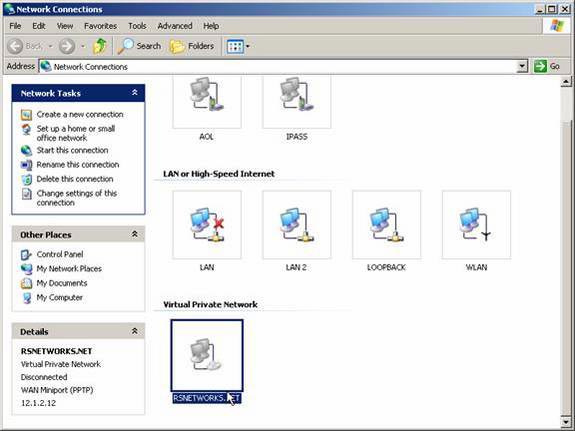
15. In the Network Connections window, right-click the newly created connection and select Properties . See how you can customize this connection before using it.
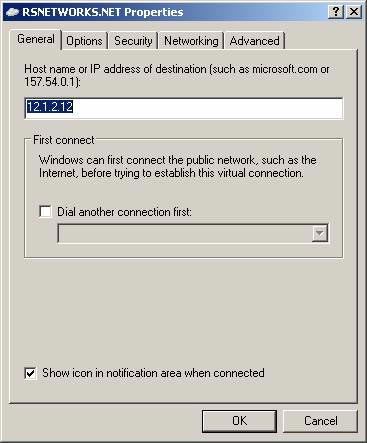
16. In the first tab General . Just the name of the connection, you can edit the name right from the Network Connection dialog box by right-clicking on the connection and selecting Rename . You can only configure one connection first, which means Windows can connect to the network (like the Internet) before starting to try to connect to the VPN. The best example is when you configure a dialup connection; It will not be the first thing you want to run. You will simply want to connect to the Internet before encrypting and sending data through it. Set this to make sure you really want it.
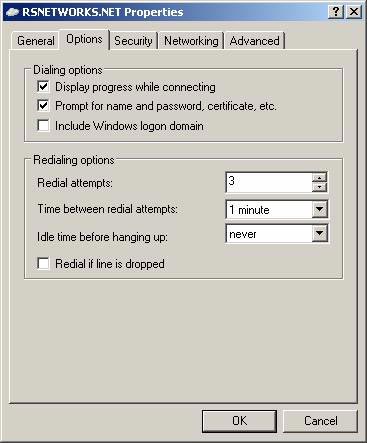
17. Next tab Options . This tab contains a lot of things you can configure. The first is the option to connect to a Windows Domain, if you check in this section (by default not checking), your VPN client will ask for Windows login domain information when starting the VPN connection phase. Moreover, there are several options in the Redialing section. The redial attempt will be configured here if you use dial up to connect to the Internet. It is very convenient to redial if the line is frequently broken.
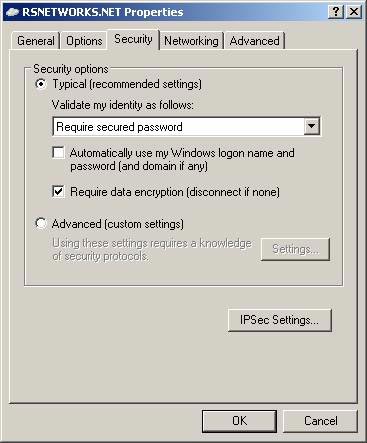
18. Tab Security . With this tab you will be able to configure basic security for the VPN client. Here you will set up any advanced IPSec configuration or other security protocols that are also highly reliable and encrypted.
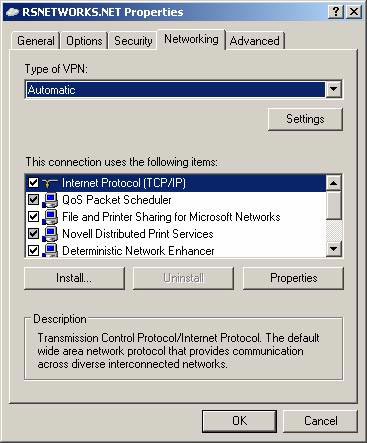
19. Next is the Networking tab. Here you can select the network components used by this VPN connection.
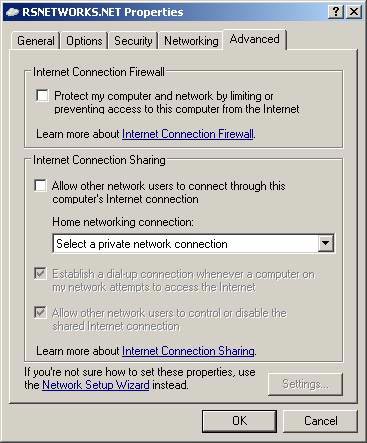
20. Finally, the Advanced tab: used to configure options for configuring a firewall or sharing in the network.
Connect to the company
So now that you have the Xp VPN client with all the settings ready, the next step is to try connecting to the Remote Access or VPN server set up at the company office. Follow some simple steps. To reopen the client, go back to the Network Connections dialog box
1. While in the Network Connection dialog box, double-click or right-click and select Connect from the menu - it will initiate a connection to the corporate office.
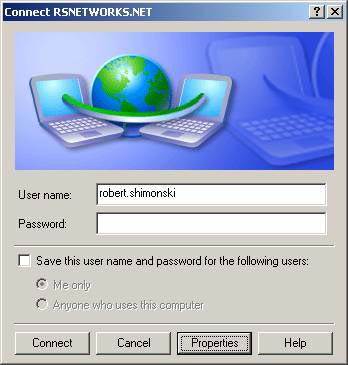
2. Enter a name and password, click Connects .
3. To disconnect the VPN, right-click the connection icon and select Disconnect .
Summary
This article has covered the basic steps to build a VPN connection in a Windows XP-based computer. This problem is useful when you have a VPN device that does not have a client computer to connect to it. If the VPN server does not use higher protocols, it is possible to use an XP client to connect.
Was this article helpful?
Your feedback helps us improve.
Related Articles
 How to arrange network connection on Windows 105 minutes read
 Configure IP network address with MS-DOS command5 minutes read
 How to configure PPPoE connection on TP-Link WiFi 6 router7 minutes read
 How to Set Up a Wireless Network (WiFi) Connection8 minutes read
 How to configure TCP/IP using CMD command on Windows2 minutes read
 Turn Windows 8 laptop into Wifi hotspot3 minutes read
Reader Comments 0
Sign in with email or Google to join the discussion.