Table of Contents
This practical guide explains how to change network name in Windows 11. Follow the steps in order, review the requirements first, and use the troubleshooting notes when a setting or option does not work as expected.
How to rename Windows 11 network via Settings
Step 1:
You open Settings on Windows 11, then you click Network & internet in the list on the left and select Advanced network settings next to it.

Step 2:
Select the network you want to rename then expand the settings and click Rename to proceed.

Enter the network name you want to change on Windows 11 , then click Save to save the new network name.

How to rename Windows network via Control Panel
Another way to change the network name is through the Control Panel and is applicable to all versions of Windows.
Step 1:
At the Control Panel interface , click Network and Internet > Network Sharing Center to adjust network settings on your computer.

Step 2:
Switch to the new interface, select Change adapter settings on the left side of the interface.
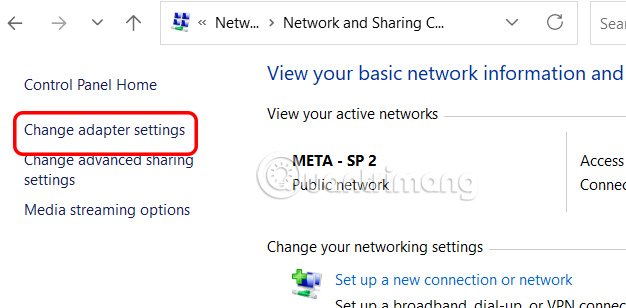
Display the connected networks, right-select the network you want to rename and select Rename . Then the user also renames the WiFi network.

How to rename network on Windows via Registry Editor
Step 1:
You open the Registry Editor interface on your computer. Then we access the path below.
HKEY_LOCAL_MACHINESYSTEMCurrentControlSetControlNetwork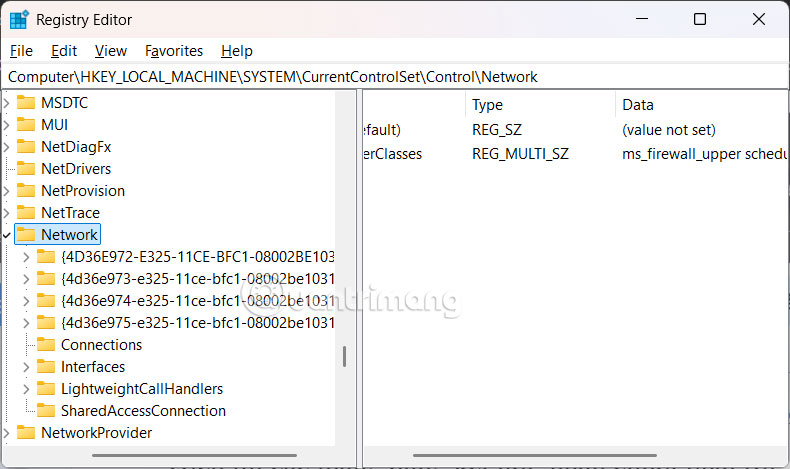
Step 2:
You expand the first one to see a few other keys inside. Each key listed corresponds to different network adapters.
Expand the keys below to rename the network on Windows 11. Look to the right and you will see the Name value showing the current network name . You will need to select each key and expand it to see the network name you want to change.

Step 3:
Once you have selected the network you want to rename, double-select Name and edit the text to match the new name you want.

FAQ
How to rename Windows 11 network via Settings?
You open Settings on Windows 11, then you click Network & internet in the list on the left and select Advanced network settings next to it.
How to rename Windows network via Control Panel?
Another way to change the network name is through the Control Panel and is applicable to all versions of Windows.
How to rename network on Windows via Registry Editor?
You open the Registry Editor interface on your computer. Then we access the path below.
Related Articles
 How to Change the Network Configuration Name in Windows5 minutes read
 How to Change MAC Address on Windows: Clear Instructions7 minutes read
 How to Change DNS to Surf Faster, Speed up Internet17 minutes read
 How to Arrange Network Connection on Windows 105 minutes read
 Fees and How to Switch Networks Keep the Number of the Network5 minutes read
 How to Change the Password to a Saved Wireless Network on a4 minutes read
Reader Comments 0
Sign in with email or Google to join the discussion.