How to change DNS for Ubuntu, Linux
Suppose for some reason you need to change DNS for Ubuntu, such as to speed up the page loading process or access a website blocked by ISP, ..., but don't know how to do it. Refer to TipsMake's article below to learn more details.
There are 2 ways to change DNS for Ubuntu, either through the user interface or through Terminal. Each method has its own advantages and disadvantages.
Method 1: Change DNS for Ubuntu from the user interface
Follow the steps below to change DNS for Ubuntu from the user interface:
Step 1: First open the Ubuntu System Settings window , then find and click Network.
Step 2: The screen will now display a list of all network connections near you and the network connection you are using.
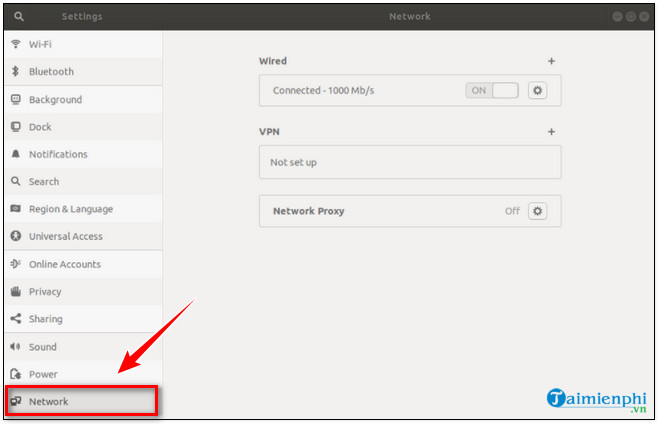
Step 3: Next find and click the settings icon, which is a cog icon, next to the network name you are connecting to.
Step 4: On the next window displayed on the screen, find and click the IPv4 tab.

Step 5: Here find and click on the DNS box , enter the DNS server address you want to use in the box.

Note: To use multiple DNS addresses, you must enter a comma between the addresses.
Step 6: Finally click Apply to apply the changes.
Method 2: Change DNS for Ubuntu through Terminal
Another way to change DNS on Ubuntu is through the Terminal command window. The advantage of this method is that it is easy to do and does not require digging into the settings like method 1 above.
The first step you need to do is add the nameserver to the dnsmasq configuration file. However, because dnsmasq is not installed on Ubuntu by default, we will have to take the additional step of installing dnsmasq. To do this thing:
Open Terminal and enter the command below:
sudo apt-get install dnsmasq

After installing dnsmasq, the next step is to run the command below to edit the DNS configuration file:
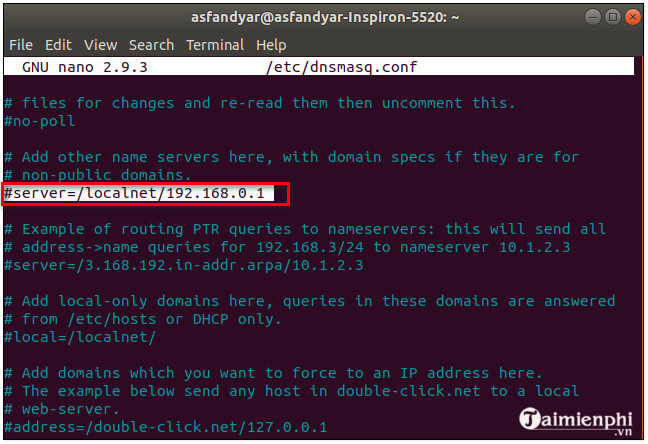
sudo nano /etc/dnsmasq.conf

On the window displayed on the screen, find the entry named " Add other nameservers here " and replace it with the DNS server address you want to use as shown below:
So above, TipsMake has just shown you 2 ways to change DNS for Ubuntu.
Besides, if you use Windows 10, you can also change DNS in the simplest way through the steps below.
Was this article helpful?
Your feedback helps us improve.
Related Articles
 How to troubleshoot Ubuntu problems does not start9 minutes read
 How to change Google DNS on Linux4 minutes read
 8 ways Ubuntu changes and improves Linux10 minutes read
 Tips and tricks after installing Ubuntu49 minutes read
 Is Arch Linux better than Ubuntu?7 minutes read
 Distinguish Ubuntu and Linux Mint13 minutes read
Reader Comments 0
Sign in with email or Google to join the discussion.