Table of Contents
NotebookLM can turn selected source material into a structured study guide with key ideas, review questions, explanations, and a glossary. Because the output is grounded in the notebook's sources, it works best when the material is accurate, focused, and appropriate for the learner's level.
A Study Guide is a generated report, not a replacement for the source. Students should use it to recall and test knowledge, then return to the textbook, notes, or cited passage when an answer is unclear.
1. Create a focused notebook
Open NotebookLM, create a notebook, and add the material for one course, unit, or exam. NotebookLM supports several source types, including PDFs, websites, pasted text, Google Docs and Slides, audio, and YouTube sources where available.
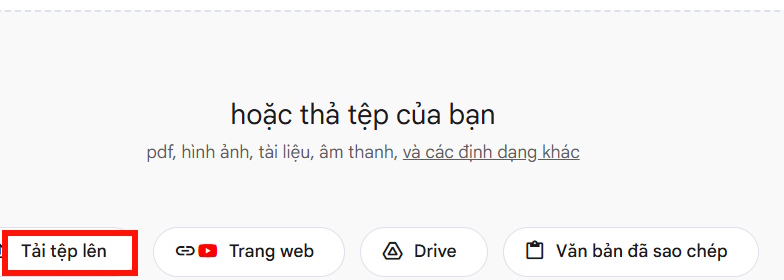
Use clear, searchable files. Scanned PDFs may need optical character recognition before NotebookLM can use the text reliably. Remove duplicate editions and deselect unrelated sources so the guide does not mix separate units.
2. Open Reports in the Studio panel
In the notebook, find the Studio panel and choose Reports. The panel can generate predefined reports such as a Study Guide, FAQ, or briefing document, as well as a customized report.
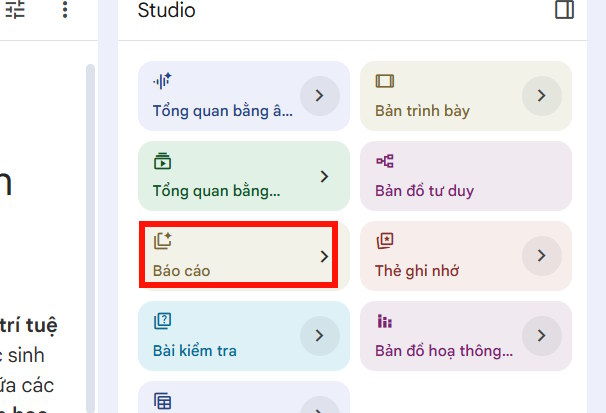
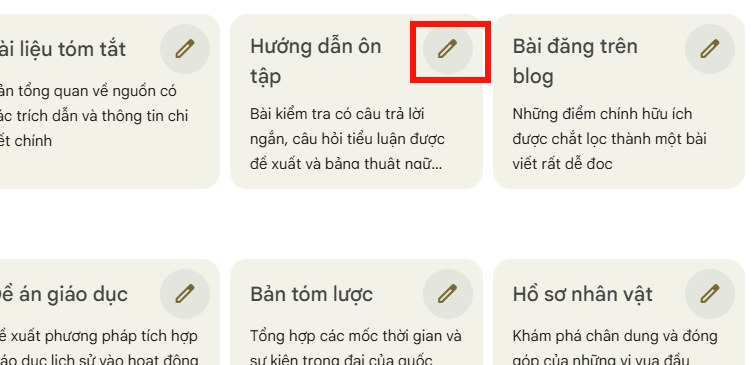
Select the pencil or customization control next to Study Guide if you want to define the audience and structure before generating it. Interface labels can change, but Google's Notebook creation guide confirms that reports are created from the Studio panel and can be customized with a prompt.
3. Customize the guide for the learner
Tell NotebookLM the learner's level, the unit to cover, and how answers should be presented. Ask it to stay within the selected sources and to distinguish content that the sources do not explain.
Prompt for a student
Create a self-study guide using only the selected sources.
Audience: [grade level or course].
Scope: [unit, chapters, or learning objectives].
Divide the material into short sections and explain each in clear language.
For each section:
- state the essential idea;
- ask 2 recall or application questions before showing the answers;
- give concise answers with references to the relevant source;
- identify any term that needs a glossary definition.
End with a short mixed review. If the sources do not contain an answer, say so instead of guessing.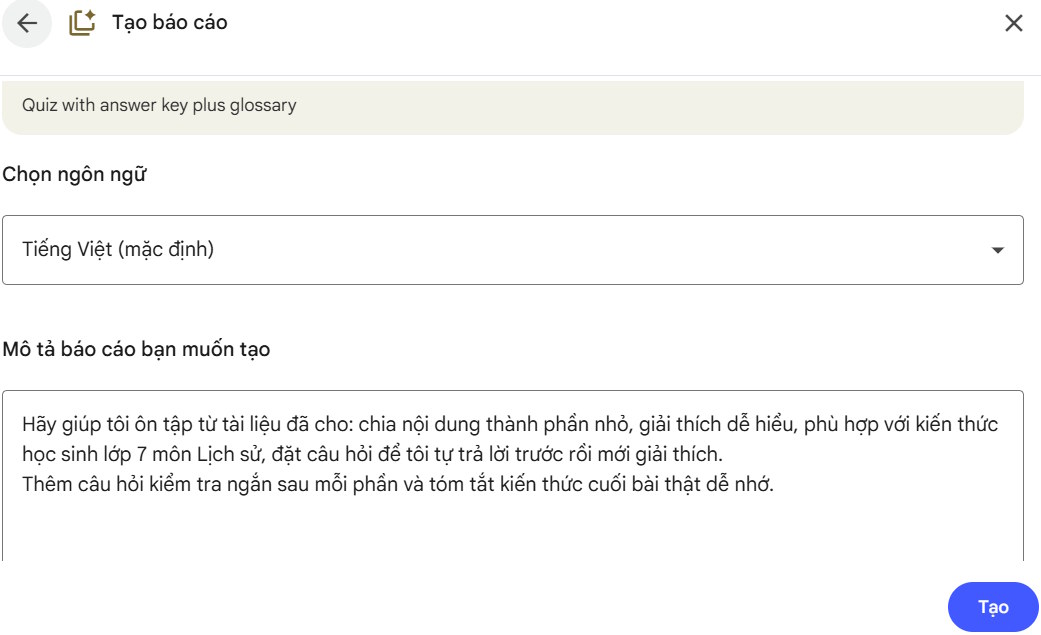
Prompt for a teacher
Create a teacher-ready revision guide based only on the selected sources.
Learners: [grade and subject].
Objectives: [paste the required objectives].
Order sections from prerequisite knowledge to more difficult applications.
In each section, include:
- a concise concept summary;
- 2 or 3 questions for independent thinking;
- answers and explanations placed after the questions;
- one source-grounded example.
After every 2 or 3 sections, add a short knowledge check with an answer key.
End with a glossary, a bullet summary, and 5 cumulative review questions.
Flag claims or answers that cannot be supported by the sources.
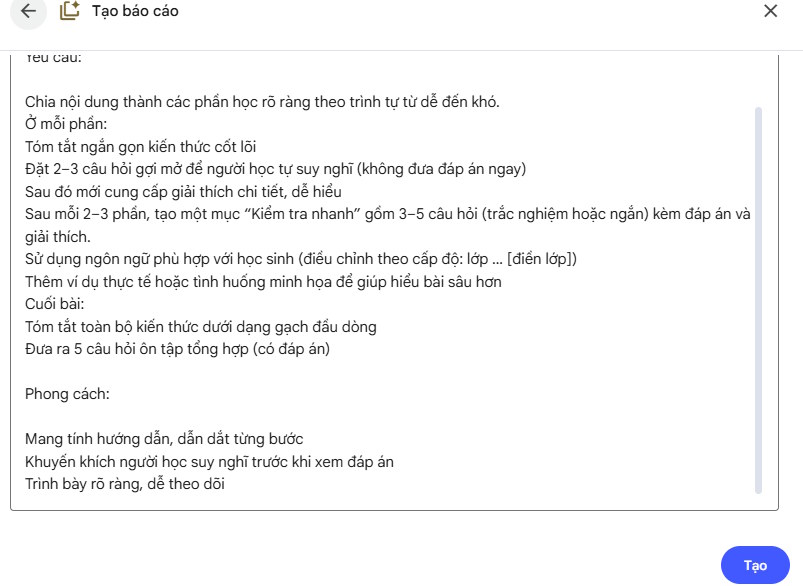
A prompt can shape the report, but it cannot repair missing material. If the generated guide skips an objective, first check whether that objective is actually covered by the selected sources.
4. Generate and inspect the Study Guide
Create the report and wait for it to appear in Studio. Open it and check the order of topics, level of explanation, review questions, answer key, and source references.
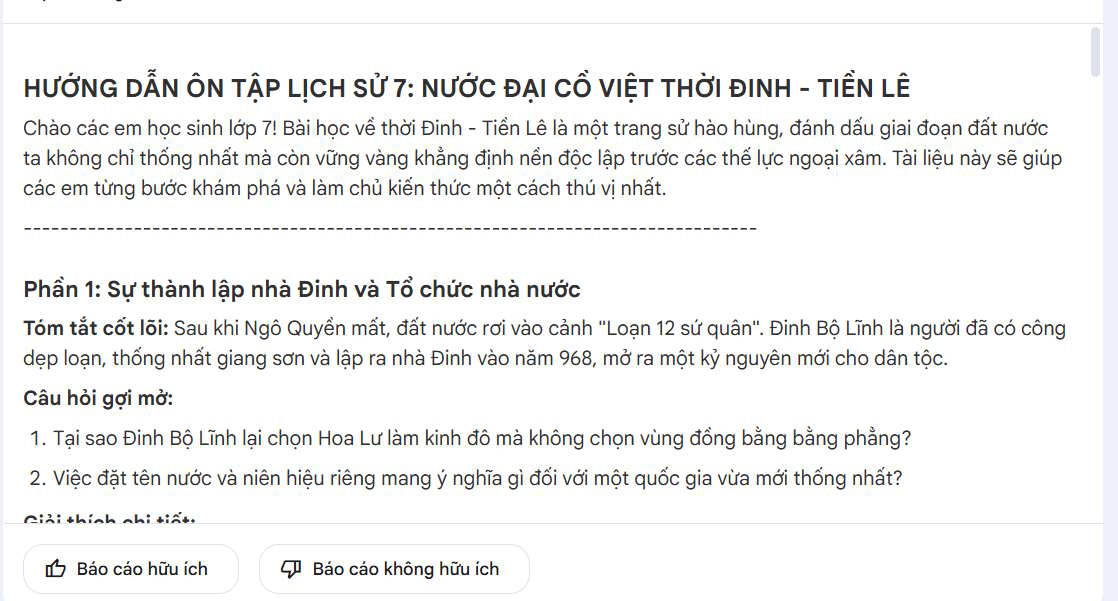
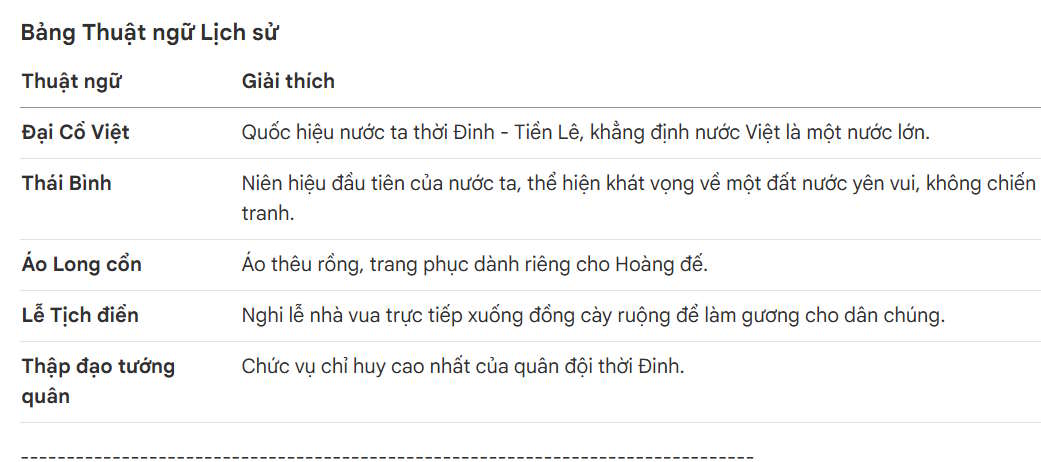
Study Guides often include important terms. Check that each glossary definition matches the meaning used in the course material rather than a broader or unrelated definition.
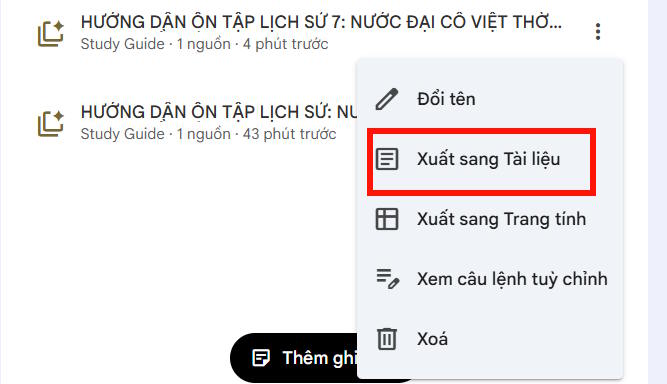
5. Export the guide for editing
Open the report's three-dot menu and choose Export to Docs. Edit the exported Google Doc to correct errors, adjust formatting, remove weak questions, and add teacher-approved instructions. Changes made in the exported document do not automatically synchronize back to the notebook.
Turn the report into an effective revision routine
- Read a short source section without the guide.
- Answer the guide's questions from memory.
- Check the explanation and return to the cited passage for mistakes.
- Write one correction in your own words.
- Reattempt missed questions after a delay.
Use NotebookLM's separate Flashcards or Quizzes output when you need repeated objective practice. Use the Study Guide when the goal is explanation, organization, and open-ended review. For another way to navigate a large notebook, see this NotebookLM learning setup.
Accuracy and privacy checks
- Verify every answer against the original source, especially dates, formulas, quotations, and technical definitions.
- Do not upload confidential student records, protected assessment material, or documents you are not authorized to share.
- Make sure generated questions test the intended objective rather than trivia from the source.
- Have a qualified teacher review the guide before assigning it to students.
A concise, verified guide for one learning objective is usually more useful than a very long report covering an entire course. Keep the source set narrow, state the audience precisely, and revise the exported document before relying on it.
Related Articles
 How to Share NotebookLM Publicly6 minutes read
 NotebookLM: User Guide with Practical Examples16 minutes read
 Instructions on Creating Flashcards and Quizzes on NotebookLM5 minutes read
 Guide to Creating Discussion Forums Using NotebookLM4 minutes read
 Guide to Creating Lesson Plans Using NotebookLM4 minutes read
 15 Best Gemini Notebook (NotebookLM) Alternatives in 202623 minutes read
Reader Comments 0
Sign in with email or Google to join the discussion.