The simplest way to create and add a watermark in Canva.
If you're passionate about design, you definitely can't ignore Canva. As a designer, you need to create and add watermarks in Canva as a signature of the author on your design.
Table of Contents
Canva's user-friendly drag-and-drop interface is a major advantage. Users can easily create and add watermarks in Canva's vast library of templates. If you don't already have a Canva account, create a free one to use the PRO VIP version without paying.
How to create and add watermarks in Canva
I. Guide to creating watermarks in Canva (Vietnamese)
Step 1 : Open your browser, access the Canva link , and log in to your account .
- Canva website link in Vietnamese: HERE
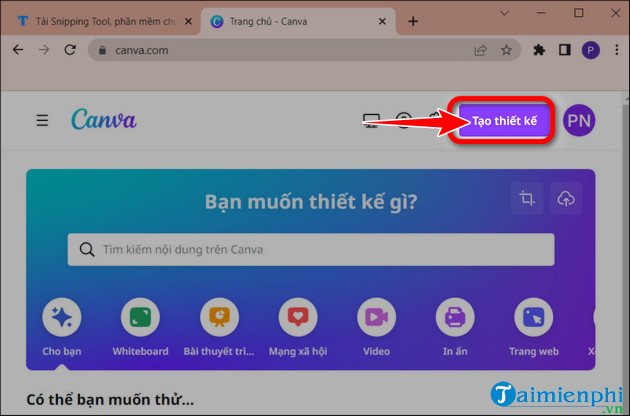
Step 2 : Click the "Create a Design" button to create a new design.
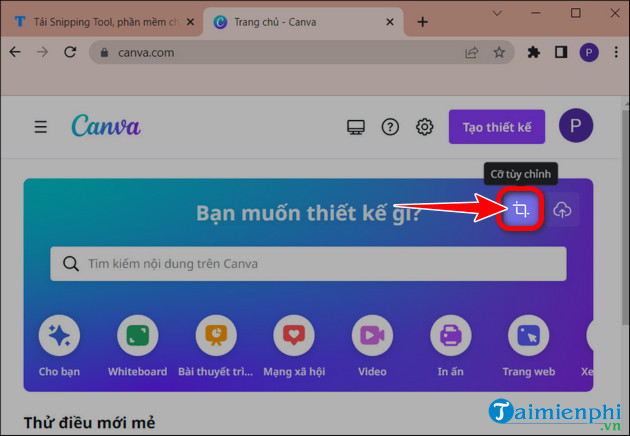
Step 3: Click on Custom Size to set the size.
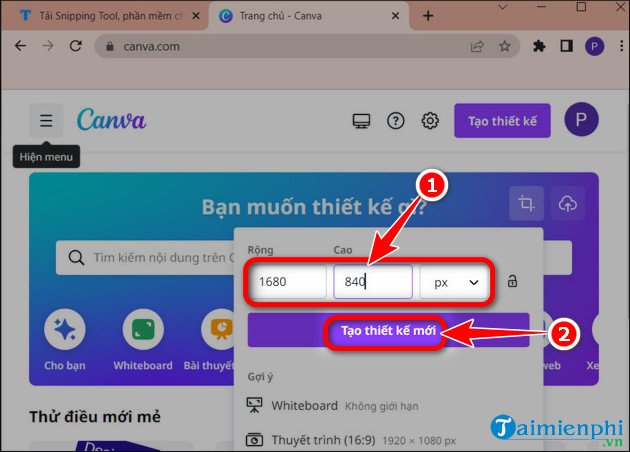
Step 4: Enter the width and height in the blank fields => Click Create new Design
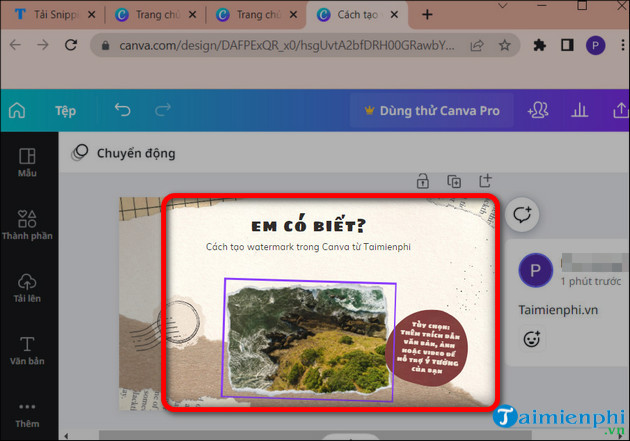
Step 5 : Create a watermark from your logo , plain text, or any other material.
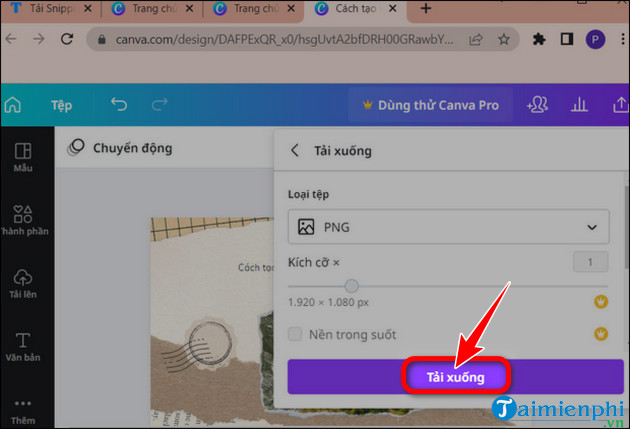
Step 6 : Click on Share => scroll down and click Download

Step 7 : Click Download to complete the watermark creation process. Additionally, you can also use Canva's link insertion feature to create notes within images or add annotations for the terminology you are using.
II. How to add a watermark in Canva
2. Detailed instructions
Step 1: Open your browser and log in to the official Canva website.
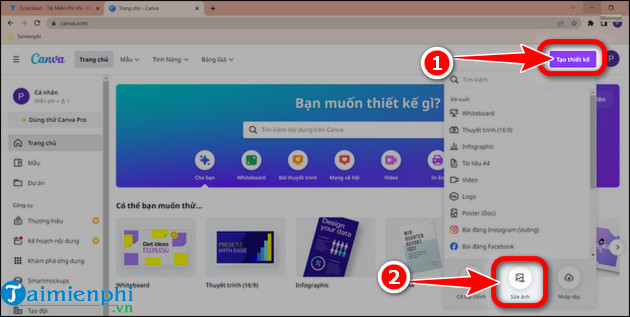
Step 2: Click the Create Design button => select Edit Image from the dropdown menu.
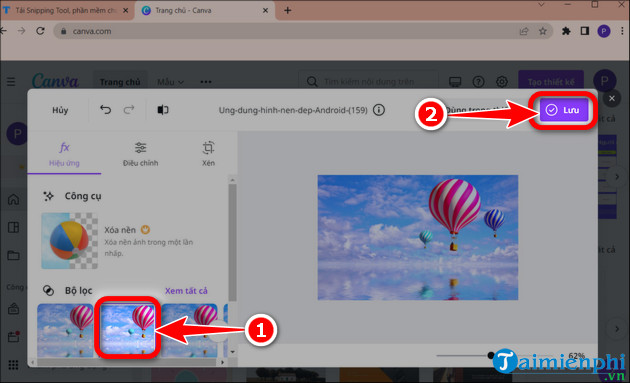
Step 3 : Add the image you want to add and the watermark => click Edit photo .
Step 4: In Images , select the transparent watermark image you created earlier => click Save.
Adding a watermark in Canva is quite simple; you can also upload images to Canva and then add or create a watermark. Everything is actually easier if you follow the steps that Taimienphi has provided above.
Was this article helpful?
Your feedback helps us improve.
Related Articles
 How to insert, delete watermark in Word documents5 minutes read
 Instructions for creating QR codes on Canva3 minutes read
 Instructions for creating stickers on Canva2 minutes read
 How to separate the background in Canva quickly and simply5 minutes read
 4 New Canva Features You'll Love9 minutes read
 Instructions for creating podcast covers on Canva3 minutes read
Reader Comments 0
Sign in with email or Google to join the discussion.