Flash CS4: Create a simple table tennis game
In this article, you'll use motion tween to create a simple table tennis game. The steps are as follows:
In this article, you'll use motion tween to create a simple table tennis game. The steps are as follows:
1. Switch back to the default workspace.
Click the Essentials area to reselect the default Flash workspace, then click Reset Essentials to restore this default workspace and start the exercise.
2. Create a new flash document.
3. Save a flash document.
Select the FLASH CS4 ONLINE folder, then save this file as 009_pingpong.fla
4. Import the drawing guide as a path for motion tween.
4.1. Select File > Import > Import to Stage . from the menu:
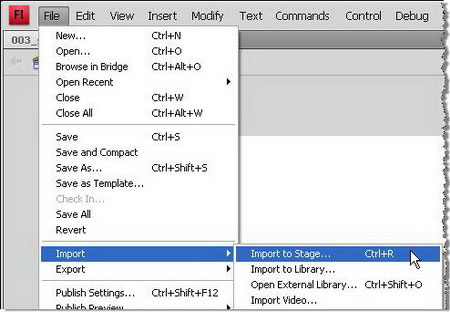
4.2. In the Import dialog box, point to the file guide.jpg and click the Open button: (file guide.jpg attached to the card sized 550x400 pixels to use)

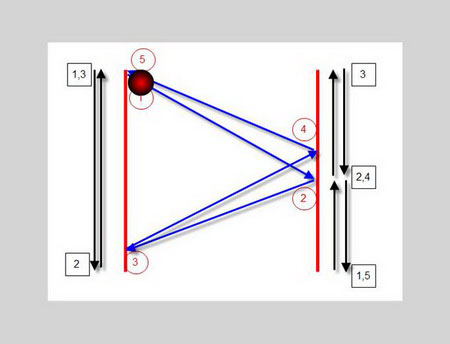
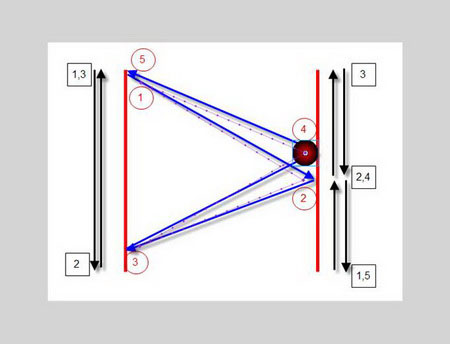
You get the image of the links to help you create motion tween for the ball and the two bats later:

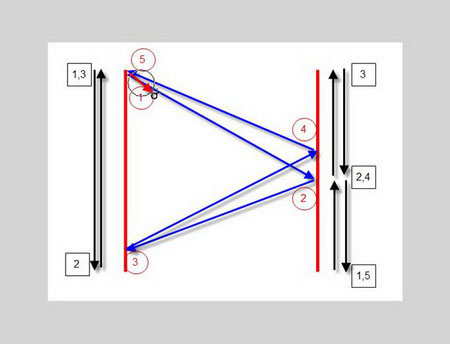
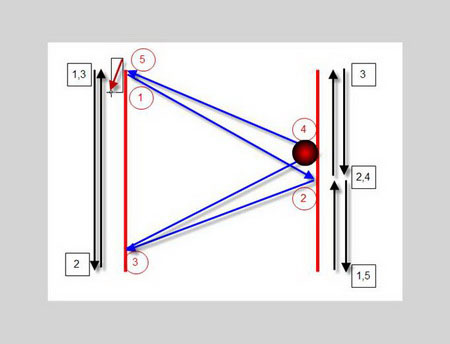
Analysis of drawings:
In the figure above, the two vertical red lines represent the moving boundary of the ball. The ball can only touch these two lines and not pass.
The blue line shows the path of the ball. In this way, the ball moves from position 1 to position 2, 3, 4 and returns to position 5, where positions 1 and 5 overlap. The black line on the left shows the path of the left racket, the left racket moves from position 1, to position two to catch the ball and returns to position 3, where positions 1 and 3 overlap.
The black line on the right shows the path of the right racket, the racquet must move from position 1, to position two to catch the ball, then move forward to position 3, return to position 4 to catch the ball and return to position 5, in which positions 1 and 5 overlap.
Thus, the ball and the racket must use 5 keyframes, the left racket uses 3 keyframes.
5. Create motion tween for the ball.
5.1.Double-click Layer 1 to rename the Guide :

5.2. Click the New Layer button in the Timeline to add a layer:

5.3. Flash add a new layer with the default name Layer 2 . Double-click Layer 2 to rename it to Ball :

5.4. Mouse over the toolbar. Click on the Rectangle Tool and hold down the mouse for a few seconds for the submenu to appear. Click on the Oval Tool :
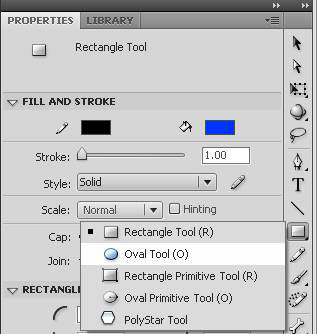
5.5 Click on the Stroke color box to select the border color for the oval:
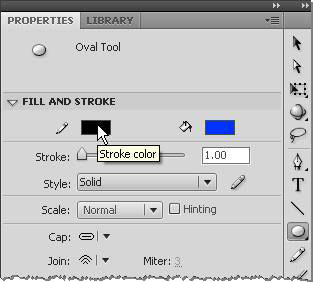
5.6. The color palette appears, click the box on the right with a red cross. This box is used to set the colorless value for the border, ie the drawn object has no borders:
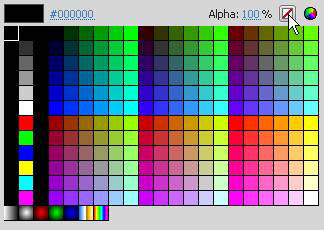
5.7 Click on the Fill color box to select the color for the oval:
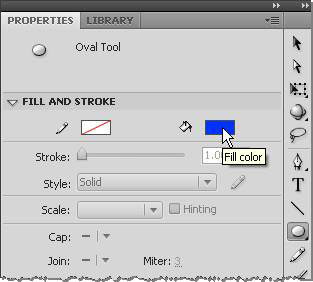
5.8. The color palette appears. You select the red pattern in the area containing the gradient color:
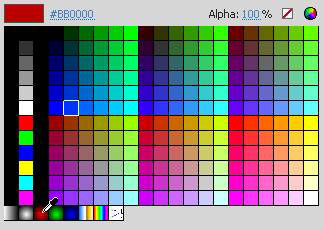
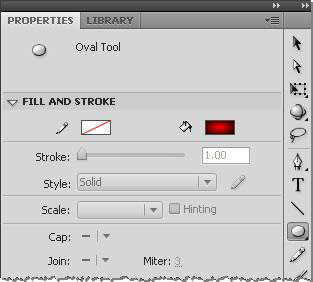
You get the following result:
5.10. Put your mouse on the upper corner, where the blue path of the ball comes from, hold down Shift and drag the mouse down to the right to draw a circle.
Release the mouse button and you get the round ball with the gradient color as follows:
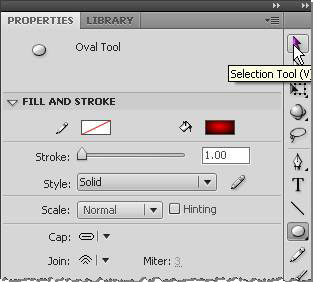
5.11 Click on the Selection Tool on the right toolbar:
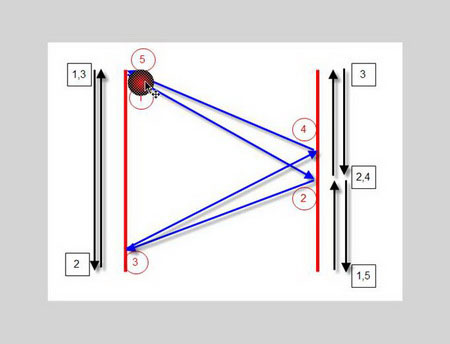
5.12 Click on the ball just drawn. Once selected, the ball turns into tiny particles, while a four-dimensional arrow appears below the mouse:
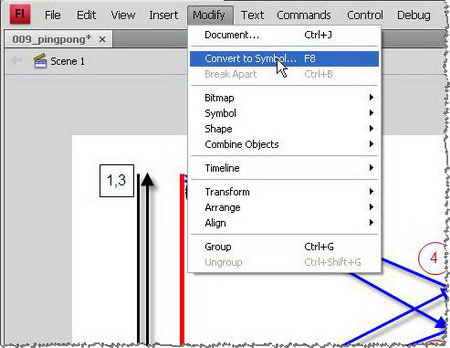
5.13. Select Modify > Convert to Symbol . from the menu (or press the shortcut F8 ) to convert the ball to symbol:
The Convert to Symbol dialog box appears. Click on the name of the ball in the Name box, select Type as Movie Clip and click OK to close the dialog box. The ball is converted into a Movie Clip.
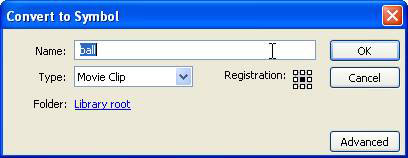
5.14 Right click on the ball to bring up the context menu and select Create Motion Tween :

Flash created a motion tween for the ball with 24 frames (equivalent to 1 second), while moving Playhead to frame 24 . You add additional frames so that the duration of the ball is long enough for you to observe. You will add the active ball to frame 60.
5.15 Move your mouse to frame 24 of layer Ball until the mouse turns into a two-way arrow:

5.16 Drag to frame 60 , release the mouse button. You got motion tween for the ball with 60 frames :

5.17 However, frame 60 is not yet a keyframe. In order for the contents of the first keyframe and the last keyframe of the ball to overlap, use the Up arrow key (up arrow) and the Down arrow (down arrow) on the keyboard. You press the Up arrow, the ball moves up 1 pixel, then you press the Down arrow, the ball moves below 1 pixel, Flash automatically adds keyframe at frame 60, and the ball position still doesn't change due to compensation:

5.18 Click on frame 60 of layer Guide :

5.19 Press the shortcut F5 to add more than 60 frames so that other layers can see the path that is on the layer Guide for easy operation:

5.20 As discussed above, the ball uses 5 keyframes . You add the following keyframes: Drag your mouse to frame 15 on Timeline :

5.21 Click to switch Playhead to frame 15 (note: click on 15, do not click on the frame on the layer):

5.22 The mouse click drags the ball from position 1 to position 2 and drops it. Flash automatically add keyframe at frame 15 on layer Ball:
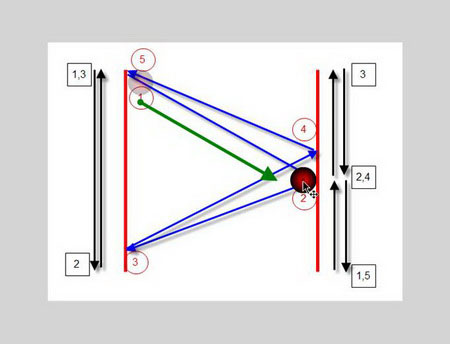
5.23 Mouse over frame 30 on Timeline and click to switch Playhead to frame 30:

5.24 Drag the ball to position 3. Flash automatically add keyframe at frame 30 on the Ball layer :
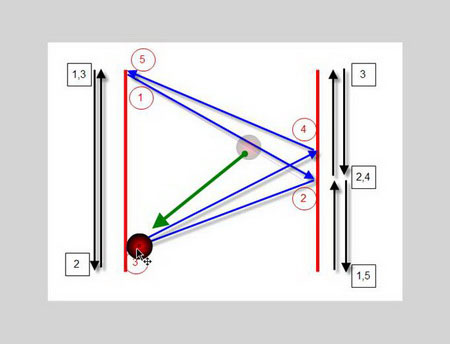
5.25 Hover your mouse over frame 45 on Timeline and click to switch Playhead to frame 45 :

5.26 Drag the ball to position 4. Flash automatically adds the keyframe at frame 45 on the Ball layer:
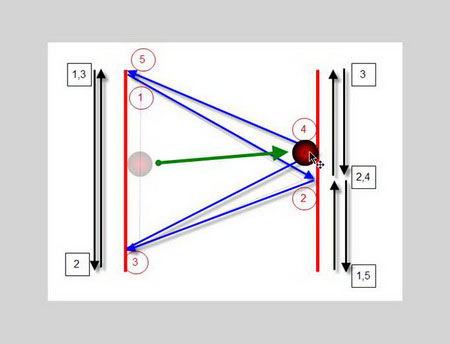
You obtained the complete motion tween for the ball with the motion path purple as shown:
Continue
6. Create motion tween for the left racquet.
6.1 Click the New Layer button in the Timeline to add a layer:

6.2 Flash add a new layer with the default name Layer 3. Double-click Layer 3 to change its name to Left paddle :

6.3 Move the mouse to the toolbar. Click on the Oval Tool and hold down the mouse for a few seconds for the submenu to appear. Click to select Rectangle Tool :
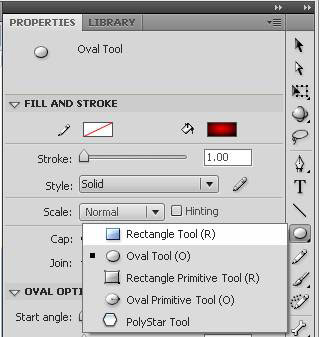
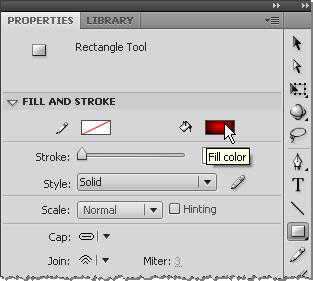
6.4 Click on the Fill color box to select the color for the rectangle:
6.5 The color palette appears. You choose the blue pattern:
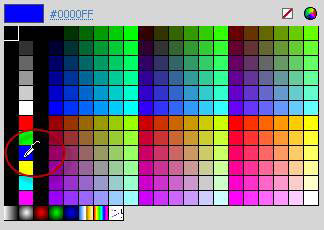
You get the following result (border color is still colorless):
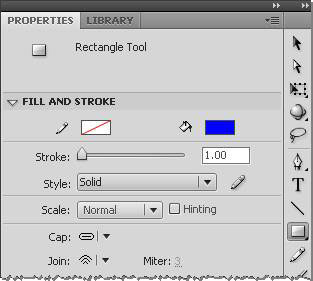
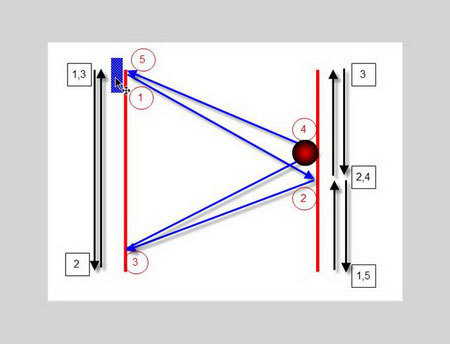
6.6 Click on the Stage , click on the corner of the starting position of the ball, drag backwards to the left and then release the mouse to get a rectangle, as shown below:
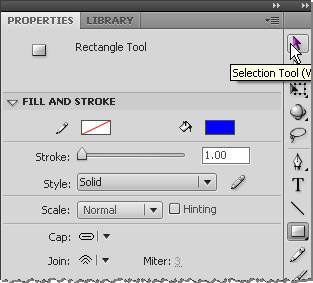
6.7 Click the Selection Tool on the toolbar:
6.8 Click to select the rectangle just drawn. Once selected, the rectangle changes to tiny particles, while the four-dimensional arrow appears below the mouse:
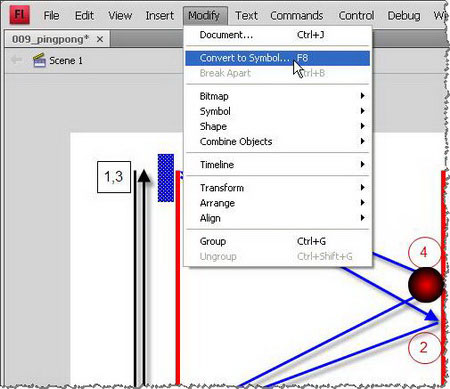
6.9 Select Modify > Convert to Symbol . from the menu (or press the shortcut F8 ) to convert the rectangle to symbol :
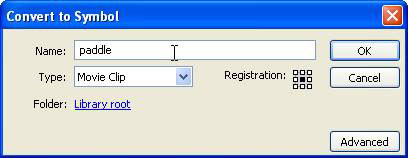
6.10 The Convert to Symbol dialog box appears. Type in the paddle name in the Name box, select Type as Movie Clip and click OK to close the dialog box. The rectangle is converted into a Movie Clip.
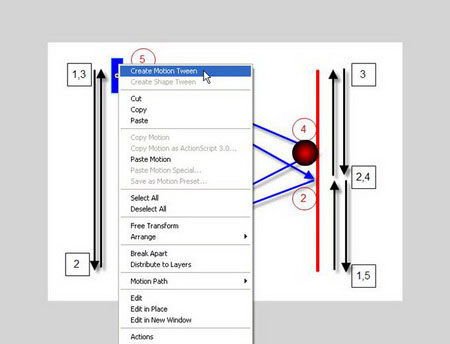
6.11 Right-click the rectangle for the context menu to appear and choose Create Motion Tween . Flash created motion tween for the rectangle on the Left paddle layer with 60 frames:
6.12 Mouse over frame 60 on Timeline and click to switch Playhead to frame 60:

6.13 Frame 60 is still not a keyframe. You press the Up arrow, the rectangle moves over 1 pixel, then you press the Down arrow, the rectangle moves below 1 pixel, Flash automatically adds keyframes at frame 60, and also positions the shape Japan has not changed because it has been offset:

6.14 Hover your mouse over frame 30 on Timeline and click to switch Playhead to frame 30:

6.15 Hold down the Shift key and drag the rectangle to position 2, where the ball is located (Shift key helps you to move vertically, not to the right or left):
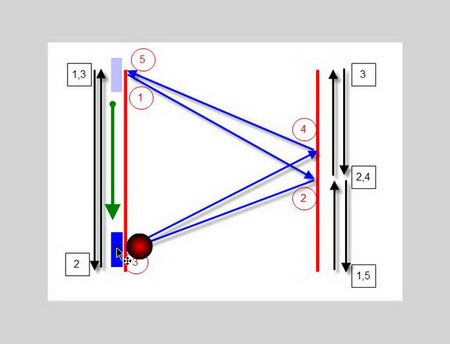
So you've finished motion tween for the left racket (ie rectangle).
7. Create motion tween for the right racquet.
7.1 6.1 Click the New Layer button in the Timeline to add a layer:

7.2 Flash add a new layer with the default name Layer 4. Double-click Layer 4 to rename to Right paddle :

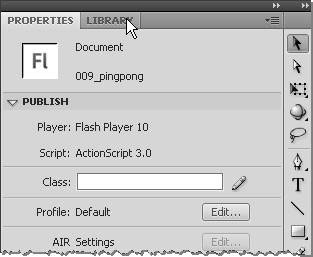
7.3 Click the Library tab to open the Library Panel :
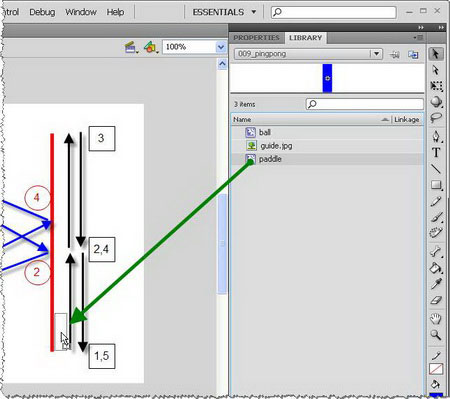
7.4 From the Library Panel , drag the Movie Clip paddle to the Stage , and drop it into position 1 of the racquet right as shown:
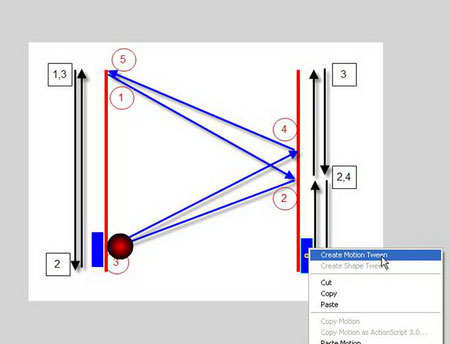
7.5 Click the right mouse button on the right racket (ie rectangle) to bring up the context menu and select Create Motion Tween .
7.6 Mouse over frame 60 on Timeline and click to switch Playhead to frame 60 :

7.7 Frame 60 is not yet a keyframe. You press the Up arrow, the rectangle moves over 1 pixel, then you press the Down arrow, the rectangle moves below 1 pixel, Flash automatically adds keyframes at frame 60, and also positions the shape Japan has not changed because it has been offset:

7.8 Hover your mouse over frame 15 on Timeline and click to switch Playhead to frame 15 :

7.9 Hold down Shift and drag the racquet to where the ball is in position 2:
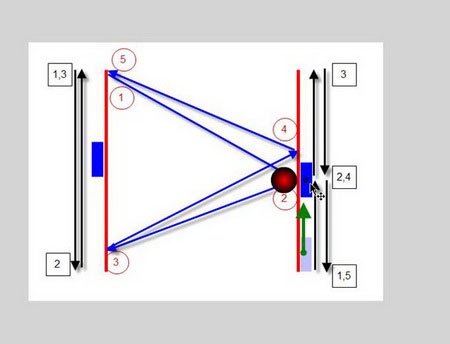
7.10 Mouse over frame 30 on Timeline and click to switch Playhead to frame 30 :

7.11 Hold Shift and drag the racquet to position 3 as shown:
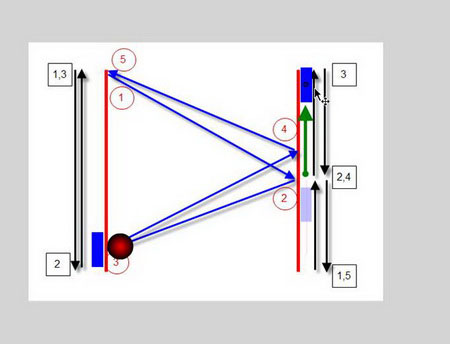
7.12 Hover your mouse over frame 45 on Timeline and click to switch Playhead to frame 45 :

7.13 Hold Shift and drag the racquet to the place where the ball is in position 4 as shown:
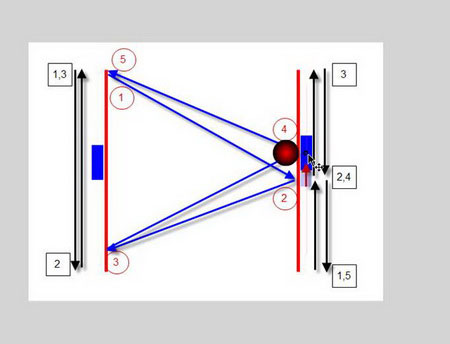
So you've finished motion tween for the right racket.
8. Move layer Guide to Guide Layer.
Layer Guide has completed the task. You can delete this layer. However, you can keep it for reference by converting it to Guide Layer:
8.1 Right-click the layer guide to bring up the context menu and select Guide :
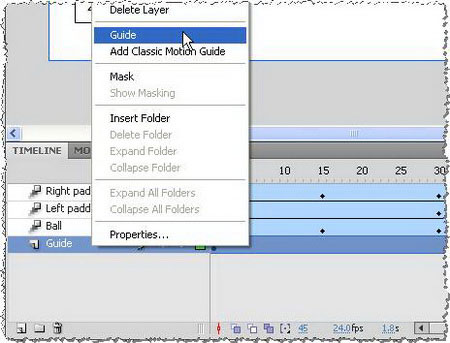
Flash to change the icon of the layer Guide into a hammer. In this way, the content of the layer Guide will not be exported to Flash Movie, does not increase the size of your work.

8.2 Select Control > Test Movie from the menu (or shortcut Ctrl + Enter ) to see the result:
Flash will export to file 009_pingpong.swf as follows:
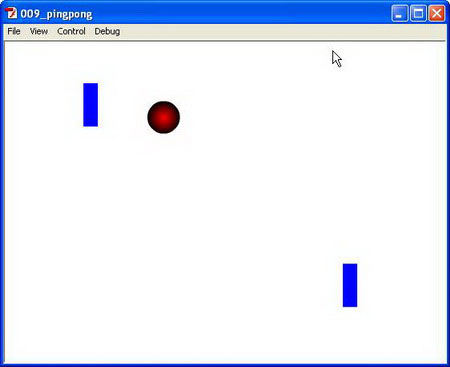
9. Move motion path
If you do the right actions as instructed, when you test Movie you will see the left racket has not touched the ball. You will move the motion path of the left racket to the racquet to hit the ball (you can get the attached sample file to practice this step)
9.1. Hover your mouse over frame 30 on Timeline and click to switch Playhead to frame 30 :

You see the left racquet a paragraph away from the ball:
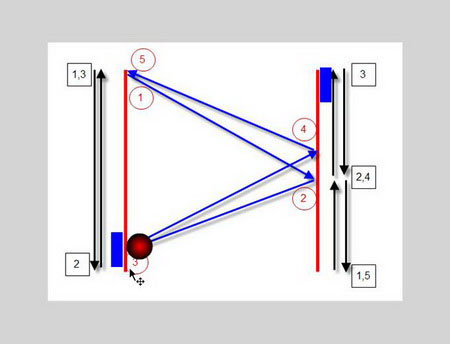
9.2 Press the selector on the left rack to show motion path :
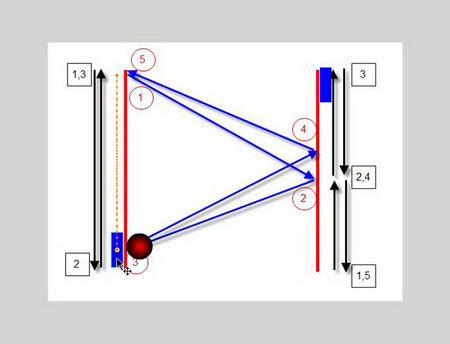
9.3 Double-click motion path :

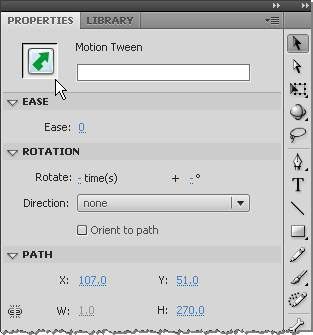
9.4 You check in the Property Inspector to have Motion Tween icon to make sure you have selected motion path , not any other object:
9.5 Use the right arrow key ( Right ) on the keyboard to move the racquet to the right until the racquet hits the ball. Each time you press the Right key, the object moves 1 pixel, if you hold down the Shift key, the object moves 10 pixels.
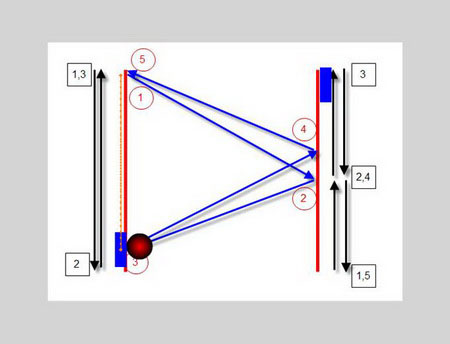
You can do the same way to apply to the right racket.
Suggested exercises:
Redo the above lesson with the change guide as shown below. This time both racquets move with keyframe positions marked on the illustration. You can download the guide2.jpg illustration and sample result file 009_pingpong2.fla for reference.


 Configuration steps for multiple Users to remotely connect to Windows Server 2016 using Remote Desktop
  How to Shut Down or Restart Another Computer Using CMD
  3 ways to turn off Your Windows license will expire soon notification on windows
  3 ways to remove a Windows 10 computer from a domain that no longer exists
  How to Convert Excel to Dat
  Fix the error of not being able to convert PostScript files on the printer