Table of Contents
This practical guide walks through fix the application was unable to start correctly on Windows, explains the main requirements, and highlights common issues that may appear along the way.
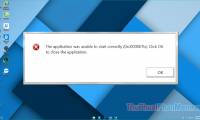
The cause of the error The application was unable to start correctly:
- - Due to missing or corrupt .NET framework 3.5 or Visual C ++ Redistributable Packages. It prevents users from using different services and affects many legitimate applications.
- - Appears when we try to launch high-graphics games, or because some file system is missing.
- - The cause of conflicts with executable files affecting performance and causing errors is definitely due to antivirus software .
1. Reboot the computer
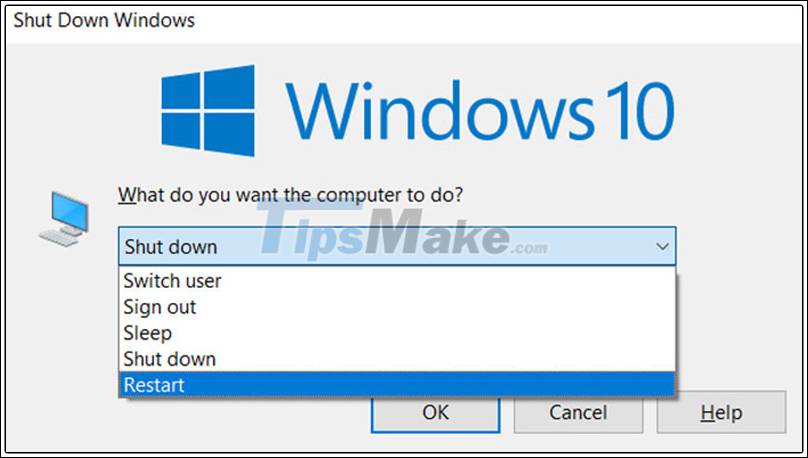
Restarting the computer if something goes wrong, when there are various errors or something is causing the system to work incorrectly then restarting Windows is a simple way to fix this problem.
2. Reinstall the application
While upgrading your application may contain some error, so reinstalling will help us fix this error.
You should pay attention to the following points when the installation is in progress:
- Reinstall the app and latest app updates.
- Install the application on the drive to the system "C: /".
- Bypass your browser, antivirus or any toolbar.
Proceed to boot to see if the error occurs or not.

3. Use the "Run as Administrator"
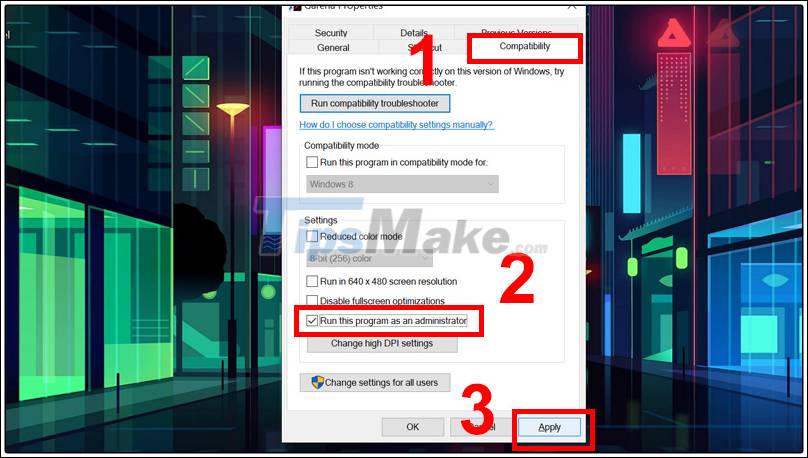
To be able to fix this error, try to open the software as an administrator. The steps are as follows:
Step 1: Right-click on the application icon you want to select> Select Properties.

Step 2: In Compatibilt tab> Select Run this program as an administrator> Click Apply to save changes.
4. Test the drive
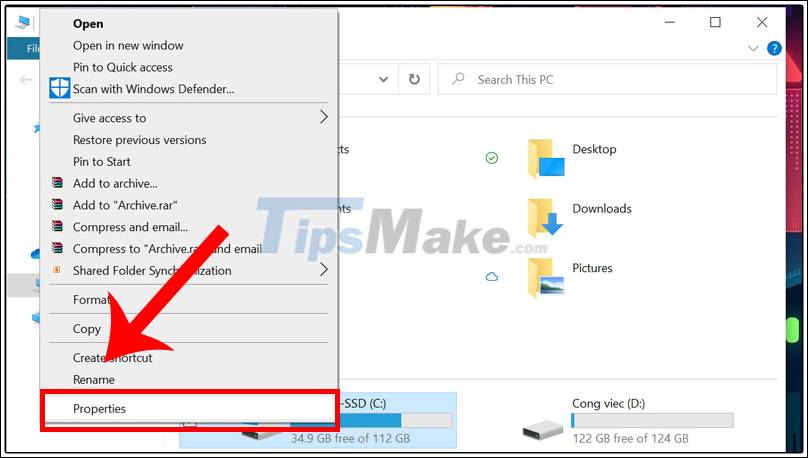
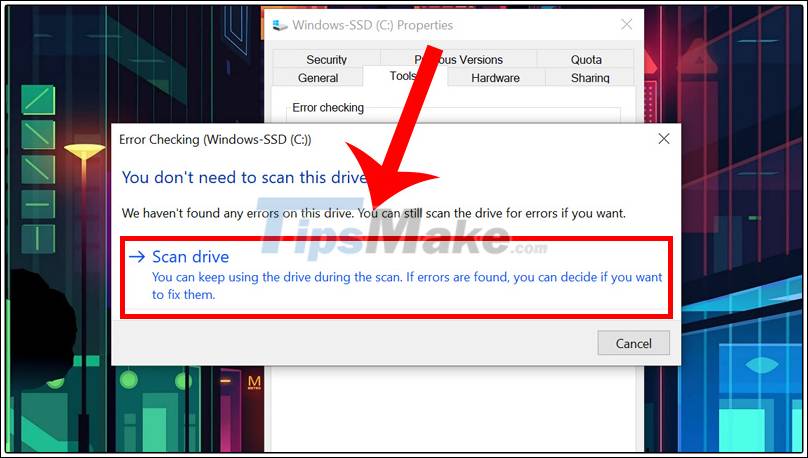
Step 1: Left-click on the C drive and select Properties.
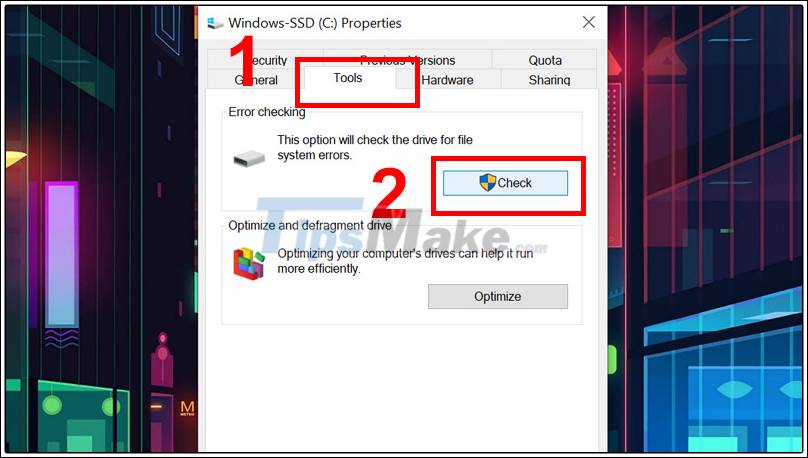
Step 2: In the Tools tab> Select Check.
Step 3: Click on Scan drive to check the drive.
5. Clean boot
By starting this you can check to see if the 0xc00007b error was caused by a third party application.
Note: To do this, you need to be logged on to your computer as an administrator.
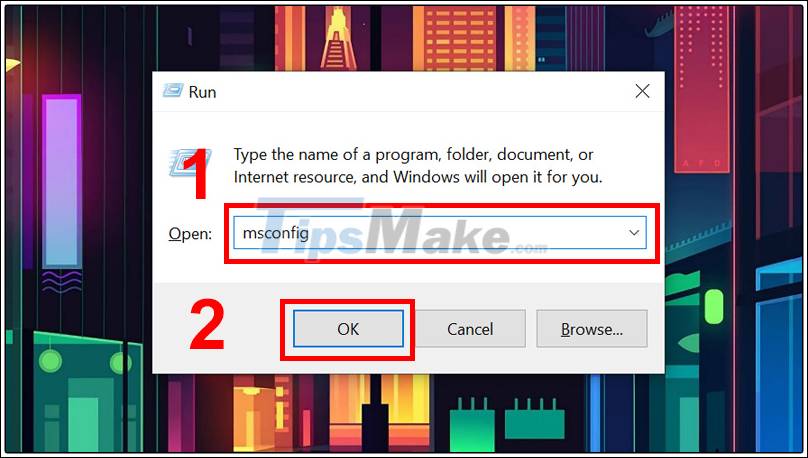
Step 1: Press the Windows + R key combination to open the Run dialog box> Type msconfig and press Ok.
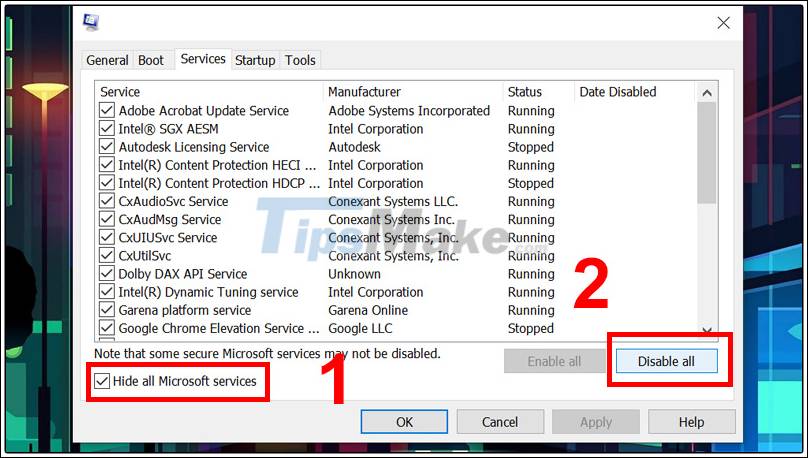
Step 2: In the Service tab and choose Hide all Microsoft services> Select Disable all.
Step 3: Go to the Startup tab> Select Open Task Manager> Click on each item> Select Disable.
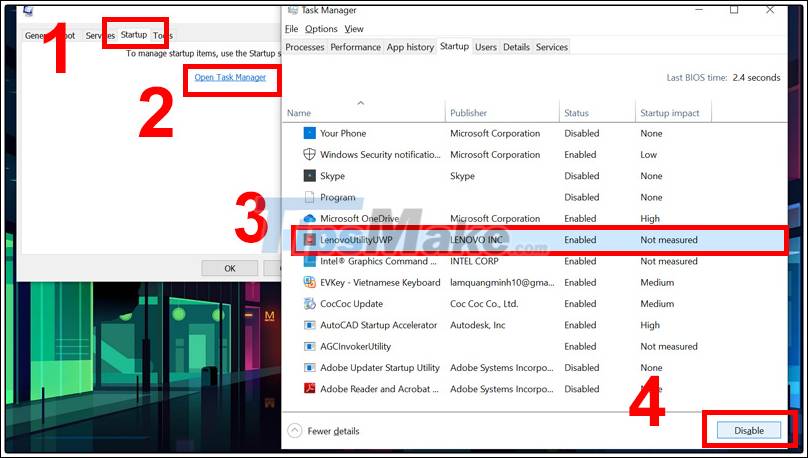
Step 4: Close Task Manager and click OK. Then proceed to restart the computer.

6. Use Registry Editor
To do this, follow these steps:
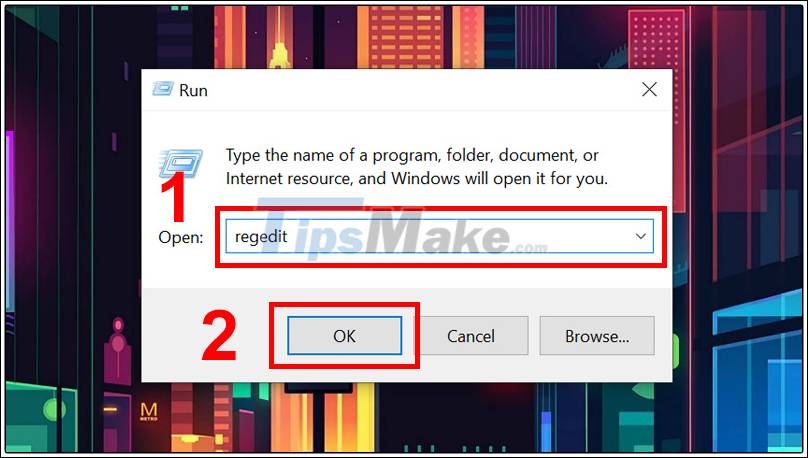
Step 1: Press the Windows + R key combination> Enter the regedit command then click OK.
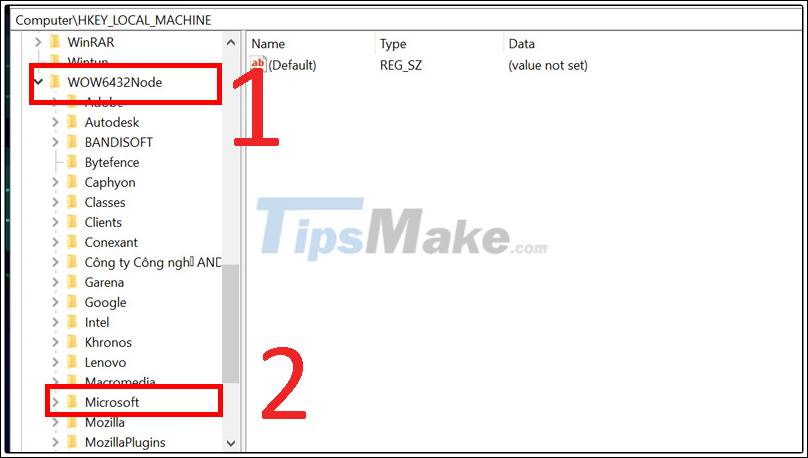
Step 2: Please navigate to the following location HKEY_LOCAL_MACHINE> Select SOFTWARE.

From the SOFTWARE section, go to WOW6432Node> Select Microsoft.
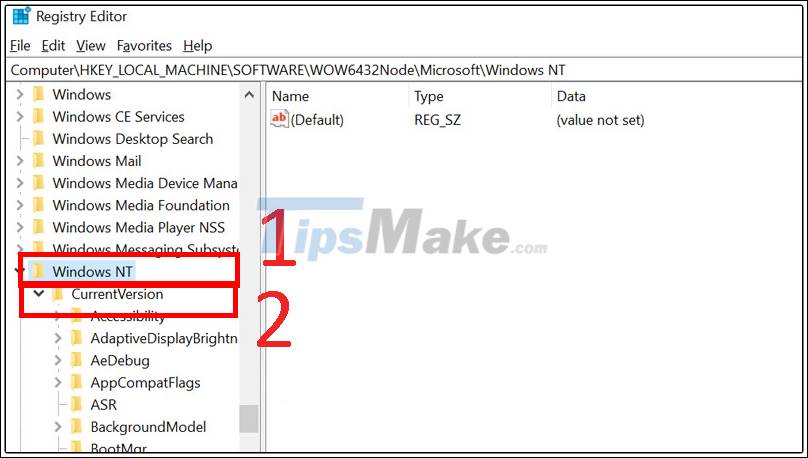
From the Microsoft section, go to WindowsNT> Select CurrentVersion.
Step 3: Select Windows> Double-click AppInit_DLLs and set it to blank value> Click Ok and restart the computer.

The above article has a quick and easy way to fix the application was unable to start correctly error in Windows. I wish you all success!
Key Takeaways
Use the information above as a practical reference for fix the application was unable to start correctly on Windows. Review each step carefully, confirm any requirements, and choose the option that best fits your situation.
FAQ
What does this guide explain about Fix the Application Was Unable to Start Correctly on Windows?
It explains the main concepts, practical considerations, and useful steps related to fix the application was unable to start correctly on Windows without requiring advanced knowledge.
Who can benefit from learning about Fix the Application Was Unable to Start Correctly on Windows?
This information is useful for readers who want a clear overview, practical guidance, and reliable steps related to fix the application was unable to start correctly on Windows.
What should I check before applying this information?
Review the requirements, confirm that your device, software, or situation matches the instructions, and back up important data before making major changes.
Related Articles
 How to Fix 'Application Was Unable to Start Correctly 0xC0000142'5 minutes read
 How to Fix the Application Was Unable to Start Correctly (0xc000007b)3 minutes read
 How to Fix 'Your PC Did Not Start Correctly' Error7 minutes read
 5 Ways to Fix 'the Application Was Unable to Start (0xc000007b)' Error6 minutes read
 'Your PC Did Not Start Correctly' Error: 8 Effective Fixes8 minutes read
 Create Start Button on Windows 8: A Practical Guide6 minutes read
Reader Comments 0
Sign in with email or Google to join the discussion.