Fix common sound errors on Windows 11
1. Did you accidentally turn off the sound?
Most current Windows laptops have a dedicated audio mute button. Sometimes you may accidentally tap it without even knowing it. The mute button will usually come with a small indicator light to let you know if the device is in mute mode. Normally, the mute feature will be located at F6.
Now, press Fn + Sound Shortcut to unmute on Laptop.
2. Check if output device is selected or not?
Windows 11 will by default use the system sound as the output device. If you connect multiple audio devices such as speakers, headphones, make sure you have selected the correct one.
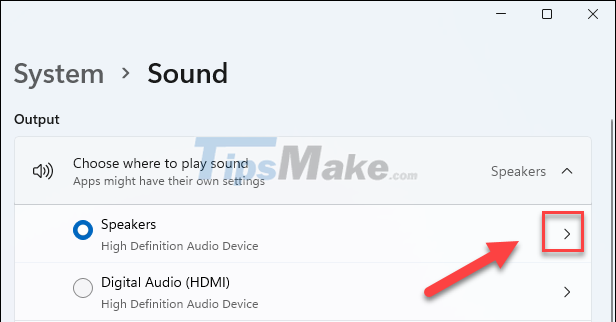
Press Windows + I to open Settings. At the System tab, click Sound.

In the Output section, Choose where to play sound, you choose the correct device that you are using.

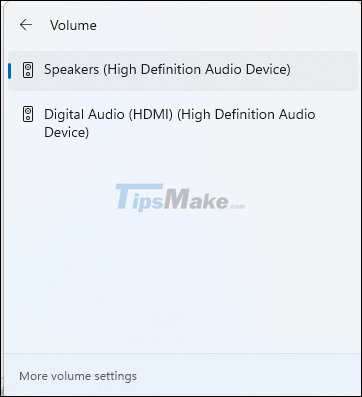
Alternatively, you can also quickly change the audio output device from the Action Center. Click the Speaker icon on the Taskbar.
Click on Manage Audio Devices next to the volume bar. It will show all connected audio devices.

Select the audio output device you want to set as default.
3. Run Troubleshooter
Windows 11 also supports the Troubleshooter program for audio. Recently, these programs have been evaluated as effective in finding and fixing common problems.
Step 1: You press Windows + I to open settings. On the System tab, select Sound.
Step 2: Scroll down to Advanced. You pay attention to the section Troubleshoot common sound problems >> Output Devices.
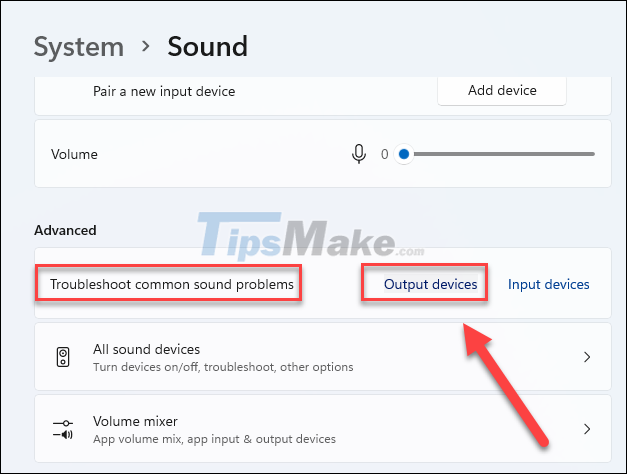
Step 3: Windows will scan the existing audio devices on the computer. Select the device you want to troubleshoot and click Next.
The system will automatically scan for existing errors and fix errors or issue updates.
4. Turn off sound enhancement
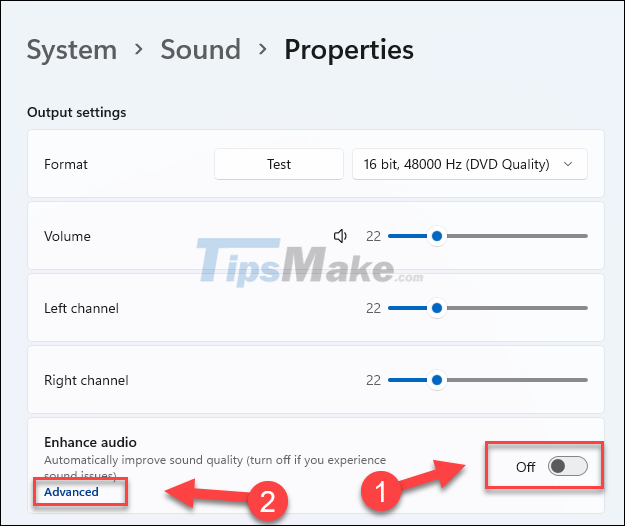
When enabled, the Enhance audio feature automatically improves the sound quality. If this feature is not compatible with your output device, it may cause an error. That makes you not get the audio experience you want.
Step 1: You press Windows + I to open settings. You open System >> Sound.
Step 2: Click on the speaker/headphone device you are using to open Properties.
Step 3: In the Properties screen, scroll down to the Enhance audio section. You Turn off the switch of this feature, then continue to click Advanced.
Step 4: You select the box Disable all enhancements.
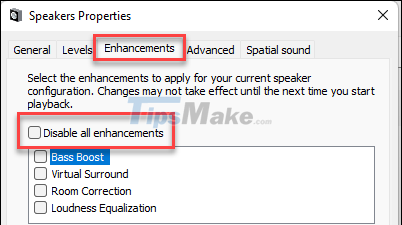
Step 5: Click Apply >> OK to save the changes.
5. Reinstall the audio driver
Faulty or outdated drivers can misbehave and cause audio-related problems in Windows 11. You can reinstall the drivers to restore them to a working state.
Step 1: Press Windows + X, then select Device Manager in the pop-up menu.

Step 2: In the Device Manager window, open the Audio inputs and outputs section.
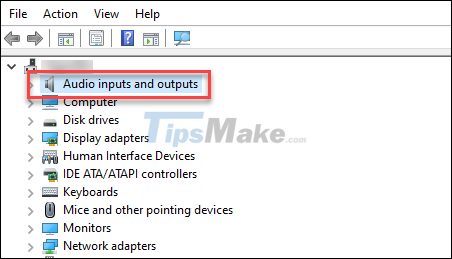
Step 3: Right-click on the audio device you want to troubleshoot. Select Uninstall device.
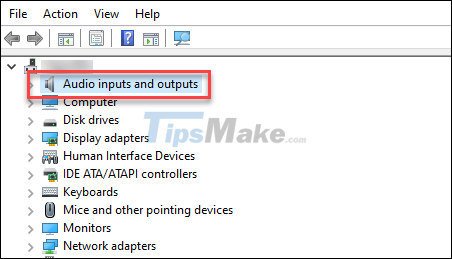
Step 4: After uninstalling the driver, restart the computer. Windows will automatically reinstall the driver.
6. Install the latest Windows 11 updates
From time to time, Microsoft will release new hotfixes to address issues that many people experience. So you should also check the new update of Windows 11 to see if there is a new fix.
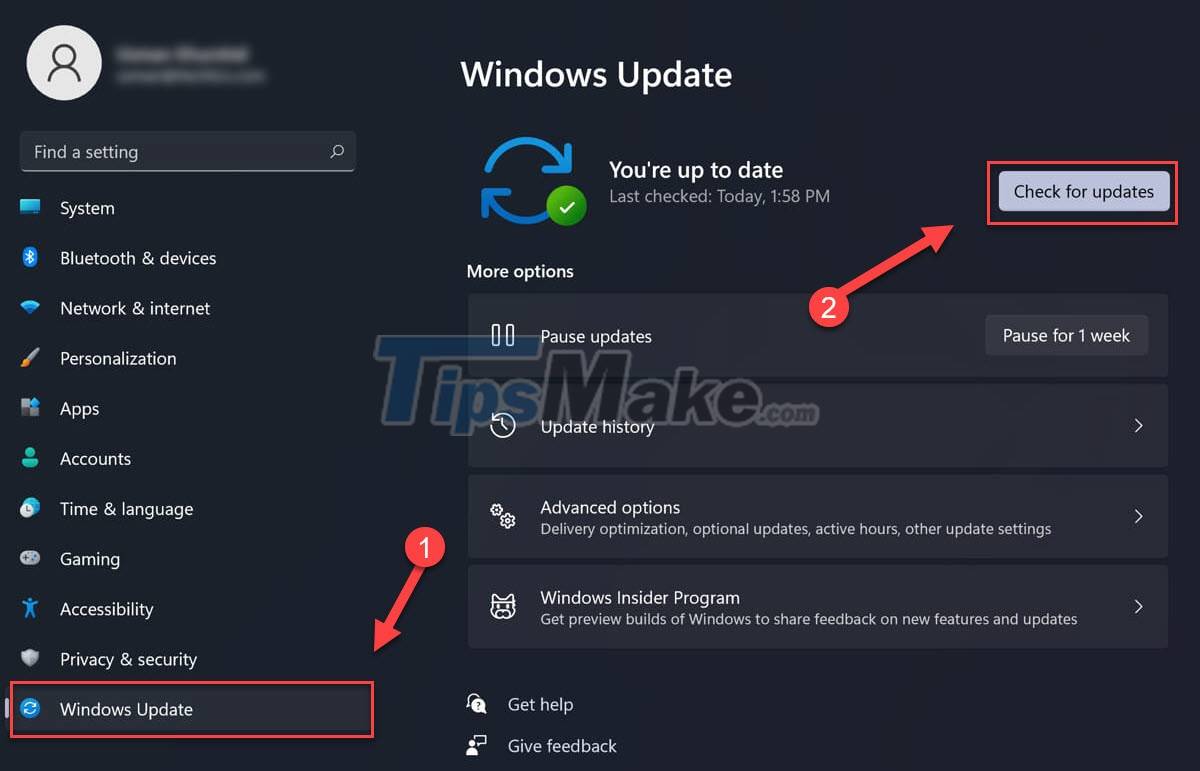
Step 1: Press Windows + I to open Settings. You go to Windows Updates.
Step 2: Click the Check for updates button and scan for pending updates. If so, download and install the new update for your computer.
7. Restart Audio Service
Step 1: Type services in the Windows search bar and open the Services application.
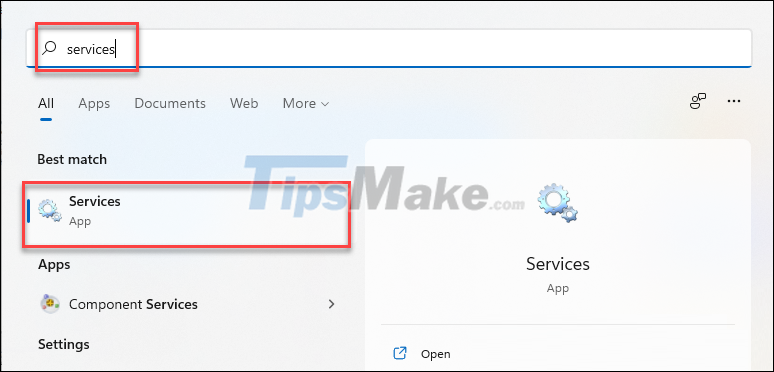
Step 2: In the Service window, search for the following services:
- Windows Audio
- Windows Audio Endpoint Builder
- Remote Procedure Call (RPC)
Step 3: Right-click on each service, select Restart. Repeat with all 3 services above.

Finally you check if the problem is solved or not.
8. Check your audio equipment
Your headphones/speakers can't be ruled out. Try connecting these devices to another computer or phone to check if they work properly.
Also, try changing the connection port and check if the cable is broken or not.
9. Restore factory settings
As a last resort, try resetting your PC to factory settings. You can still keep your personal files, but after reset the 3rd party apps will be deleted. You should consider using this method or not.
Step 1: Press Windows + I to open Settings. Open the Windows Updates tab.
Step 2: In More options >> Advanced options.

Step 3: Scroll down and find Additional options >> Recovery.
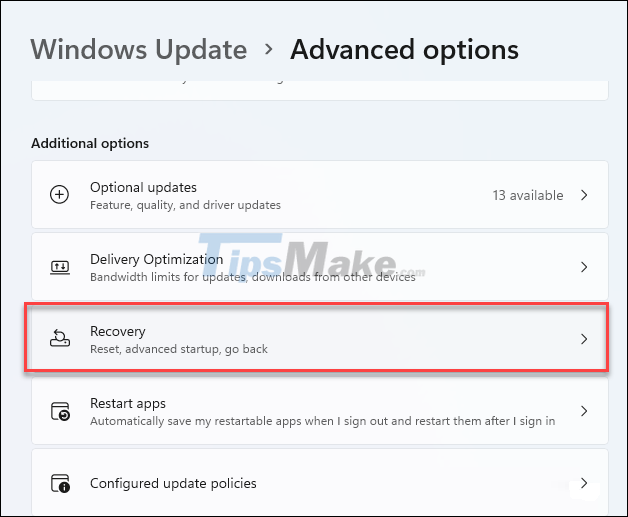
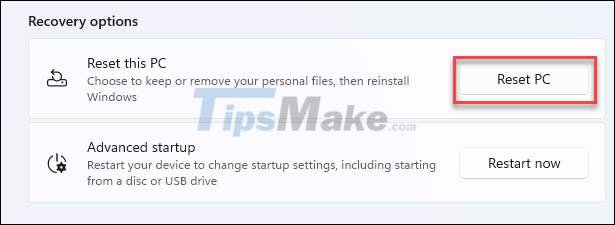
Step 4: Click Reset PC to reset your PC.
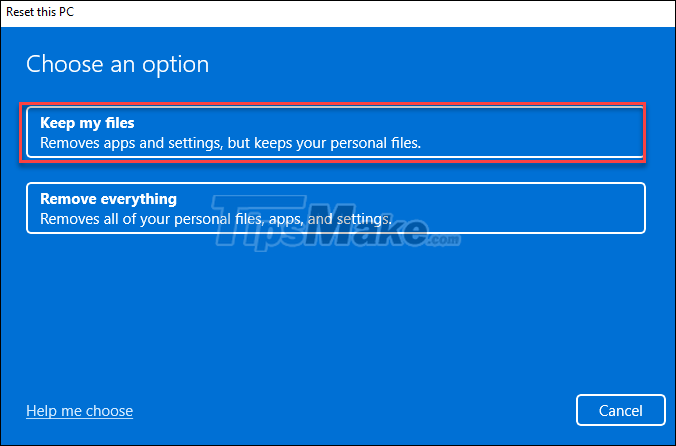
Step 5: In the next window, select Keep my files if you want to keep your personal files, if you want to delete all, select Remove everything.
Step 6: Choose Local Reinstall or Cloud Download. Finally, you just have to wait for Windows 11 to be completely reset.
Conclude
Above are some ways to fix sound errors on Windows 11. Hope you have found a useful method for your problem. Good luck!