Extremely simple instructions for enlarging photos without Photoshop
Photoshop has a Generative Fill tool that expands images in cases where the image is missing a background. Then the frame is expanded without losing realism.
Table of Contents
In case you do not use Photoshop, you can immediately use Clipdrop to expand the image with a very simple method. We just need to upload the photo and Clipdrop will help you adjust the frame. The article below will guide you to expand photos using Clipdrop.
How to expand photos with Clipdrop
Step 1:
First, we access the link below to visit the Clipdrop website.
https://clipdrop.co/Step 2:
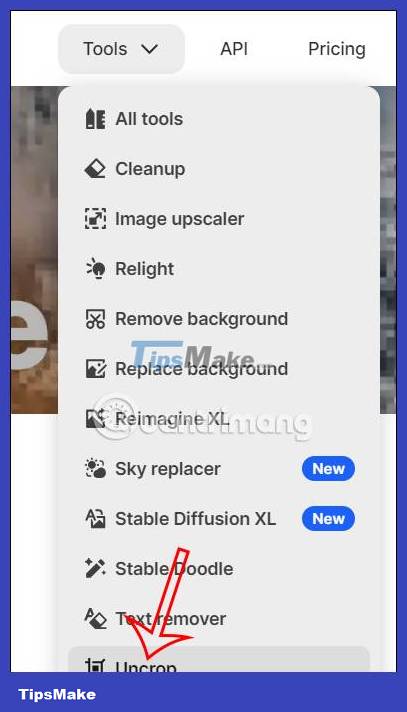
At the website interface, click on Tools and then select Uncrop at the bottom of the interface.
Displaying the new interface, the user proceeds to upload the image they want to expand to the website.

Step 3:
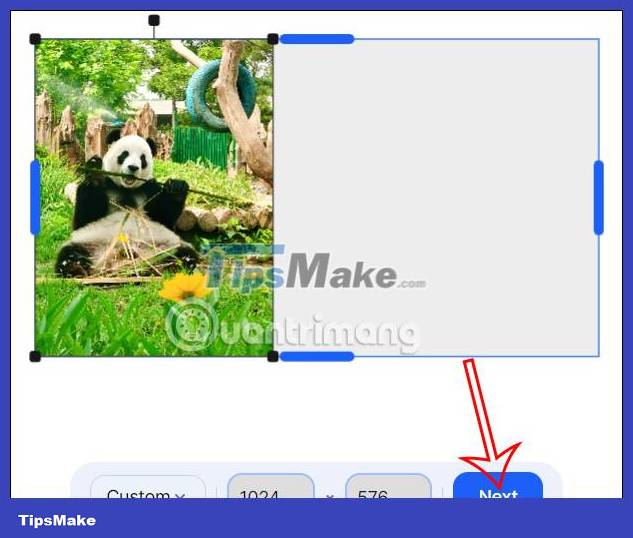
After uploading the image, we adjust the frame , image position and frame expansion direction .

Depending on how you want to expand your photo, we choose the direction to expand the frame and position the photo accordingly. After selecting, click Next to continue .
Step 4:
Now you are asked to enter your email to register to use Clipdrop , enter your email address and click Continue. Or you can use the accounts below to log in to Clipdrop.

Next, access your registration email to activate your Clipdrop account .

Step 5:
Immediately after that, Clipdrop proceeds to adjust the image, expanding the photo frame based on the original background of the photo. As a result, we get an expanded image as shown below. You press the plus sign to add a photo to expand the frame and the arrow icon to move the photo.

If you want, you can click Edit to change the image expansion style on Clipdrop.

Step 6:
Finally, if you like the extended image on Clipdrop, select it and then click Download to download it. Photos are downloaded with sharp quality, without blur or broken images.

Was this article helpful?
Your feedback helps us improve.
Related Articles
 How to rounded corners of photos in Photoshop3 minutes read
 How to crop photos in Photoshop8 minutes read
 How to cut circular images in Photoshop4 minutes read
 Steps to make rain in Photoshop look lifelike with just a few taps4 minutes read
 49 smart Photoshop tips you need to know (Part 2)9 minutes read
 Photoshop CS: Decorate photos5 minutes read
Reader Comments 0
Sign in with email or Google to join the discussion.