How to import and export OVA files in Virtualbox
VirtualBox has a graphical application that you can use to create and manage your virtual machines easily on a desktop or workstation..
One of the biggest strengths when working with virtual machines (VMs) is their flexibility. It's great to be able to create VMs on a computer and move them to another machine or create, then copy the entire VM deployment. Also, there are many pre-configured virtual machines online, which you can import in a snap and put them into operation immediately.
Oracle's VirtualBox makes all of this very simple. VirtualBox is a VM management tool for desktop computers. It has a graphical application that you can use to create and manage your virtual machines easily on a desktop or workstation. No complicated settings or configurations are needed in this process.
Import OVA file

When you have VirtualBox running, locate the File in the top menu and click on it. Then, select Import Appliance (VirtualBox calls the virtual appliance ' appliance ').

A new window will open with a field for you to choose your .ova file. Browse to the file you want to import. VirtualBox will take a few seconds to read the information on the file.

The window will turn into a table that allows you to select the settings for the virtual machine to be imported. From here, you can set up the main features of the virtual machine, such as the amount of available memory. When you are ready, finish and let VirtualBox run the import process.

After the process is complete, your VM will be ready to use.

Export OVA file
Exporting OVA files may be even more important than importing them. This is a great way to backup and snap up your virtual machine. Exporting OVA files also allows you to copy them on multiple machines or run VM versions simultaneously on the same computer.
Go back to the File menu and this time, click Export Appliance .
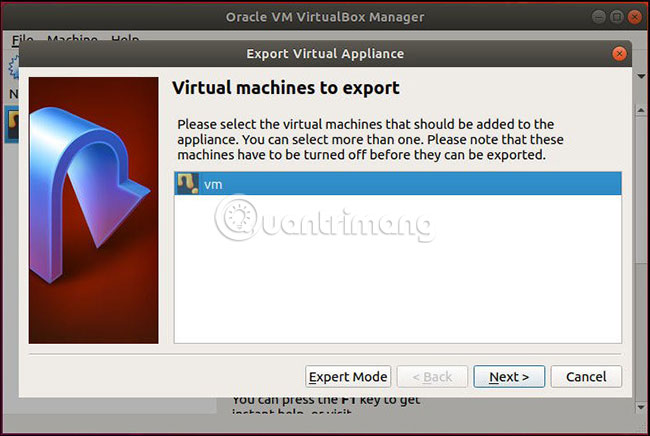
VirtualBox will open a new window with the list of available virtual machines. Select the VM you want to export.

The following window allows you to select the location for the exported OVA file. These files can be very large, so make sure you have enough free space in the destination drive to support the result file.

The next screen is the last screen in the export process. It is another table, allowing you to attach some identification and specific details to the file before packaging. In general, Name and Description are two fields that are required to fill, but you can also use more detailed product fields for the virtual machine you intend to distribute.

With everything set up, VirtualBox will start the process of moving the VM into an OVA file. Depending on the size of the VM, it may take a while to complete this, but on average it usually only takes a few minutes.
All operations are complete! Now, you have full control over your OVA files. The ability to move, copy and import virtual machines is invaluable. They bring you much more efficient VM workflows.
Hope you are succesful.