Table of Contents
Conditional formatting changes a cell’s appearance when its value meets a rule. It can highlight exceptions, show values relative to one another, or mark a status without altering the underlying data. The formatting updates when the cell value changes.
The screenshots show Excel 2019. Recent desktop versions use the same main path: Home > Conditional Formatting.
How conditional formatting works
A rule has three essential parts: the cells it applies to, the condition Excel evaluates, and the format shown when the condition is True. For example, a rule can give values below $2,000 a red fill.
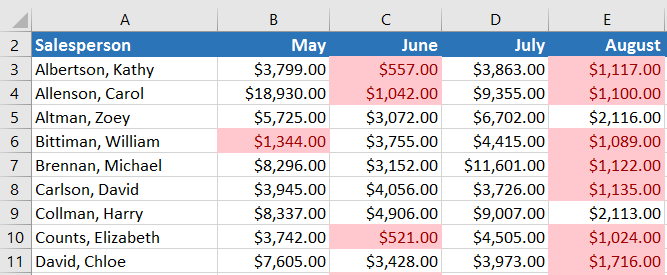
Use color as a signal, not as the only source of meaning. Keep the actual number or status visible, and choose colors with enough contrast for readers and printed copies.
Create a threshold rule
Suppose the selected cells contain monthly sales and you want to mark values that exceed $4,000.
- Select only the data cells, excluding totals and unrelated headers unless they should be evaluated.
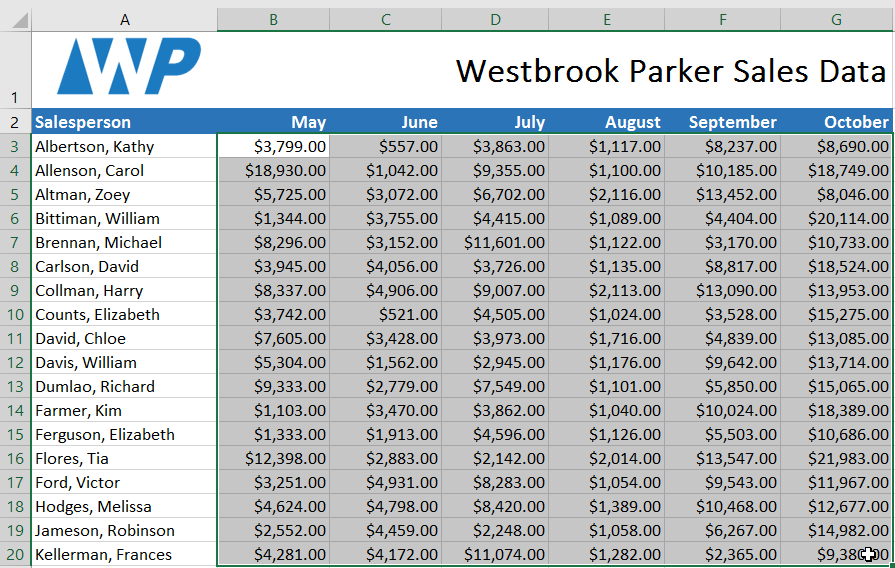
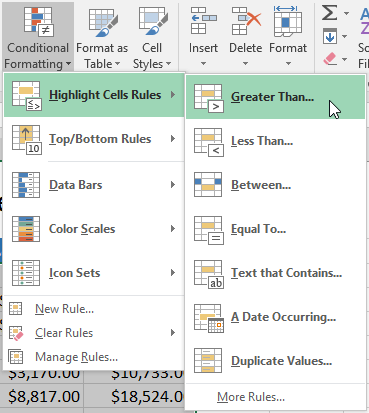
- Select Home > Conditional Formatting.
- Open Highlight Cells Rules > Greater Than.
- Enter 4000.
- Choose a preset or Custom Format, then select OK.
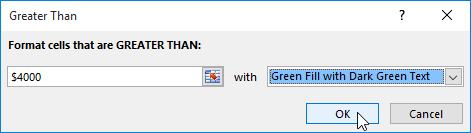
Cells above 4,000 receive the chosen formatting.
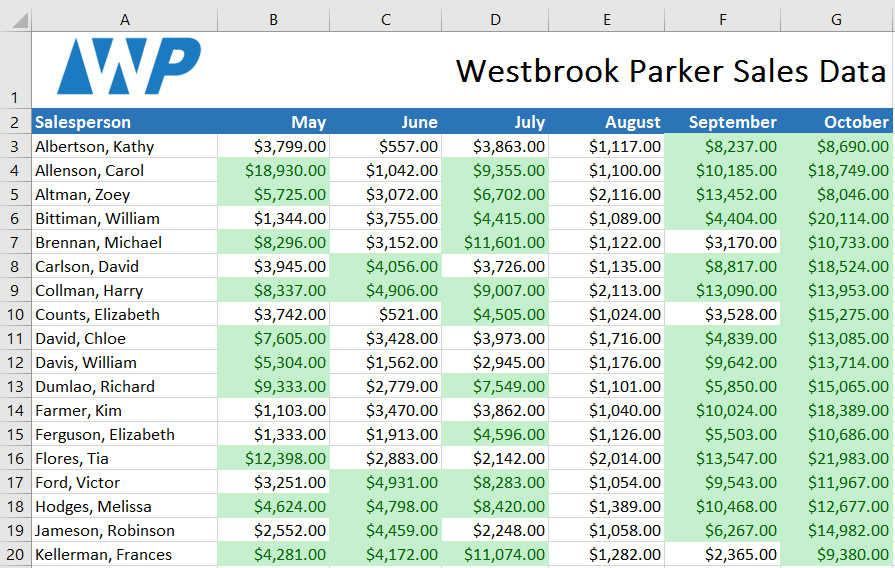
Important: Greater Than excludes a value exactly equal to 4,000. If 4,000 itself means the target was met, create a rule through New Rule > Format only cells that contain and choose greater than or equal to 4000.
Apply more than one rule
A range can have several rules—for example, green for values at or above target and red for values below target.
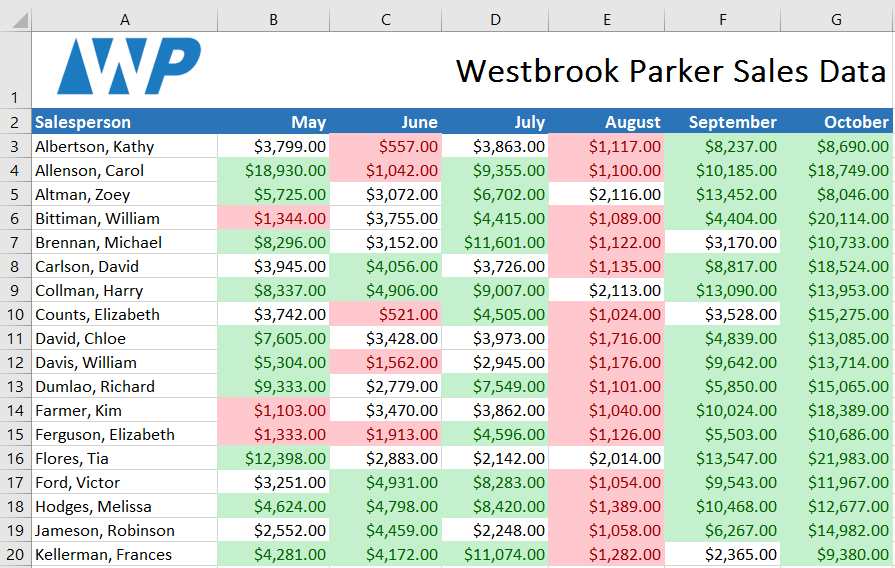
Open Conditional Formatting > Manage Rules to see their order and the Applies to range. When formats conflict, rule order matters. Move more specific rules above broader rules and use Stop If True only when later rules should not be evaluated for cells that match.
Use visual presets carefully
Data bars
Data bars draw a horizontal bar inside each cell. Longer bars represent larger values relative to the other values in the applied range.
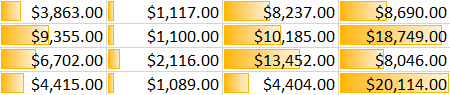
Data bars are useful for quick magnitude comparisons. Check negative-value and axis settings when the range contains both positive and negative numbers.
Color scales
A two- or three-color scale maps the values in a range between selected low, middle, and high points.
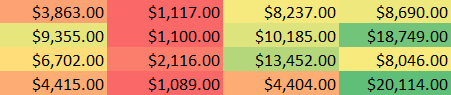
A red-yellow-green scale does not inherently mean bad-to-good; it only maps low-to-high unless you configure meaningful thresholds. Reverse the colors when lower values are better, and avoid scales when exact categories matter more than relative position.
Icon sets
Icon sets place symbols beside values according to thresholds.
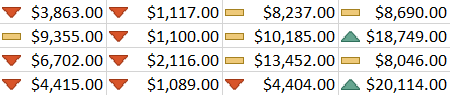
Edit the rule to verify whether thresholds are percentages, percentiles, numbers, or formulas. A default icon set may divide the selected values relatively, which is not the same as applying fixed business targets.
Apply a preset
- Select the intended range.
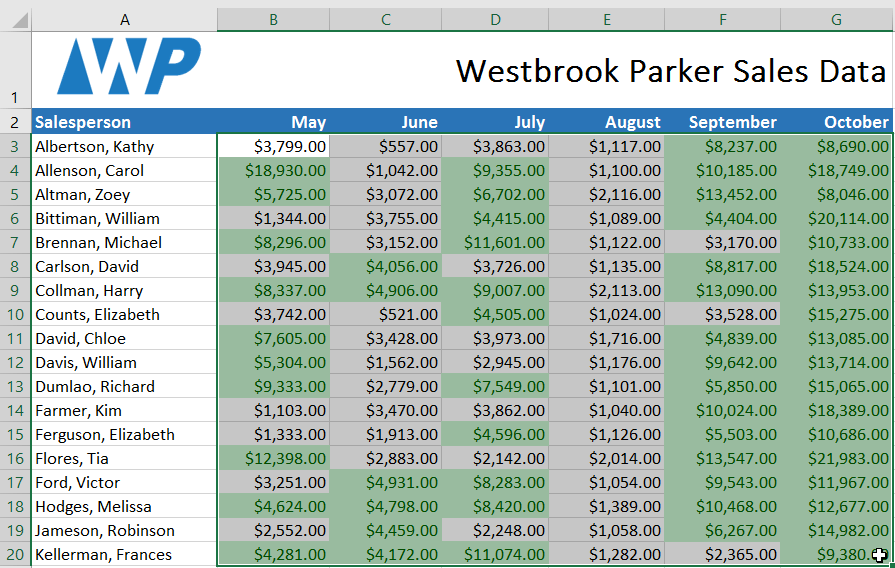
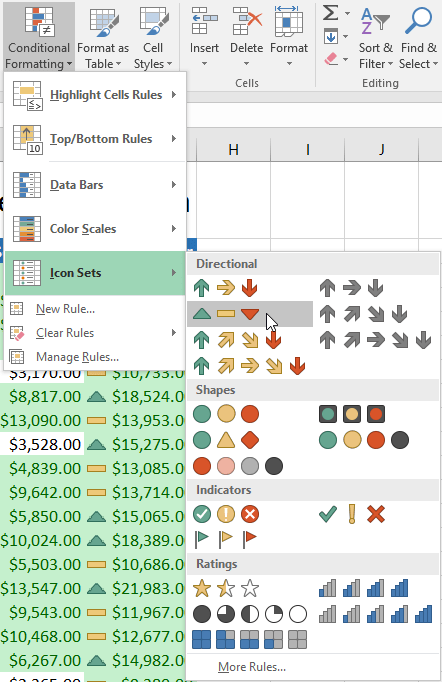
- Open Conditional Formatting, point to Data Bars, Color Scales, or Icon Sets, and preview the choices.
- Select a preset.
Review the result with minimum, maximum, blank, zero, and negative values in mind.
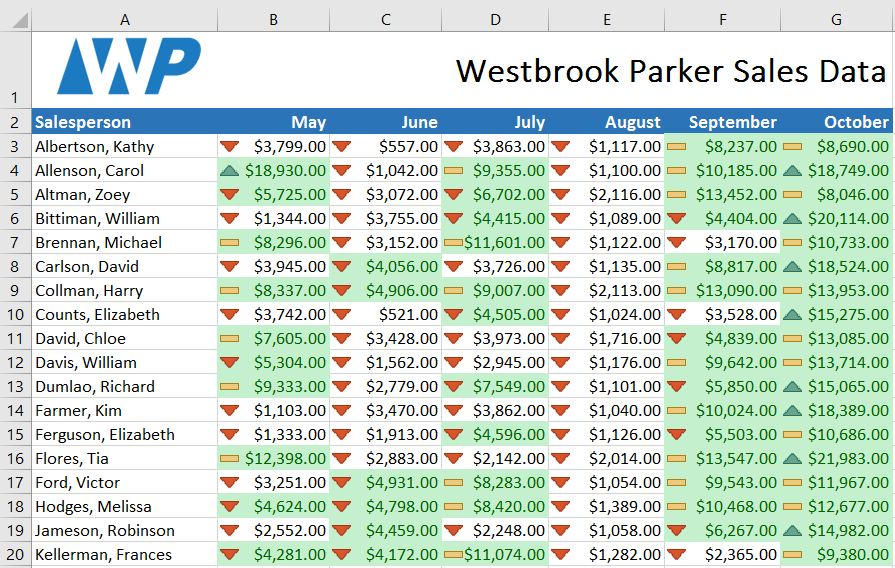
If the preset does not express the real rule, open Manage Rules, select it, and choose Edit Rule to define appropriate thresholds and formats.
Use a formula to format entire rows
A formula rule is useful when formatting depends on another cell. Suppose rows 2:100 contain tasks, column D contains Status, and you want to shade the entire row when Status is Complete:
- Select the row range to format, such as A2:F100. Make A2 the active cell.
- Choose Conditional Formatting > New Rule > Use a formula to determine which cells to format.
- Enter:
=$D2="Complete"The dollar sign fixes column D, while row 2 remains relative so each row checks its own status. Formula references are interpreted from the top-left cell in the Applies to range. A misplaced absolute or relative reference is a common reason that the wrong cells are highlighted.
Handle blanks and errors explicitly
A blank cell can behave like zero in some comparisons, and formulas that return an empty string may not be truly empty. Add a test when blanks should be ignored. For example, to highlight positive numbers in A2:A100 but not blanks:
=AND(A2<>"",A2>0)Before using a visual scale, correct error values such as #N/A when they indicate bad source data. Conditional formatting can expose problems, but it should not conceal them.
Remove or edit rules safely
To remove rules, open Conditional Formatting > Clear Rules and choose either the selected cells or the entire sheet.
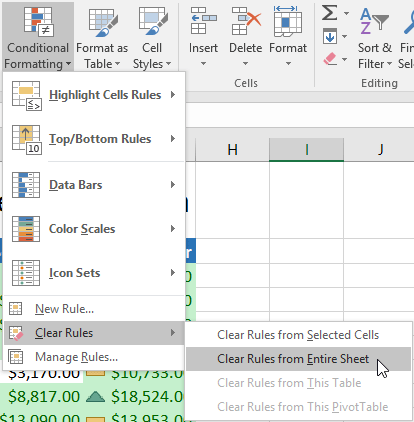
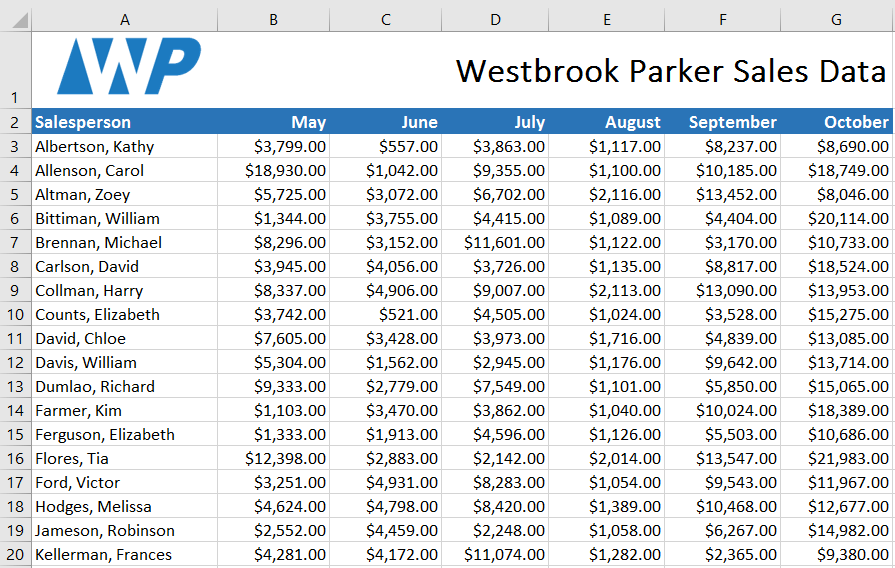
The conditional appearance is removed while normal cell values and manual formatting remain.
Use Manage Rules when you need to change one rule rather than clear every rule.
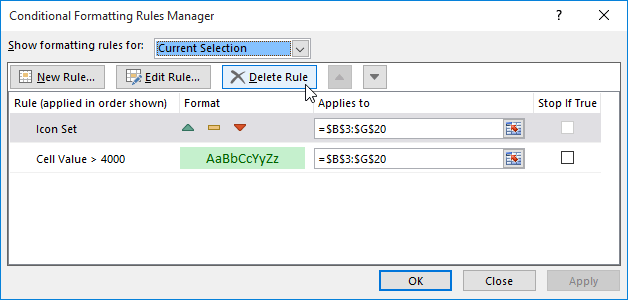
In the Rules Manager:
- set Show formatting rules for to the current selection or worksheet as needed;
- confirm that Applies to covers the intended cells and does not contain fragmented duplicates;
- edit thresholds, formula references, and formats;
- reorder conflicting rules; and
- use Apply to preview changes before closing.
Keep a worksheet readable
- Use one visual language consistently—for example, red only for exceptions.
- Prefer fixed thresholds when the organization has fixed targets.
- Use relative scales only when comparing values within that particular range is meaningful.
- Avoid stacking fills, icons, and data bars unless each answers a distinct question.
- Test copied rules because formula references and Applies to ranges may shift.
For broader cleanup before adding visual rules, see five ways to improve messy Excel data. If the goal is to summarize large records rather than style every row, use a PivotTable.
Microsoft’s conditional-formatting documentation covers built-in rules, formula references, copying formats, and rule order.
Related Articles
 How to Use Conditional Formatting to Conditional Formatting in Excel7 minutes read
 How to Use Conditional Formatting in Microsoft Excel 20169 minutes read
 Ms Excel - Lesson 13: Use Conditional Formatting in Excel2 minutes read
 MS Excel 2003 - Lesson 13: Using Conditional Formatting in Excel2 minutes read
 How to Use Conditional Formatting in Numbers on Mac8 minutes read
 How to Create Progress Bar Using Conditional Formatting in Excel7 minutes read
Reader Comments 0
Sign in with email or Google to join the discussion.