Customize folders in Exchange Server 2007
In this article we will introduce you to individual pages and comments that are intuitive on the user's directories to improve the user experience.
Network Management - In this article we will introduce you to individual pages and comments that are intuitive on user folders to improve the user experience.
Introduce
Exchange Server 2007 allows administrators to manage the default directories and custom folders used by the Message Records Management (MRM) feature.
In this article, we will validate how an Exchange administrator can improve user experience with some of the features available in Managed Folders. By using such features, we can help users to use new resources properly.
Configuring personal display page for Managed Folders
First, choose a server with IIS installed. We will then create a virtual directory on this server to configure a page to instruct users on how to use Managed Folders. This page will be accessed when a user clicks on the 'Managed folder' item in their Outlook 2007 client. You can use the current CAS server to configure this webpage or another IIS in your environment.
Now that we have logged in to the selected server, follow the steps below:
- Open IIS Manager.
- Open the Web Site.
- Right-click on Default Web Site and click New to go to Virtual Directory.
- On the first page of Virtual Directory wizard, click Next
- Virtual Directory Alias. Type ManagedFolderHP in the Alias section and then click Next. (figure 1)
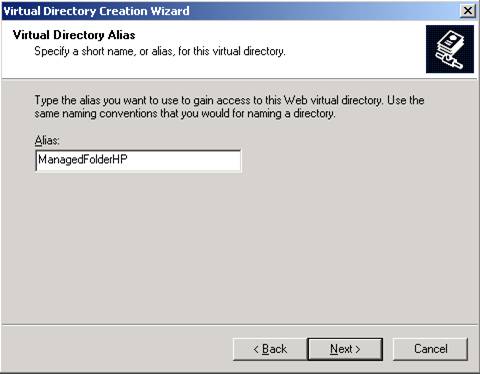
Figure 01
- On the Web Site Content Directory page. Select the internal path, where all pages associated with Managed Folder HP virtual folders will be stored and click Next.
- On the Virtual Directory Access Permissions page. You can give the default settings, then click Next.
- On the last page, click Finish.
Note :
If you use IIS / CAS Server in NLB, make sure you copy and upgrade the content of the Managed Folder page in both servers and configure Exchange that we will see in the near future using the NLB name.
Create a set of pages that demonstrate how to use Managed Folders and instruct users to use this resource step by step. According to that, you can use multiple pages and create a link between them (using images and arrow marks). Before checking the page, let's validate the following points:
- Validate whether you can access using http or https. If the website is configured to require SSL, you can only access it using SSL unless you check that option.
- Make sure that the properties of the virtual directory (Virtual Directory) on the Documents tab of the main page you created are listed.
- Please access from any client to the page you just created, if you can access it then it is now possible to start configuring Exchange Server 2007.
The next step, open Exchange Management Shell, set up the newly created page to configure the ManagedFolderHomePage attribute, as shown in Figure 2. You can use the following command to execute:
Set-OrganizationConfig –ManagedFolderHomePage: http://// ManagedFolderHP
You can also run the Get-OrganizationConfig command later to validate the current parameter.
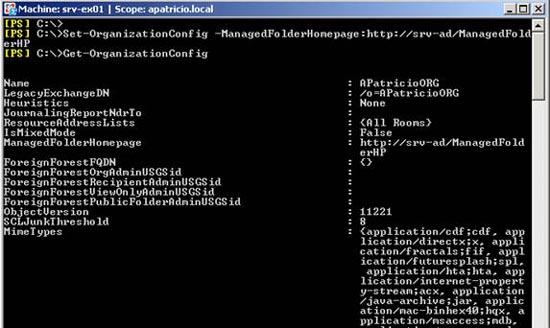
Figure 02
Exchange Server configuration and website configuration have been done, now we have to test the solution on the client side. To test it, just click on Managed Folders in Mailbox, the right part of the page we have configured, as shown in Figure 3.
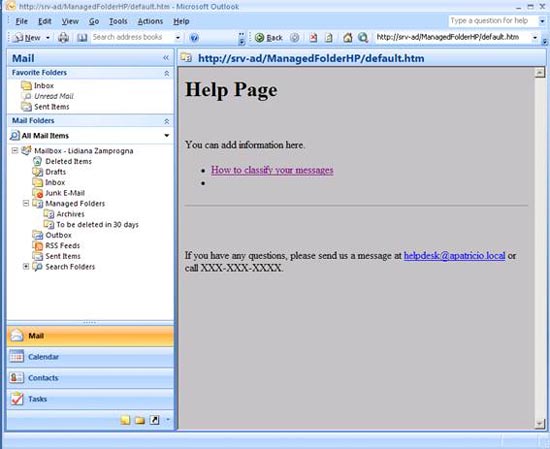
Figure 03
If you have multiple clients using Outlook Anywhere, you need to consider using a public URL instead of an internal URL and should publish it on the Firewall of expanding access. Besides, the configured URL must be accessible from both locations: internal and external. In some cases, you must solve the DNS problem.
Manage directory descriptions
Using Exchange Server 2007, we can configure comments for Managed Default Folders (like Inbox, Calendar, Outbox .) and Managed Custom Folders (directories are created by Administrator and they are in Managed Folders in Outlook client). . A comment can be viewed in OWA, Outlook 2007 and Outlook 2003 SP2 or a more powerful version (comment in Outlook 2003 or higher, comments do not appear as in new versions, users must click View and Policy to view comments).
To manage comments in the directory, you can use Exchange Management Console or Exchange Management Shell, we can follow the steps below to manage comments:
- Open the Exchange Management Console
- Open Organization Configuration
- Click Mailbox.
- Clicking Managed Default Folders tab or Managed Custom Folders tab. In this article we will add a comment in the Inbox folder, then click on the Managed Default Folders tab.
- Double click on Inbox.
- Inbox Properties appear. We can enter a comment to display to all users and have a check box enable or disable the user to minimize this comment. (Figure 4).
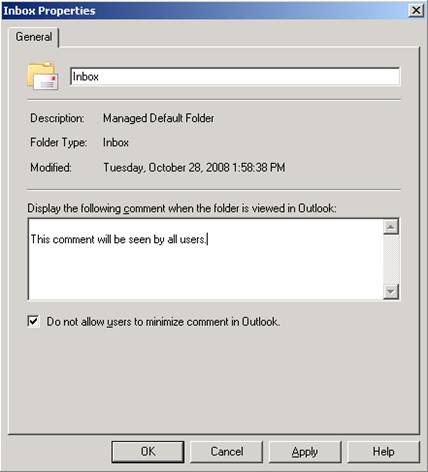
Figure 04
We can do the same with Exchange Management Shell with the following syntax:
Set-ManagedFolder -Comment: -MustDisplayCommentEnabled: <$ true / $ false>
We can take advantage of the Exchange Management Shell and use the path to access extended information that cannot be obtained from the Exchange Management Console, such as:
- Get all the information about Managed Folder object
Get-ManagedFolder | FL - Get all Managed Folders that we have Comment related
Get-ManagedFolder | where {$ _. Comment –ne ''}} - Get all Managed Folders with Comments
Get-ManagedFolder | where {$ _. MustDisplayCommentEnabled –eq 1}
Now we can go back to the Outlook Client and click on the Inbox item then we will have a comment created before displaying the content on the right, as shown in Figure 5.
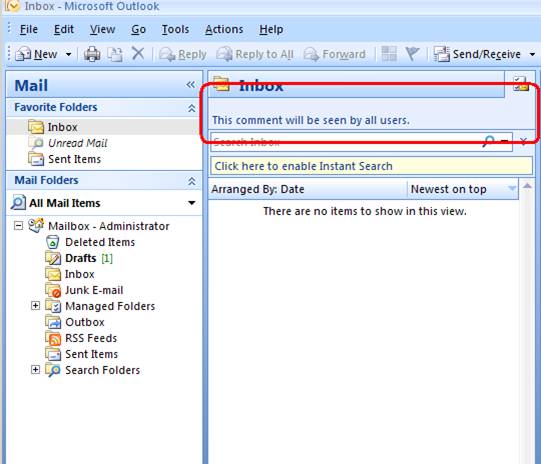
Figure 05
The comment configuration is also displayed in Outlook Web Access session, see Figure 6.

Figure 06
If you have done all of the above and the Folder Comment is still not displayed, please use the steps below to troubleshoot the process:
Validating Managed Default Folders and Managed Custom Folders
- Validate which directories you have configured to use comments. In this article we will troubleshoot the Inbox folder .
Validate policies
- Open the Exchange Management Console
- Open Organization Configuration
- Click Mailbox
- Click the Managed Folder Mailbox Policies tab
- Double-click on the desired policy and make sure that the directory we changed is listed, as shown in Figure 7.
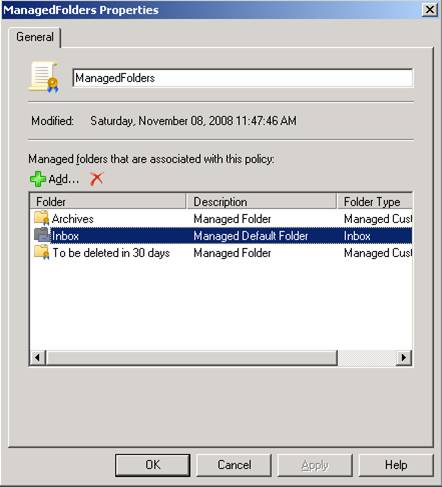
Figure 07
Validate user configuration
- Open the Exchange Management Console
- Open Recipient Configuration
- Double click on the desired mailbox
- Click the Mailbox Settings tab
- Select Message Records Management
- Click the Properties button
- Make sure that Managed folder mailbox policy is checked and you will use the same policy we saw in the previous step (Figure 8).
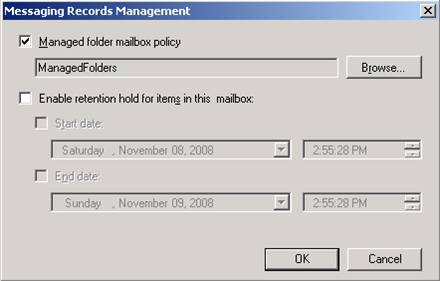
Figure 08
Perform upgrade
- You can set the server level or user level, the following two commands will do that:
Start-ManagedFolderAssistant –Mailbox
Start-ManagedFolderAssistant –Identity - Finally, you can return to the client and the directory comment will be there.
Conclude
In this article, we have seen how to manage Exchange Server 2007 to display information to users with directory comments. We also see how to use the personal page and use it with the Managed Folder features.
Was this article helpful?
Your feedback helps us improve.
Related Articles
 Removing the first Exchange 2003 server (Part I)12 minutes read
 Introducing Exchange Server 2019, how to install Exchange Server 201916 minutes read
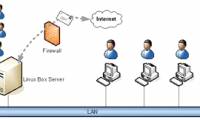 Transfer from Linux Mail Server to Exchange Server 2007 (Part 1)10 minutes read
 Discover EMC in Exchange Server 2010 (Part 2)4 minutes read
 Removing the first Exchange 2003 server (Part II)10 minutes read
 Switch from Exchange 2000/2003 to Exchange Server 2007 (part 1)14 minutes read
Reader Comments 0
Sign in with email or Google to join the discussion.