Table of Contents
You can add a visible date and time to many photos at once by using a batch editor that reads each image's capture date from its metadata. BatchPhoto is one Windows and macOS option: it can take the EXIF or IPTC date, format it, and place it consistently across a group of images.
First, make a backup and export the stamped copies to a new folder. A visible timestamp changes the image pixels, and a mistaken camera clock will produce a mistaken stamp.
Before you stamp the photos
- Copy the original files to a protected backup location.
- Check the date on several images in a photo viewer or metadata inspector.
- Correct a known time-zone or camera-clock error before processing the full set.
- Decide whether the output needs the date only or both date and time.
- Choose an output folder that is different from the source folder.
A timestamp is useful for organizing photos, project logs, inspection records, or a retro camera look. It is not proof that an image is authentic. Visible text and metadata can both be edited, so legal, insurance, or evidentiary use may require original files, a documented chain of custody, and advice from the relevant professional.
How BatchPhoto obtains the date
BatchPhoto can read the original capture date stored in supported photos' EXIF or IPTC metadata. If that information is absent, incorrect, or stripped by another app, the program may not have the true capture time. According to the developer's support guidance, it may fall back to a file date, which can also be corrected in the Date filter.
The following steps use BatchPhoto's three-part workflow: Add Photos, Edit Photos, and Setup.
Step 1: Add the photos
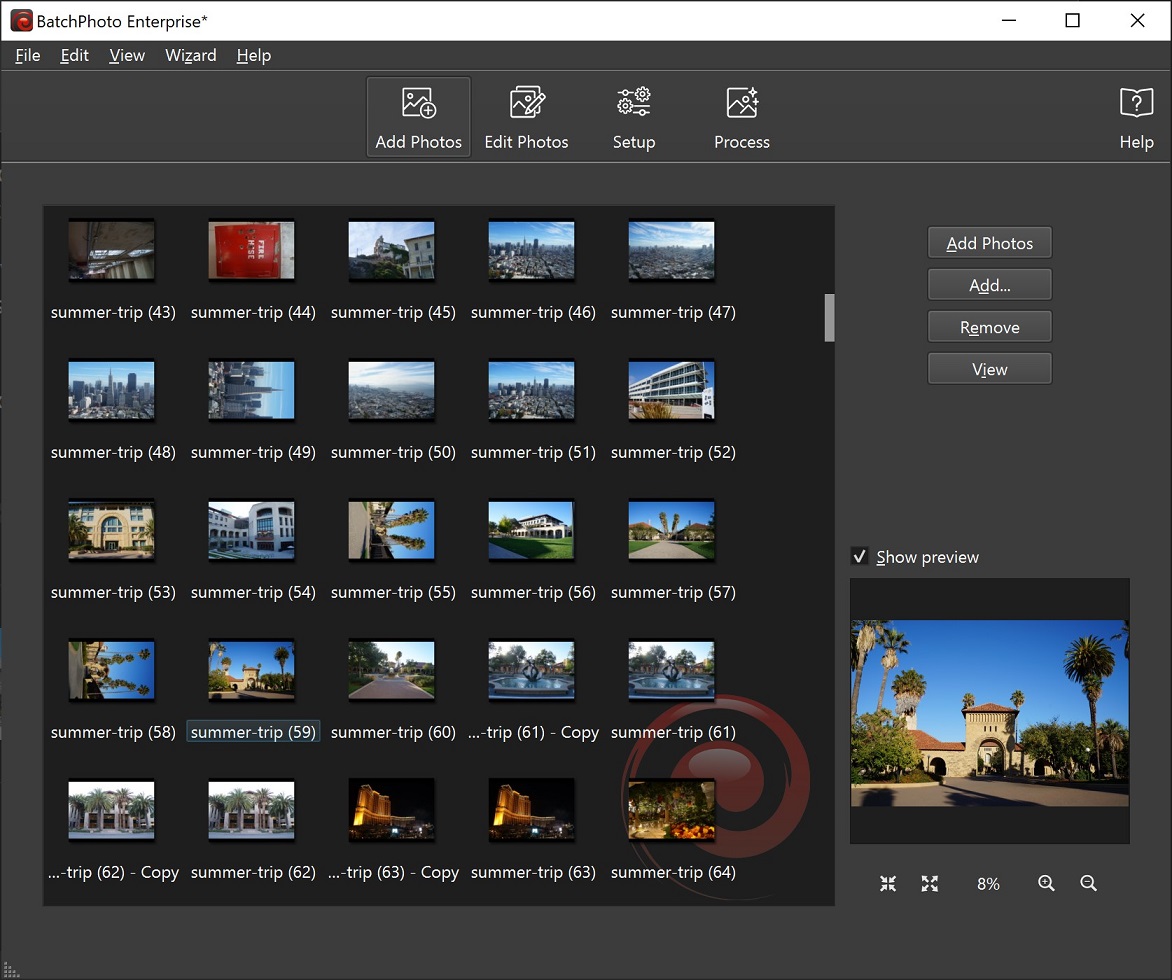
Open BatchPhoto and add the images you want to process. You can drag files into the window, choose Add Photos for individual files, or use the folder option to import a whole folder. Review the list before continuing so unrelated images are not stamped.
Step 2: Add and customize the date stamp
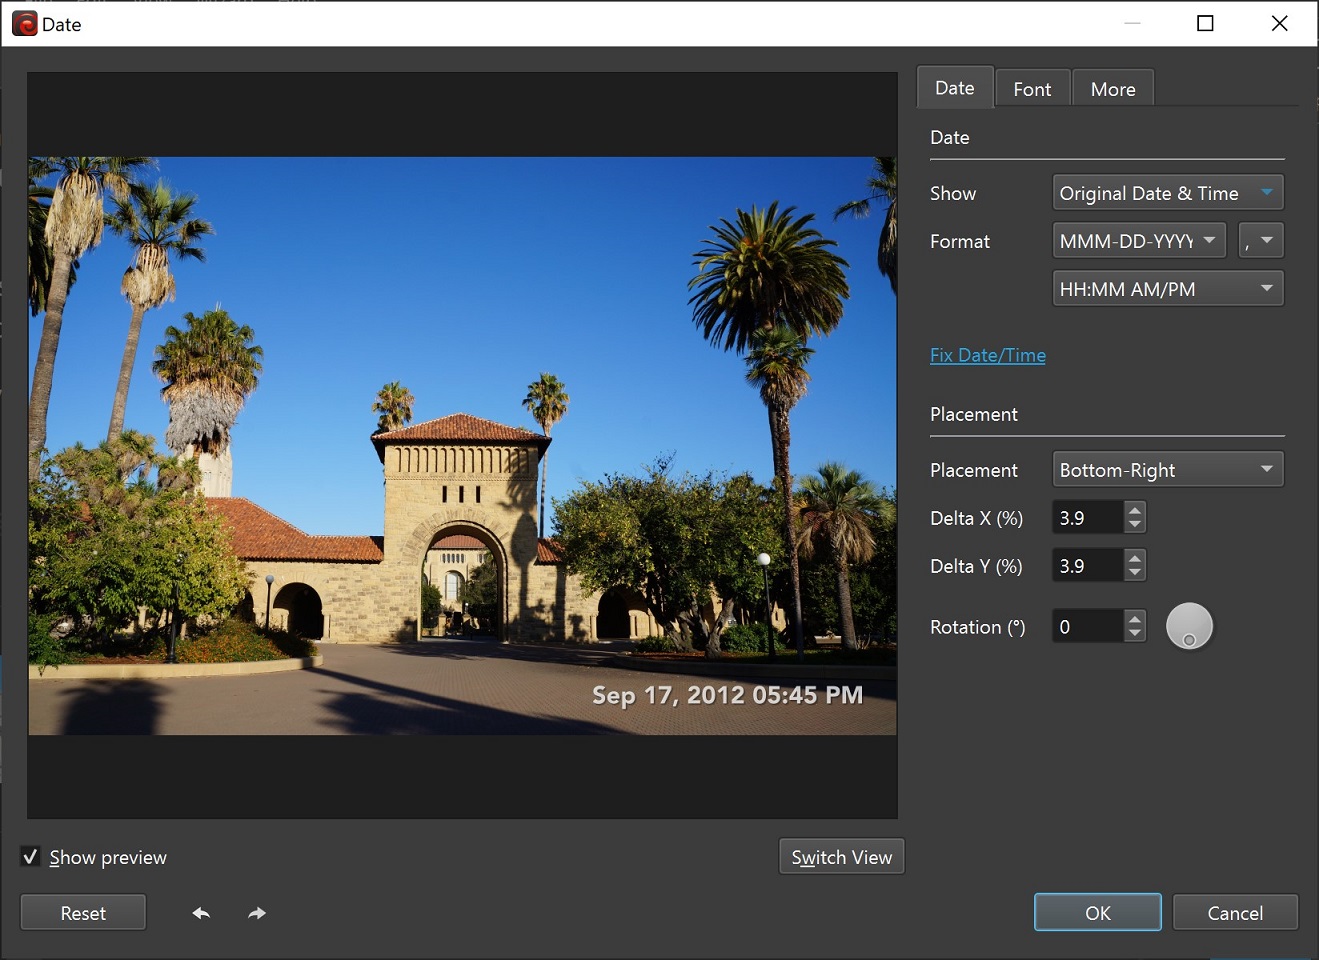
Go to Add Filter > Annotate > Date. Choose which metadata date to display and set the format. A clear, sortable format such as 2026-09-04 14:30 avoids ambiguity between day-first and month-first dates.
Adjust the position, font, size, color, and transparency. Stroke, shadow, or a background box can keep light text readable over a bright image. Place the stamp inside the edge so it is not cut off by printing or social-media cropping.
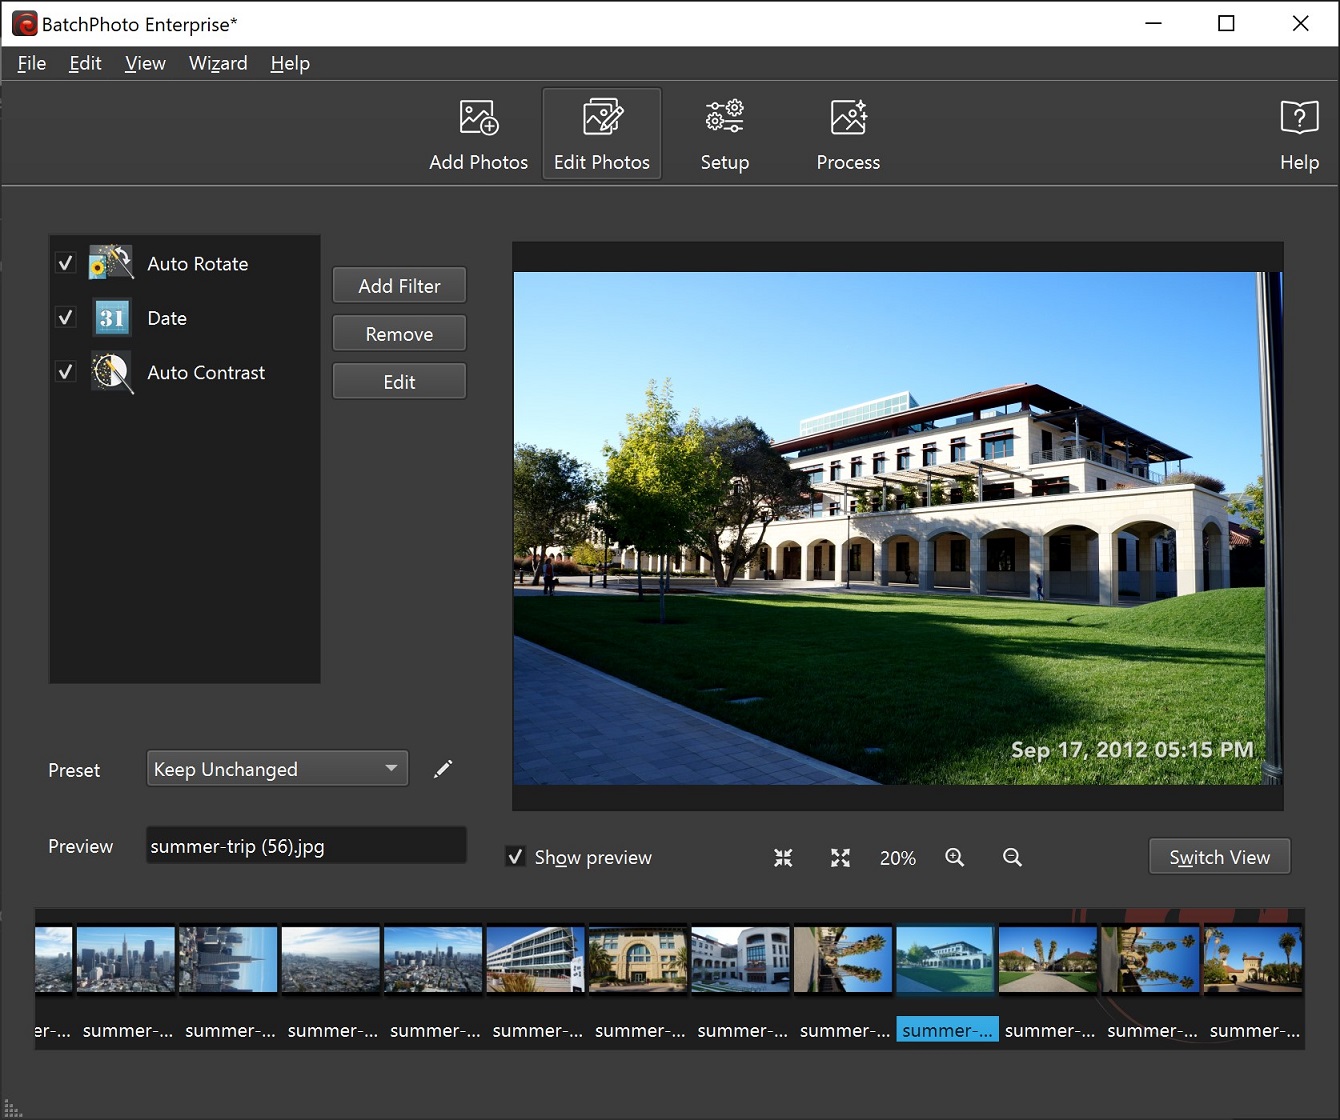
Preview both landscape and portrait images. If portrait photos appear sideways or the stamp lands incorrectly, add the Auto Rotate filter before the Date filter and verify the orientation on sample files.
Step 3: Choose the output settings
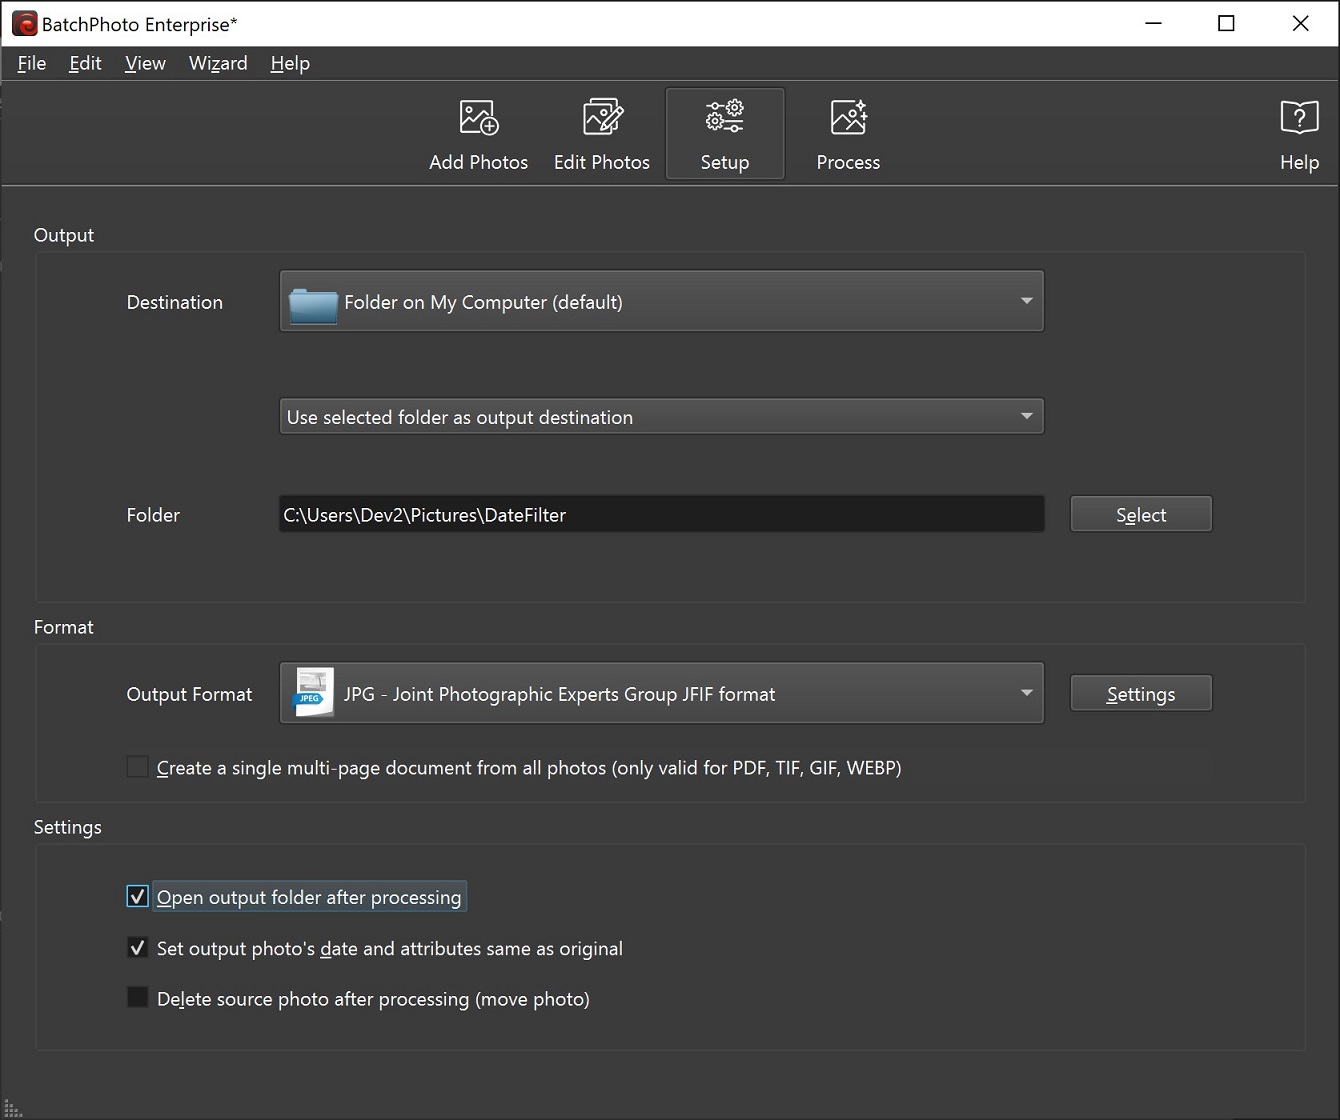
In Setup, choose a new destination folder and the required output format. Keep filenames recognizable, or add a suffix such as -stamped to distinguish the processed copy.
If you save as JPEG, choose an appropriate quality setting because JPEG is lossy and recompresses the image. Use PNG or TIFF when a lossless output is required and the larger file size is acceptable. Then select Process.
Check a sample before processing the whole library
Process three to five representative images first. Confirm:
- the displayed date and time match the known capture time;
- 12-hour or 24-hour formatting is correct;
- the stamp is readable on both light and dark backgrounds;
- portrait orientation is correct;
- resolution and compression meet the intended use;
- the originals remain unchanged in their source folder.
Only after the sample passes should you run the complete batch. The developer's date-stamping page lists the current supported controls and trial option.
If the timestamp is wrong
The most common cause is an incorrect camera clock. Check whether the error is a fixed offset, a wrong time zone, or a daylight-saving difference. BatchPhoto's Date filter includes a correction option, but test it carefully: applying the same offset to photos from different cameras or trips may create new errors.
If a file has no usable capture metadata, enter a manual date only when you know it from another reliable record. Do not silently substitute the file creation date, because copying or downloading an image can change that value.
Protect privacy when sharing stamped photos
Adding visible text does not remove hidden metadata. A photo may still contain camera details, capture time, and GPS coordinates. Review and remove sensitive metadata from the share copy when appropriate, while retaining an untouched original for your records.
Batch processing makes timestamp placement consistent and saves repetitive editing, but accuracy comes from the source metadata and your review. Back up the originals, correct the clock carefully, test a small batch, and inspect the exported files before distributing them.
Related Articles
 Date and Time in Cplusplus: Date and Time in C ++5 minutes read
 How to Change the Date and Time Format on Windows, Change the Slash to a Dot10 minutes read
 How to Change Date and Time on Windows 114 minutes read
 How to Change Time, Date and Month in Windows 10?5 minutes read
 How to Change Date and Time Manually in macOS4 minutes read
 How to Send Multiple Photos at Once on Whatsapp3 minutes read
Reader Comments 0
Sign in with email or Google to join the discussion.