9 important things to do after installing i3wm
i3wm, or i3 Window Manager, is a popular choice for both beginners and seasoned users alike.
If you appreciate minimalism and are looking to speed up your workflow, you should definitely switch to a title window manager. With the right setup and tweaks, a window manager can exponentially increase your productivity while adding a touch of aesthetics to your desktop.
i3wm, or i3 Window Manager, is a popular choice for both beginners and seasoned users alike. It's lightweight, highly customizable, powerful, and perfectly suited for anyone new to venturing into the Linux world.
This article outlines all the necessary tasks that you should perform after installing i3wm to start the transition from the traditional desktop environment.
1. Specify key for Super Key
When you boot into an i3 session for the first time, you will be prompted to set up the default keybinding for the Super function. It's an important keybinding that you will use forever inside i3 or any window manager.
By default, i3wm gives you the option to bind the Win key or Alt key to Super. That's what people usually do, however, you are free to choose any key you like.
2. Set wallpaper with Nitrogen
If you install i3wm from scratch, chances are it will greet you with a blank screen. Although the first impression is not very appealing, don't worry, as it only takes a few commands to change the wallpaper permanently.
To change i3wm wallpaper you need to install wallpaper manager. Nitrogen is a popular wallpaper manager that allows you to manage and set wallpapers.
Install Nitrogen on the Linux desktop using the distribution's package manager:
On Ubuntu/Debian derivatives:
sudo apt install nitrogen
On Arch Linux:
sudo pacman -S nitrogen
On RHEL/CentOS/Fedora systems:
sudo dnf install nitrogen
To set a wallpaper, fire up Nitrogen and navigate to the folder where the wallpaper is stored. Nitrogen will automatically load the images for you to choose from.
Also, add this line to the i3wm configuration file to automatically execute Nitrogen and restore the wallpaper every time you log out or refresh the i3wm:
exec always nitrogen --restore
3. Install and set up Picom Compositor
i3wm, by default, does not come with a compositor. So if you're looking to add blur, transparency, or any of those fancy visual effects as seen in the r/unixporn subreddit, you'll need to install a compositor separately.
Compton used to be the most suitable compositor for i3wm users. But recently piccom, a subsidiary of Compton, took over. Install the picom compositor, set it to autostart like you did with Nitrogen.
Using a compositor will also fix any tearing or other problems that you may experience in i3wm.
Install Picom Compositor
Installing piccom compositor is pretty straightforward, and the process is exactly the same as installing any package on Linux. To install piccom, fire up the terminal and run the following commands depending on the distro you are running:
On Arch-based systems:
sudo pacman -S piccom
On Debian/Ubuntu derivatives:
sudo apt install -y piccom
On RHEL/Fedora/CentOS systems:
sudo dnf install piccom
Set piccom to automatically execute
To automatically run picom as soon as you log into your i3 window manager session, add a line to the i3wm configuration file to tell i3 to execute picom at session start.
Type this line anywhere in the configuration file and then reload i3wm by pressing Super + Shift + R keys:
exec piccom
4. Change Terminal Emulator
The initial i3wm configuration file will point to i3-sensible-terminal as the default terminal. While there's no harm in using what's available, you're actually missing out on better options that offer extensive features and customization. Alacritty, Terminator, Kitty are a few names you can consider.
If you're not sure which terminal to choose, learn more about the best Linux terminal emulators.
To change your default terminal emulator in i3wm, edit this line in the configuration file and replace "i3-sensible-terminal" with your preferred terminal. For example, to set Alacritty as the default terminal, you could type:
bindsym $mod+Return exec alacritty
5. Install dmenu
You may have noticed that in contrast to desktop environments like GNOME or XFCE, pressing the Super key does not bring up the application menu.
To run an application in i3wm, you must launch it through the terminal or using the application launcher. dmenu is a solid choice for something like that and is often pre-installed with distributions that offer the i3wm variant. It's fast, lightweight, and easy to customize.
You can install dmenu to your Linux system through the distribution's package manager. Open a terminal and run the following commands depending on your distro:
On Arch Linux:
sudo pacman -S dmenu
On a Debian/Ubuntu based system:
sudo apt install -y dmenu
On RHEL/Fedora/CentOS:
sudo dnf install dmenu
Once installed, fire up the dmenu with Win + D and search for the application you want to launch.
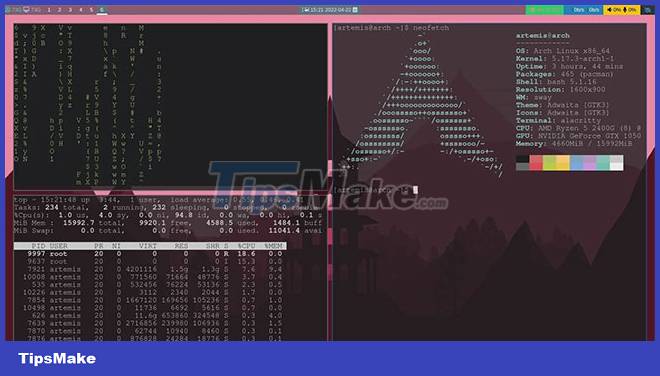
6. Status Bar Settings
The status bar is an optional element located at the bottom or top of the screen. It monitors and displays system information such as CPU usage, RAM usage, Internet speed, etc.
You can configure it to display metrics about any hardware or software component in the system. If you are conscious about your resources and want to keep a close eye on performance, you should definitely install the status bar.
Popular choices include i3status bar, Waybar, and Polybar.
7. Organize your workspace
By default, workspaces are sorted with numbers from 1 to 10. You can switch between workspaces using Super + X where "X" is any number from 1 to 0. although this is fine, the optimal approach would be to replace the numbers with the names that correspond to the contents of each workspace.
For example, replace 1, 2, 3 with Web, Code, Media, etc. To do this, drill down into the i3wm configuration file and enter or edit the following lines:
set $ws1 "1" set $ws2 "2" set $ws3 "3" set $ws4 "4"
And:
bindsym $mod+1 $ws1 bindsym $mod+2 $ws2 bindsym $mod+3 $ws3 bindsym $mod+4 $ws4
. Fort:
set $term "1: term" set $web "2: web" set $file_manager "3: files"
And:
bindsym $mod+1 $term bindsym $mod+2 $web bindsym $mod+3 $file_manager
Edit the rest to your liking and refresh the i3wm with Super + Shift + R. The changes will take effect.
8. Personalize the keybinding
Navigating on the window manager is very keyboard-focused. To get the most out of the window manager, you need to familiarize yourself with keybinding, at least for the basic functions.
If the default master-links don't work for you, please edit the i3wm configuration file and set your own custom master-links. To learn more about keybindings and how to customize them, refer to the official i3wm documentation at:
https://i3wm.org/docs/userguide.html#keybindings
9. Backup dotfiles
The most important task that beginners often overlook is backing up dotfiles. Dotfiles is the Linux term for configuration files.
It is so named because all configuration files are usually stored in hidden folders and in Linux all hidden folder names start with a dot. Hence, they are named "dot" -files.
If you are new to i3wm or any window manager, you will inevitably encounter bugs and glitches while testing.
To ensure that you can quickly restore your i3wm to its original state every time it fails, you need to maintain a backup of its configuration files.
An ideal way to back up dotfiles is to upload them to a GitHub repository. If unsure, learn more about Git and how to use it.
i3wm is rated as a reliable window manager, but in the world of open source software, there are always alternatives.
You can try out several options to find the one that works best for you!
- 15 important things to keep in mind when you are young
- 5 things to do when installing Ubuntu on PC
- Important notes before updating to Windows 10 October 2018 v1809
- Things to know before installing AI browser
- 5 important things to remember after parting
- 5 things you can do with Fire TV without ads.
- 6 Important Things You Should Know When Using WhatsApp
- 6 Important Steps to Take After a 'Clean' Install of Windows 11
- How to create a media server with VLC to stream music and videos
- How to install Safari on Linux
- 6 best DIY security camera software for Linux
- 8 best open source NAS operating systems for Linux
- How to fix Ubuntu freezing in VirtualBox
- 7 lightweight Linux distros, ideal for PCs with Intel Atom processors
- How to enable / disable automatic login in Debian 10
- Disabling unnecessary services for faster boot Linux
- Fix USB not working in Linux
- Use Guestfish to reset the forgotten root password for the virtual machine in qcow2 format on KVM


-
 How to install SPSS on a MacBook: A step-by-step guide.
-
How to install DriverEasy and quickly update your computer drivers.
-
A simple and easy guide to downloading and installing AutoCAD 2020.
-
Instructions on how to download and install AutoCAD 2021 for free on your computer.
-
How to install and use 3uTools to connect your iPhone to your computer or laptop.
-
5 New Linux Apps Users Should Install Right From the Start
 How to install SPSS on a MacBook: A step-by-step guide.
 How to install DriverEasy and quickly update your computer drivers.
 A simple and easy guide to downloading and installing AutoCAD 2020.
 Instructions on how to download and install AutoCAD 2021 for free on your computer.
 How to install and use 3uTools to connect your iPhone to your computer or laptop.
 5 New Linux Apps Users Should Install Right From the Start