Table of Contents
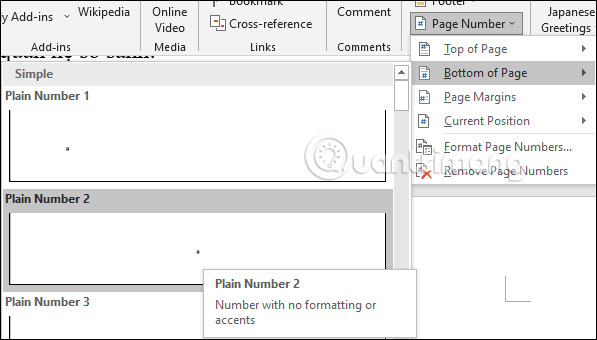
To add page numbers in Microsoft Word, go to Insert > Page Number, choose the top, bottom, margin, or current cursor position, and select a style. For anything more complex—such as Roman numerals in the introduction and Arabic numbers in the body—divide the document with section breaks, turn off Link to Previous, and format each section separately.
The steps below apply to current desktop versions of Word, including Microsoft 365, Word 2024, 2021, 2019, and 2016. Older versions use the Page Layout label where newer versions say Layout.
1. Add page numbers to the whole document
- Open the Insert tab and select Page Number.
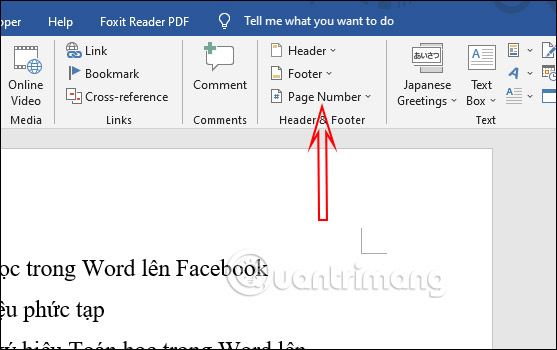
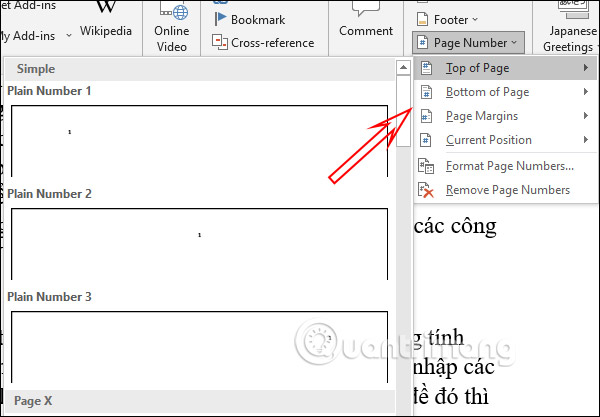
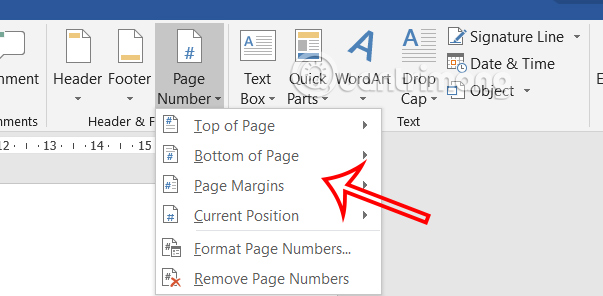
- Choose Top of Page, Bottom of Page, Page Margins, or Current Position.
- Select a left-, center-, or right-aligned design.
- Select Close Header and Footer, press Esc, or double-click the document body.
If the document already has a custom header or footer, place the cursor where the number belongs and choose Page Number > Current Position. This reduces the chance of replacing the existing layout.
2. Hide the page number on the first page
Use this for a title page when the second page should still display its actual document number, usually 2.
- Add page numbers normally through Insert > Page Number.
- Double-click the header or footer to open the Header & Footer tab.
- Enable Different First Page.
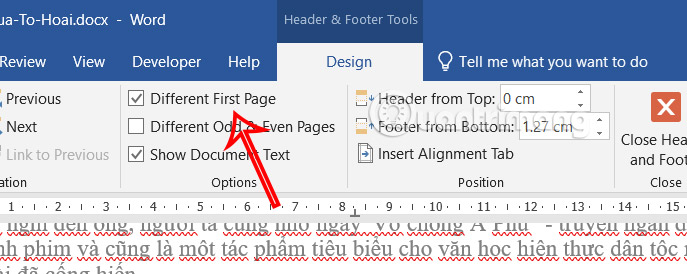
The page number disappears from the first page while the following pages remain numbered.
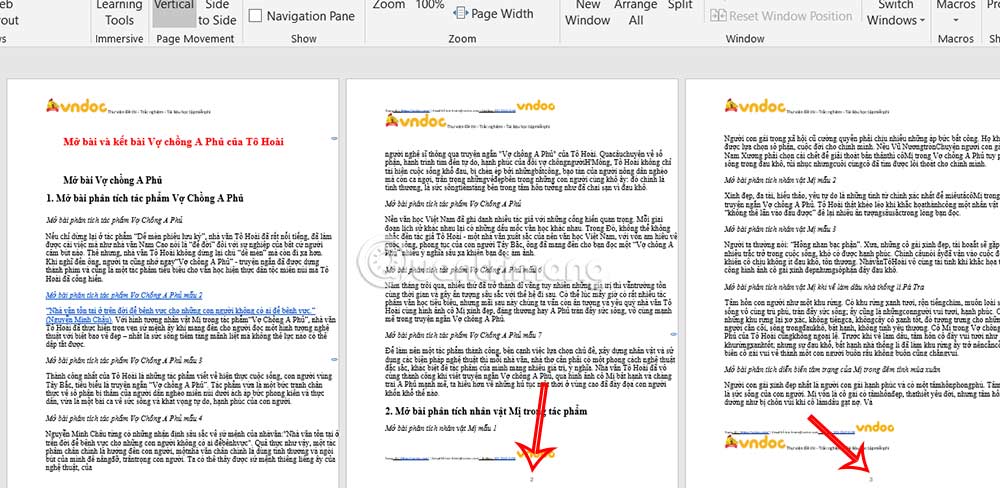
If you want the second physical page to show 1, open Page Number > Format Page Numbers and set Start at to 0. For two or more unnumbered front-matter pages, use the section method in the next section instead.
3. Start page numbering on a later page
This is the reliable method when a cover, contents, acknowledgments, or other front matter should not share the body's page numbers.
- Place the cursor immediately before the first page that should display the new numbering.
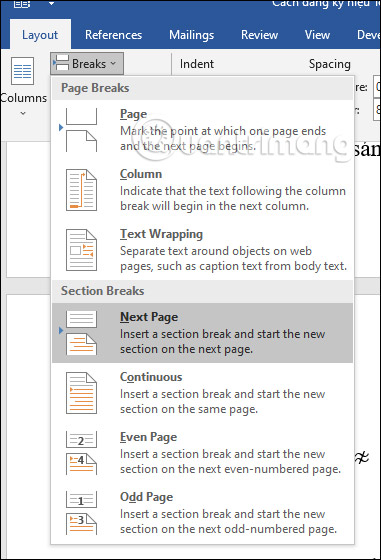
- Choose Layout > Breaks > Next Page under Section Breaks.
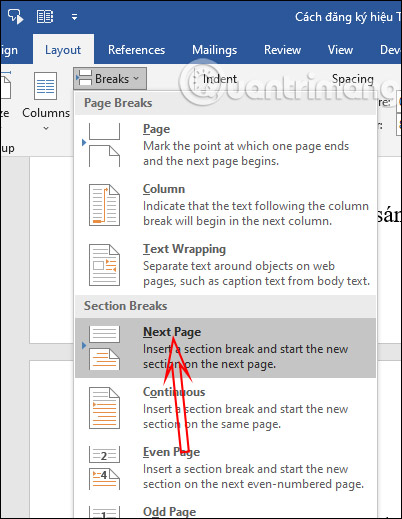
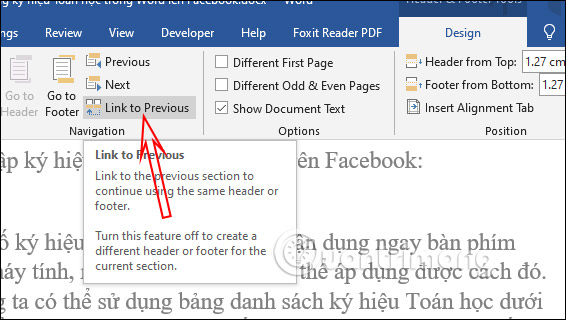
- Double-click the header or footer in the new section. On the Header & Footer tab, turn off Link to Previous. Headers and footers are linked by default, so skipping this step can change both sections.
- In the new section, select Page Number, choose a position, then open Page Number > Format Page Numbers.
- Under Page numbering, select Start at and enter 1 or another required value.
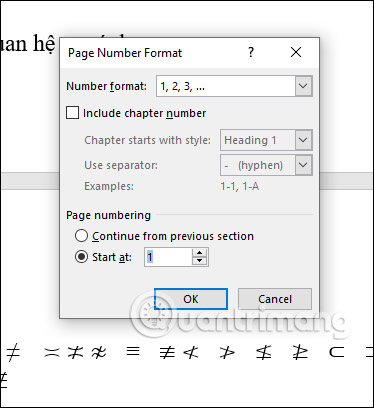
If the earlier section already contains page numbers, delete its number only after confirming that Link to Previous is off. Microsoft's section-numbering instructions describe the same structure.
4. Start numbering at any chosen number
Use this when the Word file is one part of a larger printed document and needs to begin at page 25, 101, or another value.
- Select Insert > Page Number > Format Page Numbers.
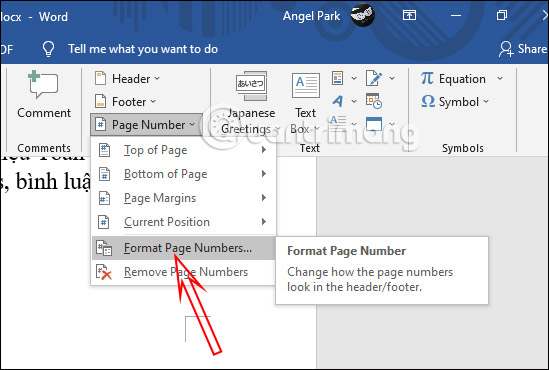
- Choose the number format, select Start at, and enter the required starting number.
- Add or retain the page-number position, then close the header or footer.
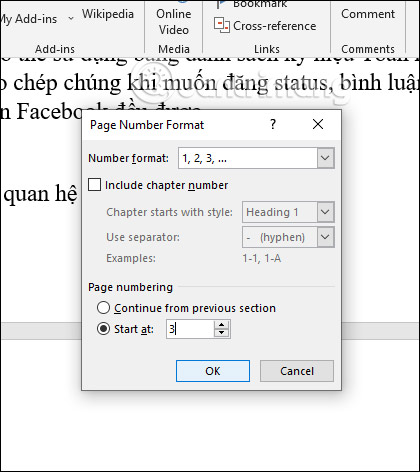
The change applies to the section containing the cursor. If the document has multiple sections, confirm which section is active before changing the value.
5. Use Roman numerals
Roman numerals are commonly used for front matter. They can be applied to the whole document or to one section.
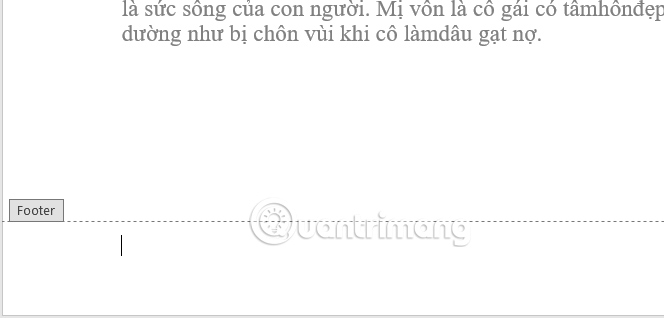
- Double-click the header or footer containing the page number.
- Select Page Number > Format Page Numbers.
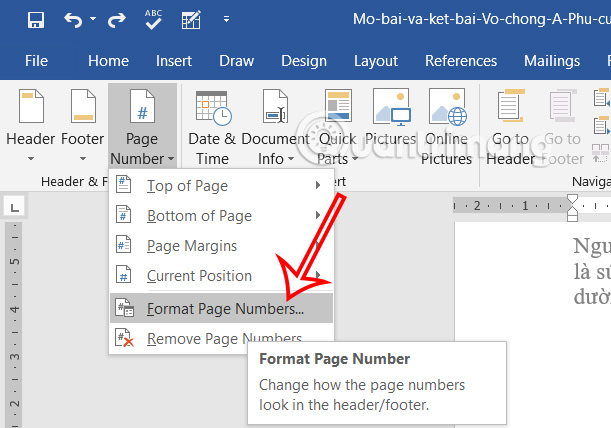
- Under Number format, choose i, ii, iii or I, II, III, then select OK.
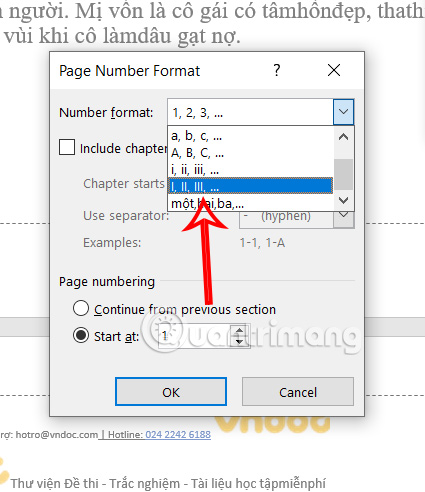
- If no number has been placed yet, choose Page Number and select a location and style.
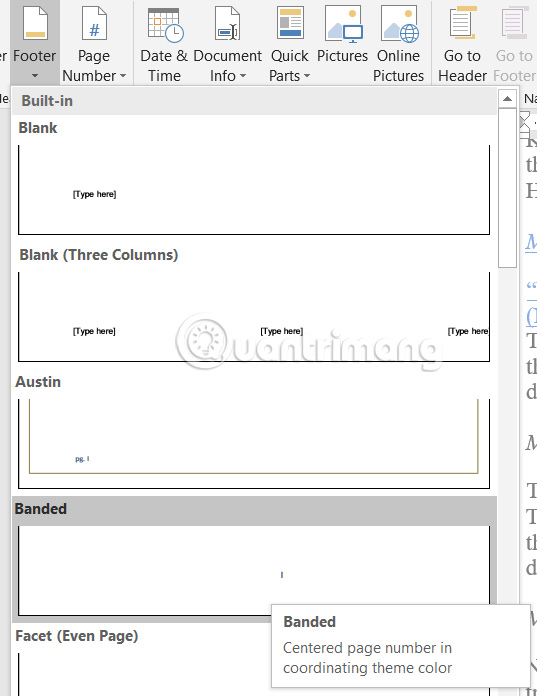
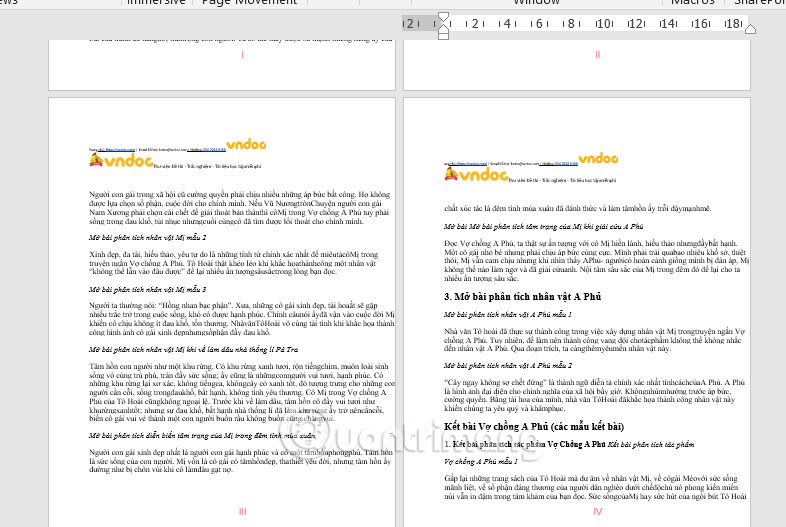
6. Put page numbers on the outside edges of facing pages
Books and double-sided documents often place odd-page numbers on the right and even-page numbers on the left.
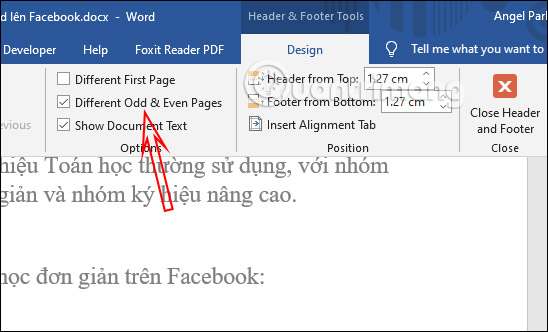
- Double-click the header or footer and enable Different Odd & Even Pages.
- On an odd page, insert a right-aligned page number.
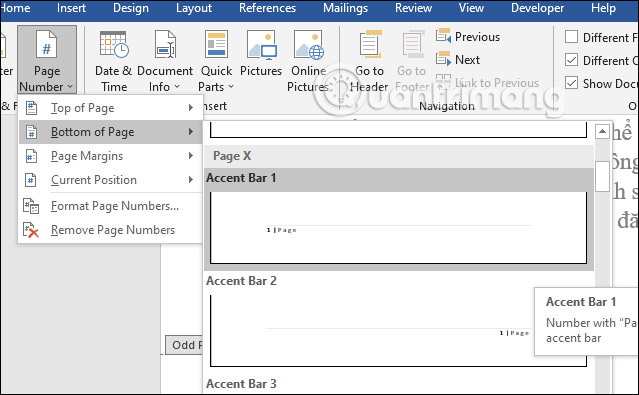
- Move to an even page and insert a left-aligned number.
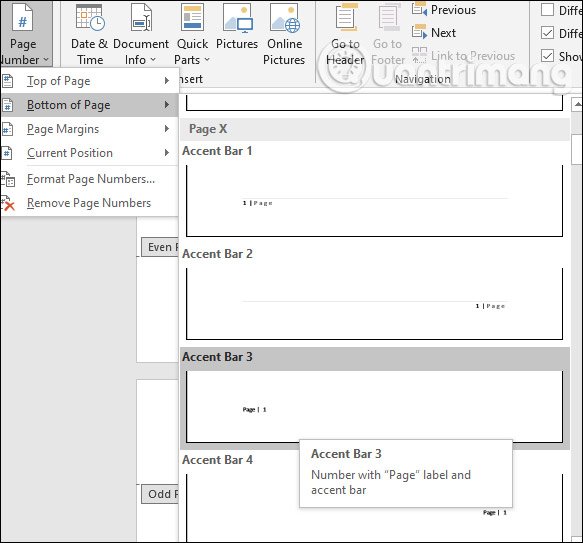
Check the result in File > Print with the intended duplex and binding settings. “Odd on right” assumes conventional left-to-right book layout; other binding directions may require the reverse.
7. Use different number formats in different sections
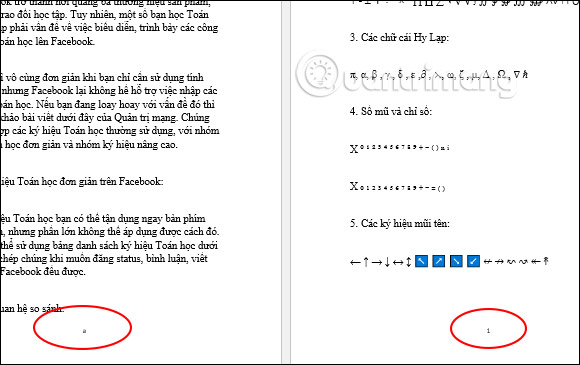
A document can use letters in one section, Roman numerals in another, and Arabic numbers in the main body. The key is to create sections and format each one independently.
- At the boundary between formats, select Layout > Breaks > Next Page.
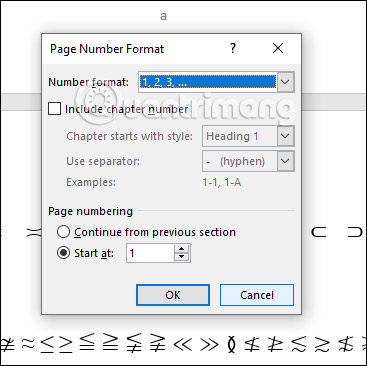
- In the first section, open Format Page Numbers, choose a format such as a, b, c, and set its starting value.
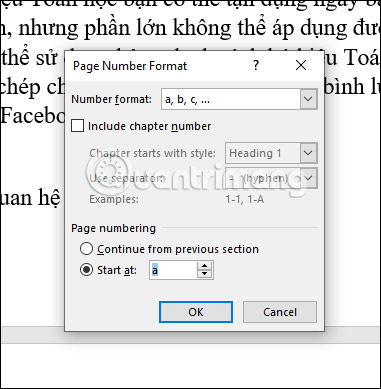
- Insert the page number in that section.
- In the next section, turn off Link to Previous, open Format Page Numbers, choose 1, 2, 3, and set Start at 1.
The result is one document with separate numbering systems.
For a detailed front-matter workflow, see how to combine Roman and Arabic page numbers in Word. If headers or footers also need to change by section, use the guide to different headers and footers in Word.
Add Page X of Y
Go to Insert > Page Number and choose a Page X of Y design. If a custom header or footer already exists, place the cursor first and use Current Position. Word for the web provides a similar Include Page Count option.
Remove page numbers
Select Insert > Page Number > Remove Page Numbers.
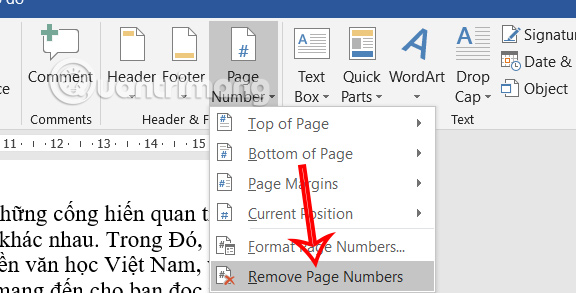
If some numbers remain, the document probably has multiple sections or separate first, odd, and even headers. Double-click each affected header or footer, select only the page-number field, and press Delete. Avoid deleting the entire header or footer if it contains other content.
Troubleshooting page numbers
Every section changed when you edited one
Open the affected header or footer and turn off Link to Previous in the section that needs independent formatting. Header links and footer links are separate, and odd, even, and first-page variants are also separate.
The first page shows no number, but page 2 shows 2
This is normal when Different First Page only hides the first page's field. If page 2 must show 1, set the section to start at 0 or create a new section on page 2 and start that section at 1.
A blank page appeared after a section break
Turn on Home > Show/Hide (¶) and inspect the break. Next Page, Odd Page, and Even Page breaks can intentionally create a new physical page. Use Continuous only when the new section should begin on the same page.
Numbers are missing on alternating pages
Check whether Different Odd & Even Pages is enabled. Add a number to both the odd-page and even-page header or footer; editing only one does not populate the other.
Related Articles
 How to Style Pages Symmetrically on Word: Number Word Pages4 minutes read
 How to Number Pages in Word Starting from Page 24 minutes read
 How to Start Page Numbers on Any Page in Word12 minutes read
 Number Pages in Word 2013, Insert Page Numbers Automatically4 minutes read
 How to Type Pages in Word 2007 from Any Page: Number Word Page5 minutes read
 How to Quickly See the Total Number of Pages of Word Files?3 minutes read
Reader Comments 0
Sign in with email or Google to join the discussion.