5 ways to securely disconnect a removable hard drive on a Mac
Just like on Windows, when you no longer need to use a hard drive or removable storage device, you need to safely disconnect (Eject) it from your Mac to avoid it. error phenomenon, data misplacement.
Table of Contents
Here are 5 ways to easily, safely and quickly disconnect a removable hard drive on your Mac.
Why do you need Eject secure drives on Mac
Eject is a necessary step to prevent data loss when you suddenly disconnect your hard drive or removable storage device (memory card, USB) from your computer. More specifically, to speed up data transfer to external storage devices, macOS sometimes writes data to a temporary location in memory instead of writing it to the storage device. If you unplug the removable hard drive before the data is written, data loss is inevitable.
When you right-click on the removable hard drive you want to disconnect and click 'Eject', the temporary recording will complete, writing 100% of the data to the actual device. After you officially disconnect the drive from the system, no data will be lost.
Method 1: Drag the Drive icon into Trash
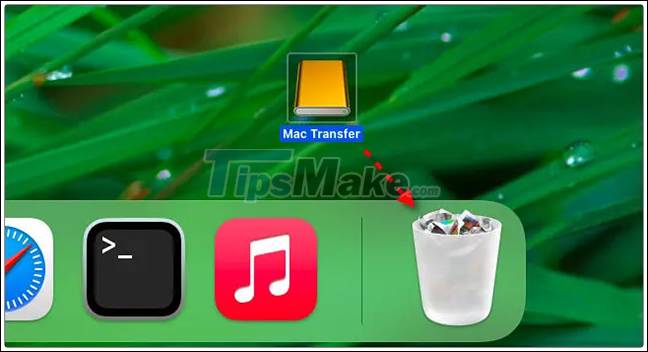
One of the most common ways to safely disconnect a removable hard drive on a Mac is to drag it to the Trash section.
To do so, the removable hard drive must be visible on your home screen. To safely disconnect, simply click and drag the icon of the removable hard drive to the Trash section. While dragging, the Trash trash icon will change to an Eject icon. When you release the pointer, the removable hard drive will be safely disconnected.
Tip: If you don't see the icon of the removable hard drive on the home screen, you can do the following setup steps to make it appear. First, bring Finder to the foreground, then click on Finder> Preferences in the menu bar (or press Command + Comma on your keyboard). When the Finder Preferences opens, select the 'General' tab. Next, check the items you want to appear on the home screen.
Method 2: Eject from the menu bar
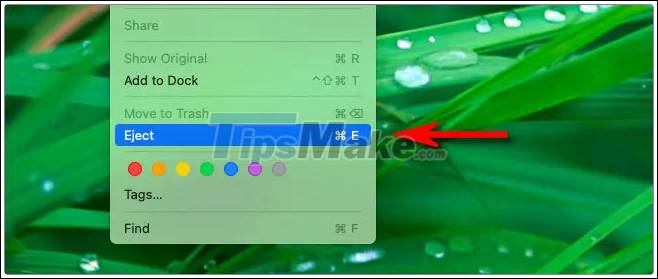
You can also safely disconnect the hard drive from your Mac using an option available on the menu bar at the top of the screen.
First, click on the removable hard drive you want to Eject on your home screen or in Finder, and then on the top menu bar, choose File> Eject.
Method 3: Eject from Finder
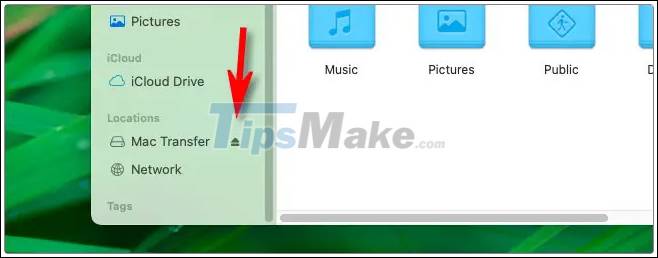
Securely disconnecting a removable hard drive can also be done easily in the Finder. Simply open any Finder window, then expand the 'Locations' section of the sidebar menu. Next, click the small Eject icon next to the name of the removable hard drive in the drop-down list. It's done!
Method 4: Right click on the hard drive icon
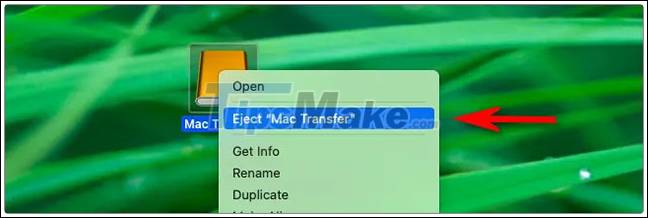
With this method, simply click the icon of the removable hard drive you want to safely disconnect in the Finder or on the home screen. Then right click on this icon with your mouse or trackpad. In the menu that appears, select the 'Eject' option.
Method 5: Press Command + E
And finally, you can safely disconnect the hard drive from your Mac using a keyboard shortcut.
First, click the drive icon (on the home screen, in a Finder window or in the sidebar of the Finder) and press the Command + E key combination. The hard drive will immediately be safely disconnected from the system. your system.
Was this article helpful?
Your feedback helps us improve.
Related Articles
 Instructions for choosing the best removable SSD hard drive for Macbook today10 minutes read
 Instructions for 5 ways to fix the error of not recognizing the removable hard drive on Windows6 minutes read
 Review Samsung 850 EVO 500GB - The best removable SSD on the market today6 minutes read
 5 ways to check hard drive effectively to help periodically check the hard drive9 minutes read
 9 SSDs for the best gaming for gamers14 minutes read
 8 effective ways to check your hard drive to periodically check the health of your hard drive17 minutes read
Reader Comments 0
Sign in with email or Google to join the discussion.