Let's explore a few different methods you can use to get work done on your Mac.
What You Need Before You Start
You will need the following items to create a Windows 11 boot installer:
- Flash drive or any other form of removable media with a capacity of 8GB or more.
- Internet connection is active.
- You will also need the latest Windows 11 ISO file. To download, select Windows 11 from the Download Windows 11 Disk Image (ISO) for x64 devices section. Select your preferred language from Select the product language , then click Confirm and download the installer on your Mac by selecting 64-bit Download .
Warning : Both methods below will completely erase your USB, so make sure to back up any important files first.
Use a Third-party Application to Create a Windows Boot Drive
The simplest way to create USB boot Windows 11 is to use a third-party application. The article recommends using WinDiskWriter because it is open source, lightweight and has an easy-to-use interface.
Just connect the flash drive to your Mac and follow these steps to create a Windows 11 boot drive using WinDiskWriter.
- and download the latest build available.
- After downloading the zip file, extract it and open the application by double-clicking on it.
- In the Target Device section, make sure the correct drive is selected. If another drive is displayed, click the drop-down menu option and select your USB.

- Click Choose in the Windows Image section to open a Finder window and locate the Windows ISO file you downloaded earlier. Then, click Open .
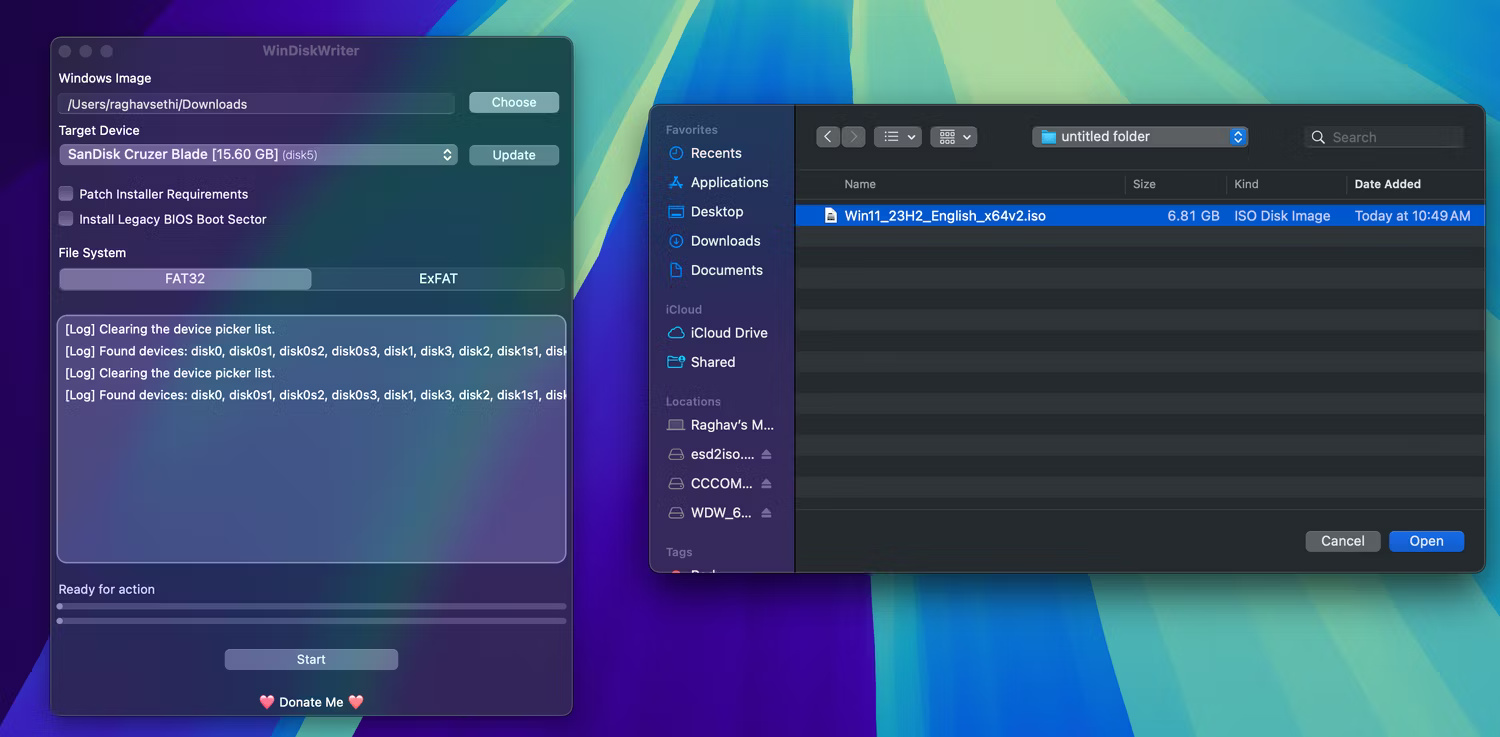
- Finally, click Start at the bottom to begin the process. Note that this process may take some time, so please be patient.
Once the process is complete, you can safely remove your USB and use it as a boot drive on any PC.
Create a Windows 11 Boot Drive Using Terminal
If you don't want to use a third-party app, you can create a manual installer using the Terminal app on your Mac. Before you begin, make sure you have Homebrew installed on your Mac, as you will need it later.
- Open Disk Utility on your Mac using Spotlight Search or find it in the Applications > Utilities folder.
- In the sidebar, select your USB, then click Erase in the upper right corner.

- Name the drive to your liking, select ExFAT as the format, then click Erase.

- Open Terminal on your Mac and enter the following command to mount the ISO file. Make sure to replace the path of the ISO file to where you stored the file. In most cases, the file will be in your Downloads folder.
hdiutil mount ~/Downloads/Win11_23H2_English_x64v1.iso- Now you will need to install wimlib via Homebrew. You can do it by entering this command:
brew install wimlib
- Next, enter the following command to create a folder named sources in the root directory of the flash drive. Make sure to replace USB with the name you assigned to the drive when formatting.
mkdir sources /Volumes/USB/sources- Now, you will need to split one of the files into two parts. Otherwise, the installer may not be able to start. Note that this process may take some time to complete, so please be patient.
wimlib-imagex split /Volumes/CCCOMA_X64FRE_EN-US_DV9/sources/install.wim /Volumes/USB/sources/install.swm 3800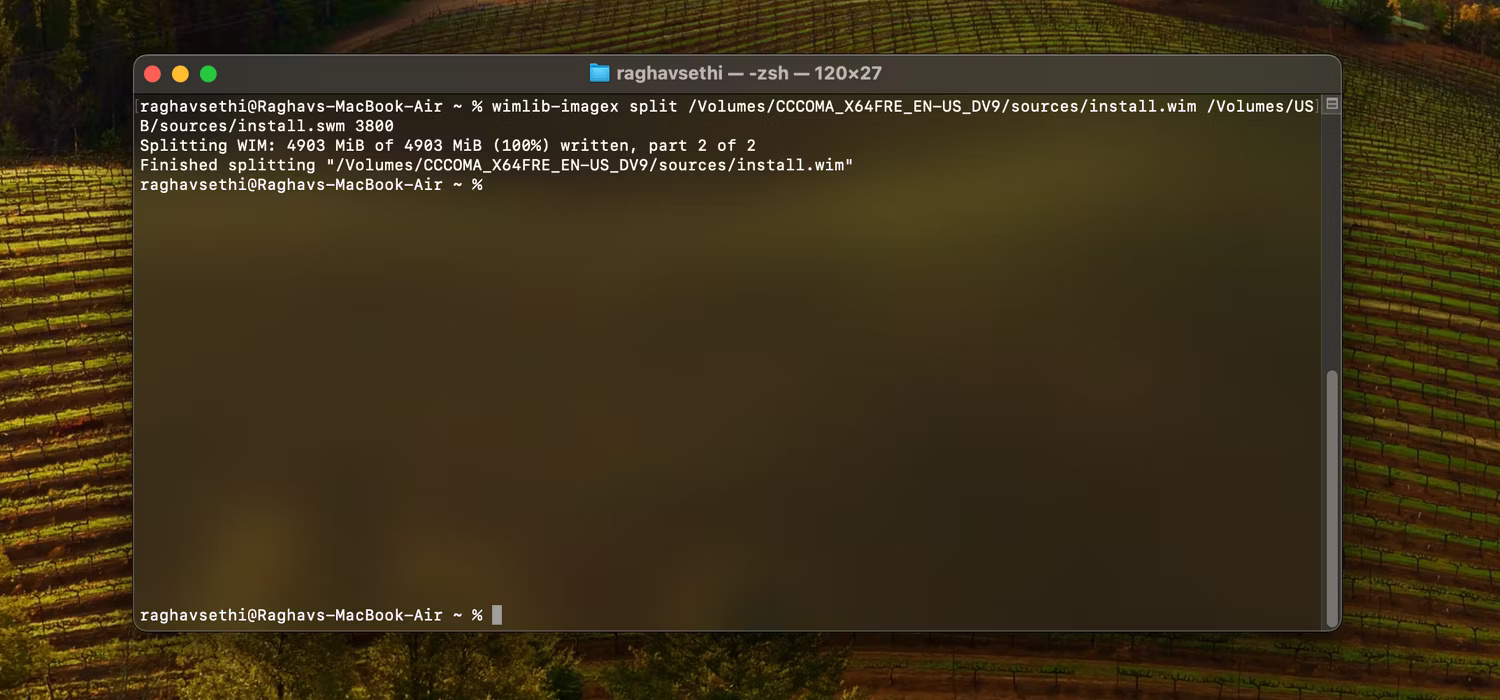
- Finally, you can copy all remaining files by entering this command:
rsync -vha --exclude=sources/install.wim /Volumes/CCCOMA_X64FRE_EN-US_DV9/* /Volumes/USBNow that the Windows 11 boot drive is ready, you can use it to install a new copy of Windows on your PC. Creating a Windows boot installer on a Mac is not as simple as on a Windows PC, so if you're still having problems, it may be easier to create the installer directly on Windows.




Reader Comments 0
Sign in with email or Google to join the discussion.