15 ways to optimize Windows 11 to make your computer run faster
In this article, TipsMake will show you 15 ways to optimize Windows 11 to make your computer work faster!
1. Why is it necessary to optimize Windows 11?
Windows 11 is currently the latest operating system from Microsoft. Not only does it design a completely new interface, but it also provides users with more advanced features.
However, upgrading to Windows 11 can make your computer or laptop slower than before the upgrade. Therefore, you should know some ways to optimize Windows 11 so that your device works as quickly and smoothly as possible.
Windows 11 is the latest operating system version from Microsoft.
2. Instructions on how to optimize Windows 11 to make your computer run smoother
Free up storage space
If your laptop or computer has little storage space, this can be a reason for your computer to be slow and lagging. You can use the Storage Sense feature built into Windows 11 to manage your device's memory, or you can free it yourself by following these steps:
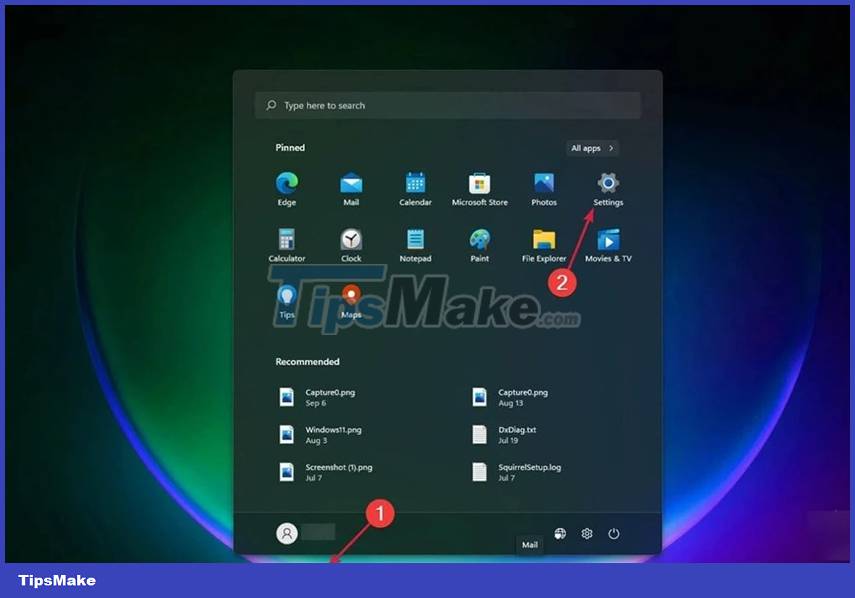
- Step 1: Click the Start button on the Taskbar and select Settings .

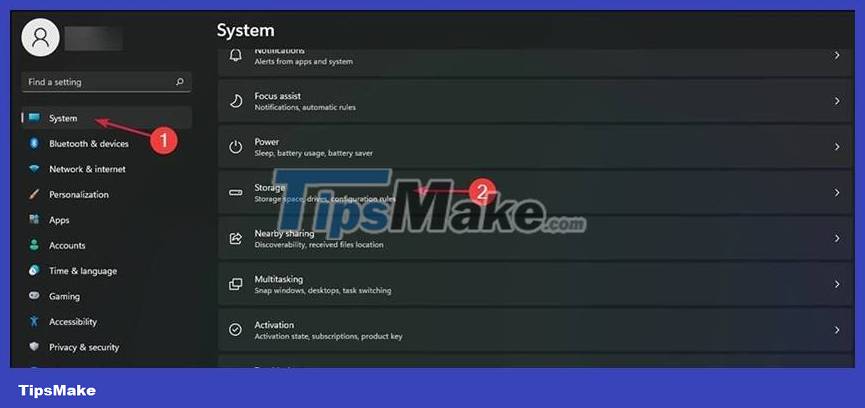
- Step 2: In the left column, click on System , then select Storage in the right pane.
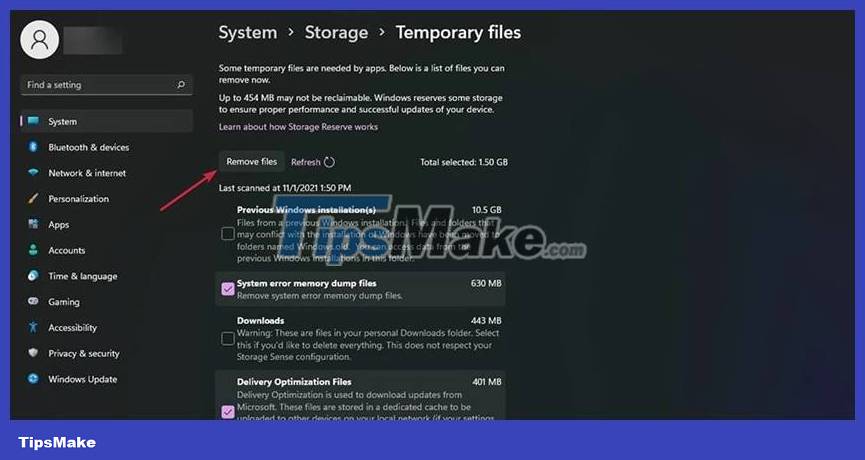
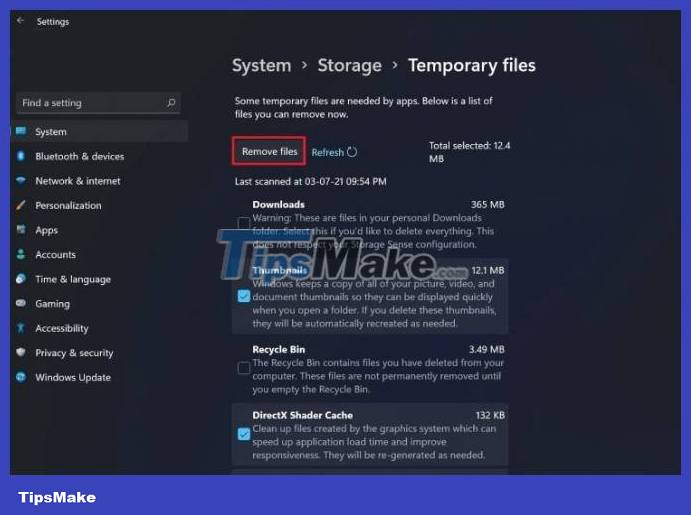
- Step 3: Select Temporary files to see a list of files in folders on the device.

- Step 4: Check the list again and select the data you want to delete, click the Remove files button . You can return to Storage to delete other files.
Delete unused programs
There are countless applications on the system after updating Windows 11, including applications that you have never used or applications that you downloaded but no longer need to use.
These applications not only take up memory but can also run silently in the background, making your computer slow and easily heat up. Therefore, you need to delete these applications to improve the performance of your Windows 11 computer. Follow these steps:
- Step 1: Click the Start button on the Taskbar and select Settings.
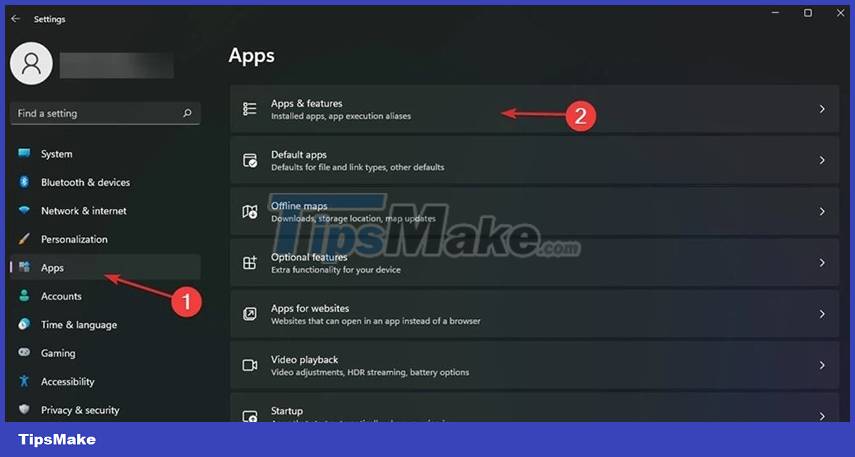
- Step 2: In the left column, select Apps , then select Apps & features in the right column.
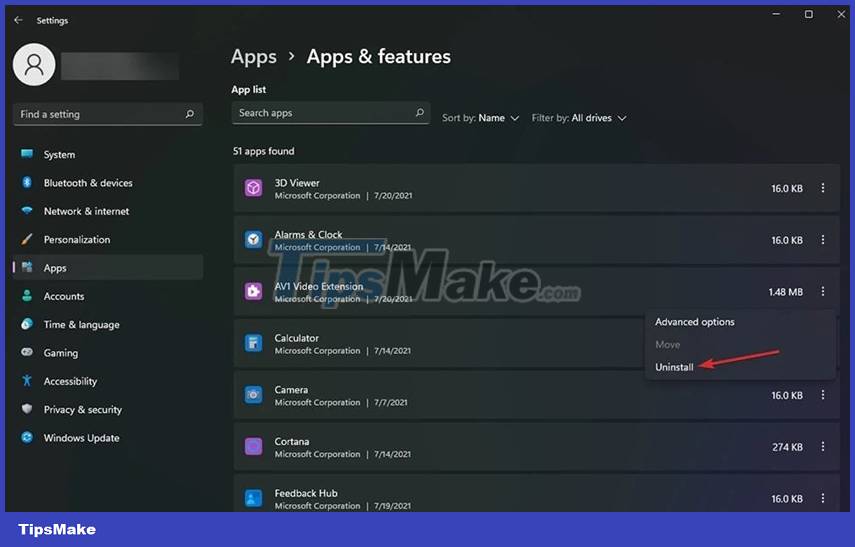
- Step 3: Select the applications that you do not need to use, select the three-dot icon on the right and click Uninstall to delete.
Defragment hard drive
The hard drive defragmentation feature helps you reorganize files so your computer will need less time to access data, thereby operating more quickly. Please follow these steps:
- Step 1: Click the Start button on the Taskbar and find Defragment and Optimize Drives , then open the application.

- Step 2: The Optimize Drives window will open and show you a list of hard drives on the device. You just need to select a hard drive and click the Optimize button to defragment the hard drive.
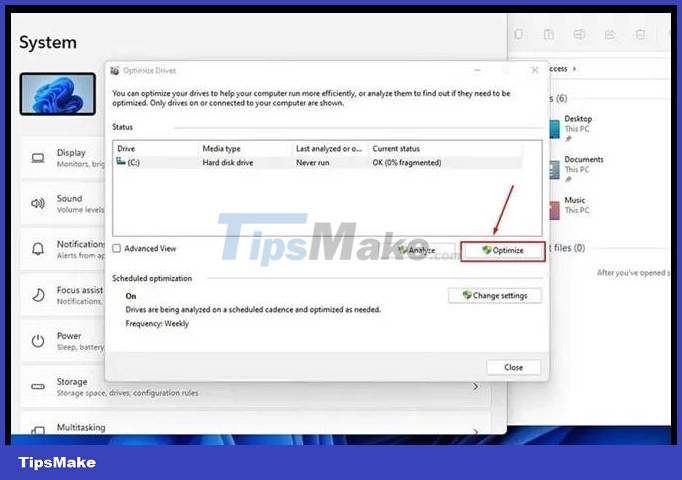
- Step 3: After the process is completed, repeat the above step with the remaining hard drives and restart the computer!
Note: If your device is using an SSD, you should not defragment it because it will reduce the lifespan of your SSD.
Use Windows Debloater
There are some programs and services that you cannot delete in the usual way, you can use Windows 10 Debloater software to delete these programs and services. Please follow these steps:
- Step 1: Click the Start button on the Taskbar and find Windows PowerShell and click run.
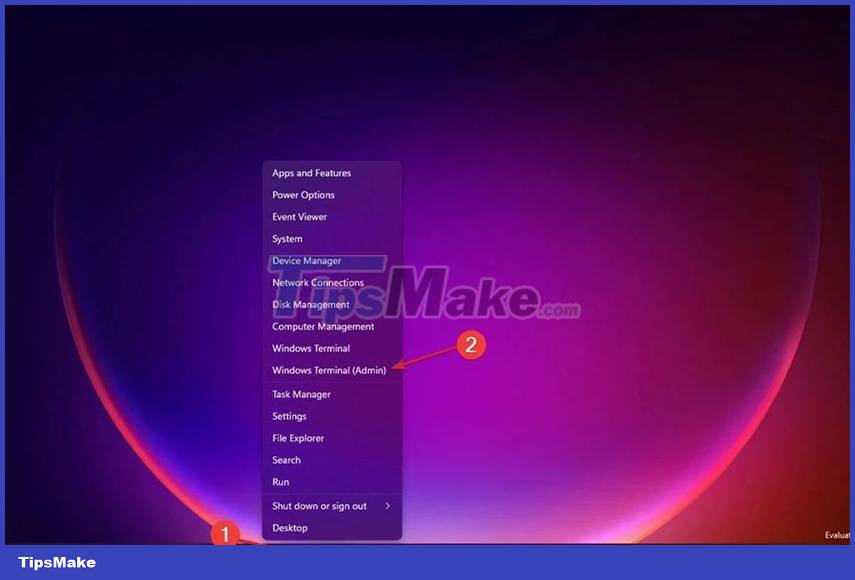
- Step 2: Then enter the command 'iwr -useb https://git.io/debloat|iex' and press Enter to download the program.
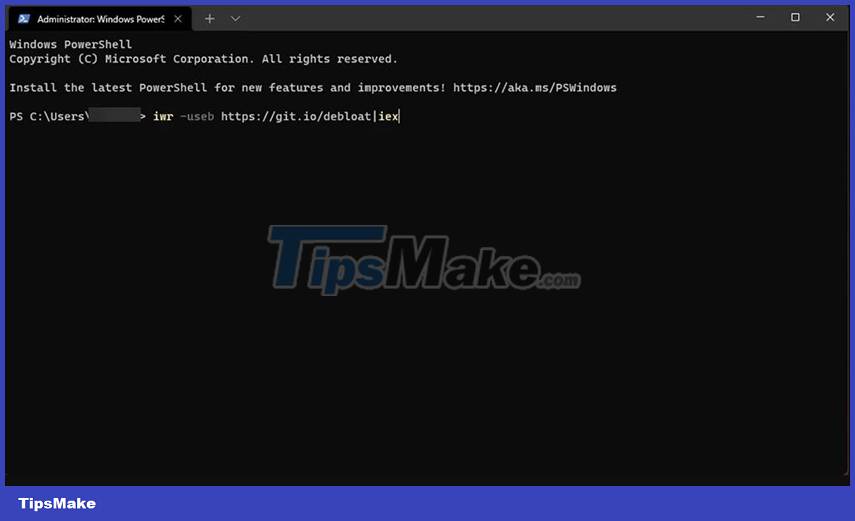
- Step 3: Then delete unnecessary applications and services and restart the computer.
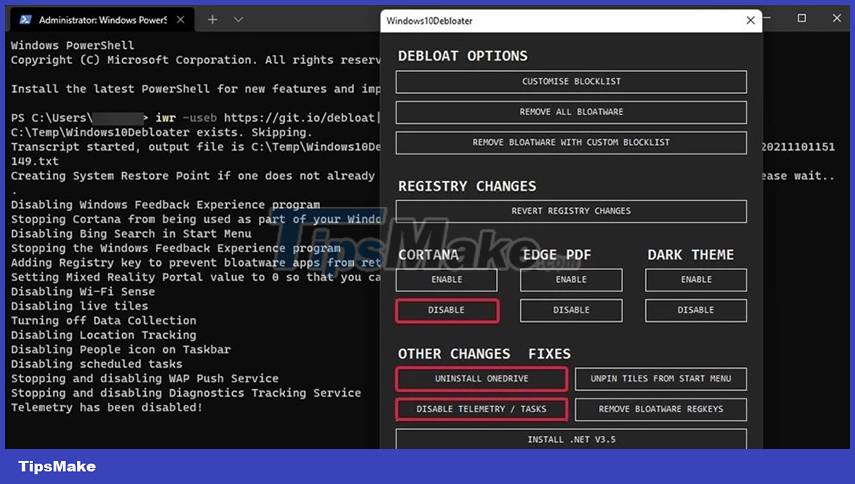
Turn off transition effects
Windows 11 is equipped with transition effects to make the user interface more unique and attractive. However, if your device has limited memory, these effects will make your device slow and often lag. Please follow these steps to turn it off!
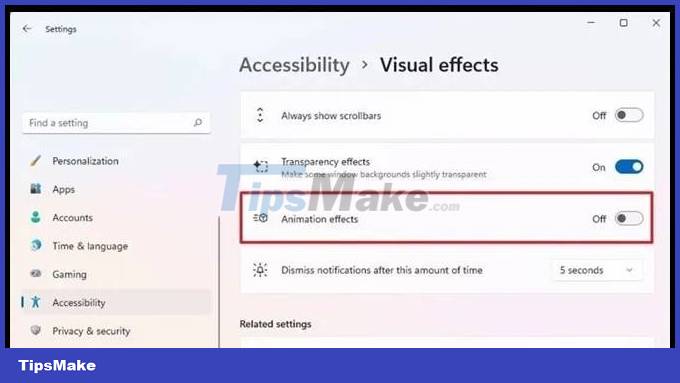
- Step 1: Click the Start button and select Visual effects settings .

- Step 2: You can turn off Transparency effects and Animation effects mode with the switch on the side.
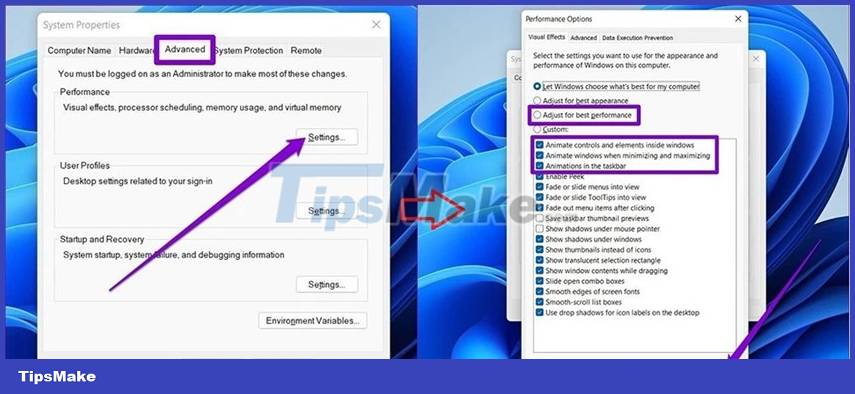
- Step 3 : Press the Windows key on the keyboard, find 'view advanced' and select View Advanced System Settings .

- Step 4: Select Advanced and click Settings in the Performance section . Then click Adjust for best performance > Apply then OK to complete.
Switch to a high-performance power plan
Power Plan is a function that manages the power consumption of your device. Normally it will be set in balanced mode . But if you can plug your device in at any time, you can switch to a more efficient power mode for maximum performance.
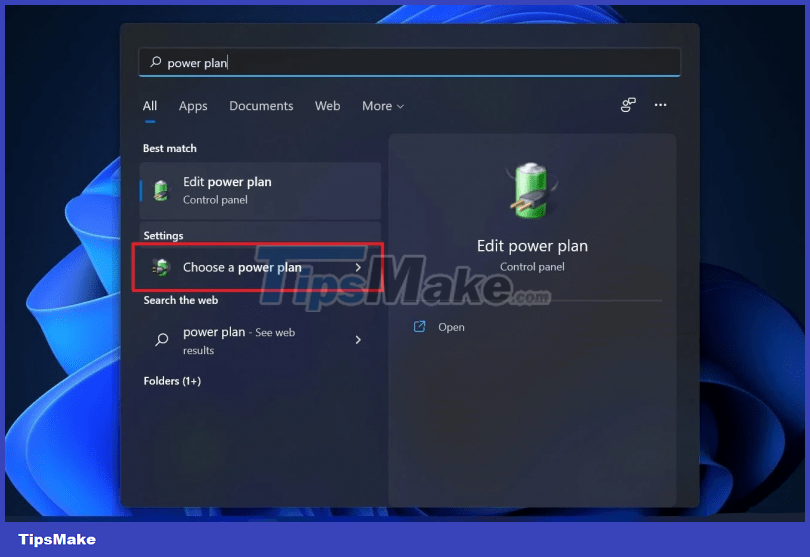
- Step 1: Open Search on the taskbar and enter Power Plan in the search box. After displaying the results, click Choose a Power Plan.
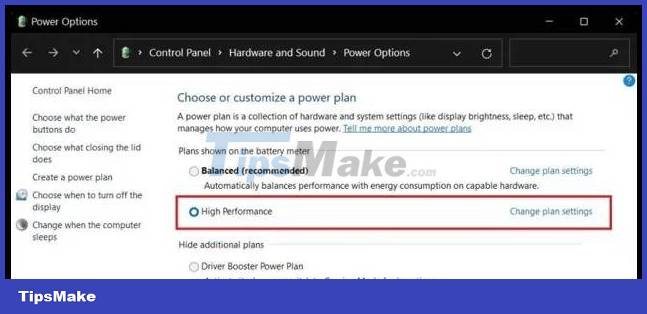
- Step 2: When the window opens, select the High Performance item (click Create a power plan in the left side bar if you do not see the High Performance item ). If you play games, you can choose Driver Booster Power Plan !
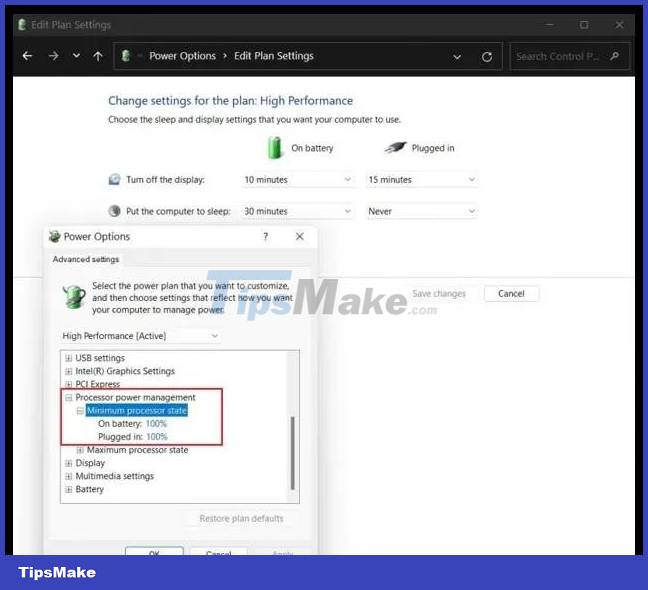
- Step 3: Then, click Change Plan Settings and then select Change Advanced Power Settings . Finally, make sure the minimum and maximum processor percentage is 100 in the Processor Power Management section.
Turn off auto-start applications
The more applications you install on your computer, the longer it will take for you to start Windows. Stop auto-starting applications on Windows 11 with these steps:
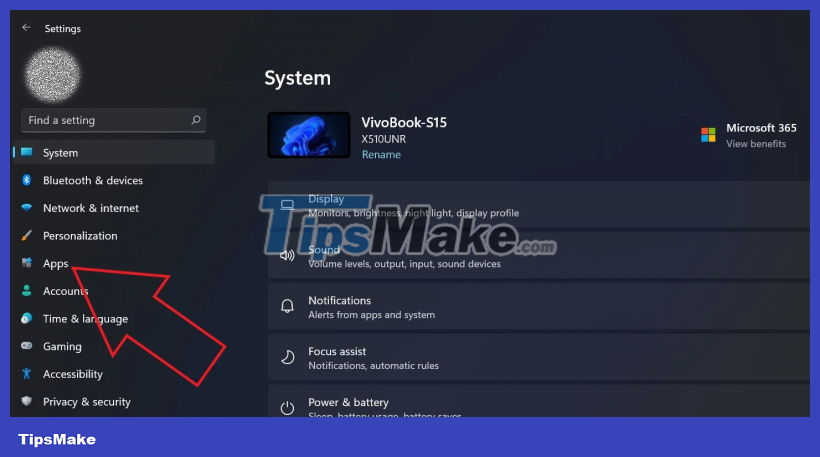
- Step 1: Select Start on the Taskbar , then select Settings and find Apps in the left column.
- Step 2: Then, click Startup in the right column.
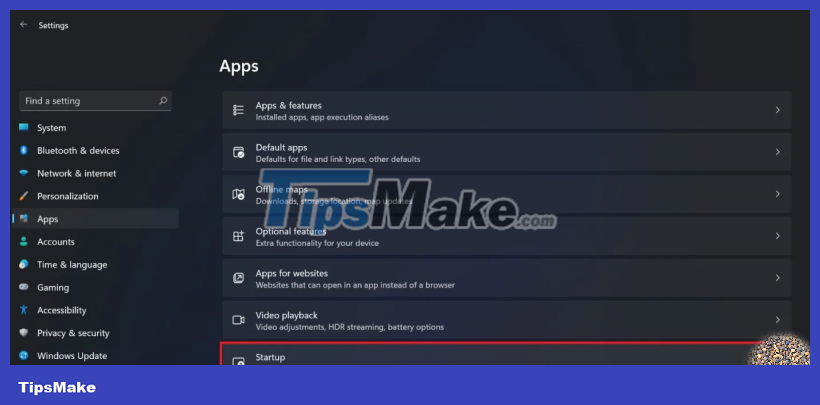
- Step 3: Finally you will see all applications starting with the system, turn off applications that you do not need to use.
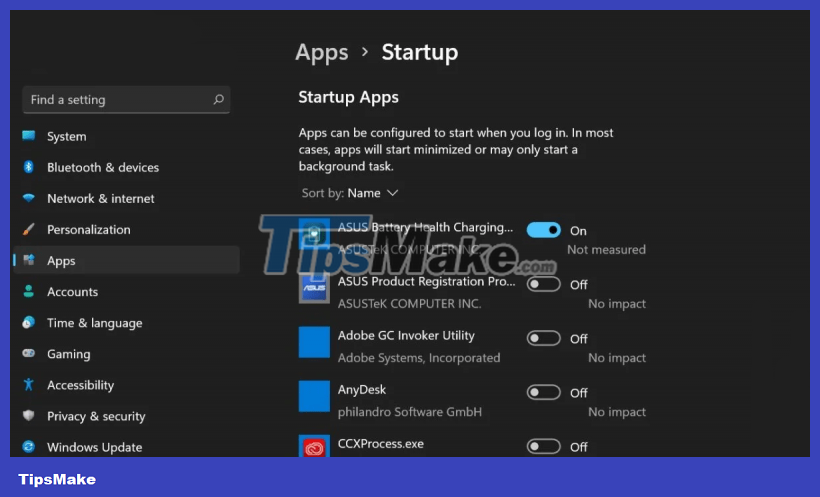
Turn off the startup program
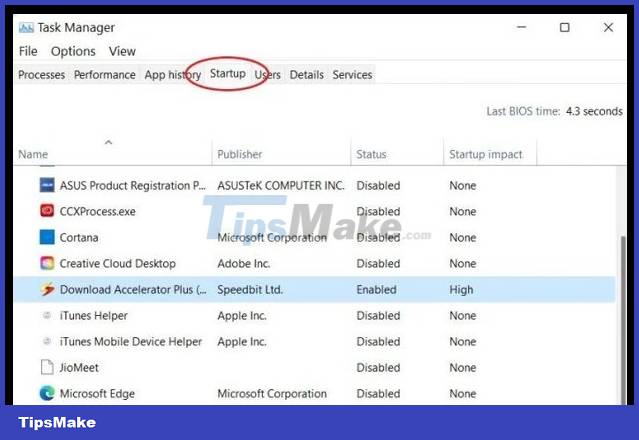
Task Manager allows you to view startup programs and also partly affects your computer's startup time. Follow these steps to disable unnecessary startup programs:
- Step 1: Press the key combination Ctrl + Shift + Esc to open the task manager.
- Step 2: Then select the Startup tab , select the desired programs and select Disable .
Turn on Storage Sense
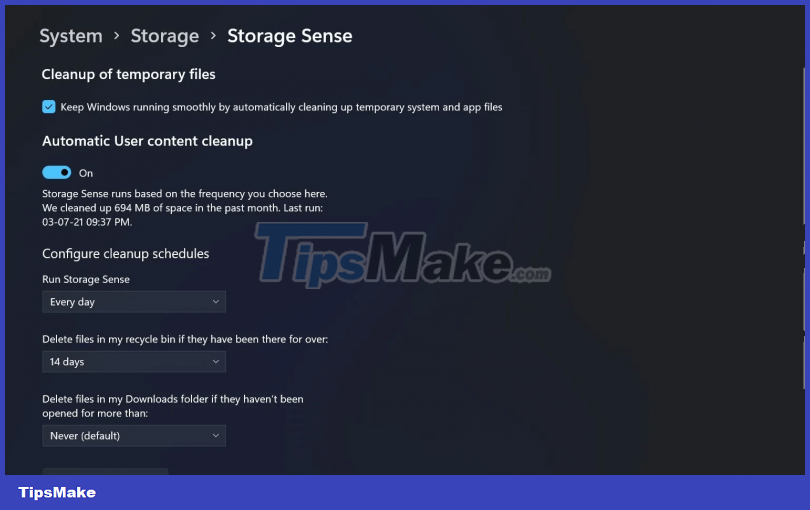
Windows 11 retains the Storage Sense feature from the previous generation that monitors your device's storage while automatically freeing up space when required by deleting unwanted files. Make sure you still have this feature turned on!
- Step 1: Open Settings and select System .
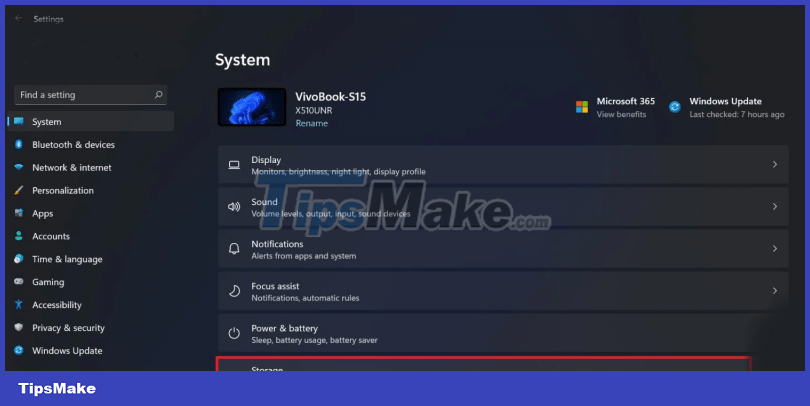
- Step 2: Select Storage then find Storage Sense and turn it on or click Run Storage Sense Now at the bottom of Storage Sense to turn it on.
Delete temporary files
When using a computer for a long time, the device can be cluttered with dozens of files including: images, temporary internet files, downloads, etc. If left for a long time, it will weigh down the memory. and makes your computer slow. Please delete them to make your device "breathe easier"!
- Step 1: Click Start on the Taskbar, select Setting > Systems .
- Step 2: Select Storage > Temporary Files .
- Step 3: Select the files you no longer need and click Remove files.
Turn off notifications
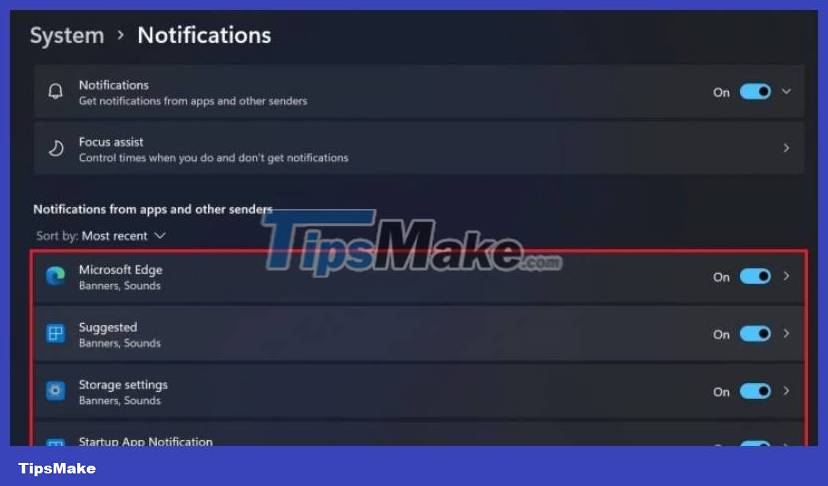
Your laptop often shows annoying notifications during use. Luckily, Windows 11 supports you to turn off notifications to optimize your device. Follow these steps:
- Step 1: Select Start on the Taskbar and click the Settings app > System .
- Step 2: Then select Notifications and find the applications you want to turn off notifications.
Turn off Game mode
To help you improve performance when playing games, Windows 11 is equipped with Game Mode . But it is only convenient if you are a "gamer" with high gaming needs. If you only use your laptop for studying or working, you should completely turn off this mode.
Turning off Game Mode stops the DVR and other Xbox-related services in the background, keeping your computer running smoothly and quickly.
Turn off Game Mode if you don't need to play games
Turn off Notifications and Tips
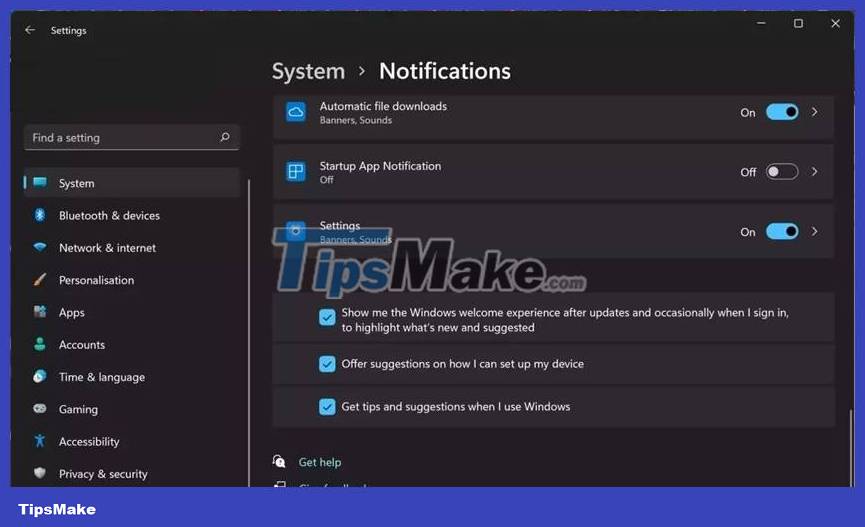
While using the computer, sometimes notifications suddenly pop up, disrupting your work and study process. And maybe this is the reason why your device becomes laggy, please turn it off by following these steps:
Step 1: Select Settings , then click System and then select Notifications .
Step 2: Turn off the Offer suggestions on how I can set up my device and Get tips and suggestions when I use Windows options.
Do not install third-party anti-virus software
Users often tend to install third-party anti-virus software to protect their computers. But this view is completely wrong because Microsoft has upgraded security and built-in Windows Security is capable of protecting your device. So please delete or stop installing these software.

Built-in Windows Security will protect your computer well
Upgrade RAM/SSD
Please increase your computer's RAM/SSD so it can operate more powerfully and smoothly. If eligible, you should consider upgrading to an SSD if your device is using an HDD because the read/write speed of SSD is 5 times faster than HDD, helping to run programs faster, even starting up . faster.
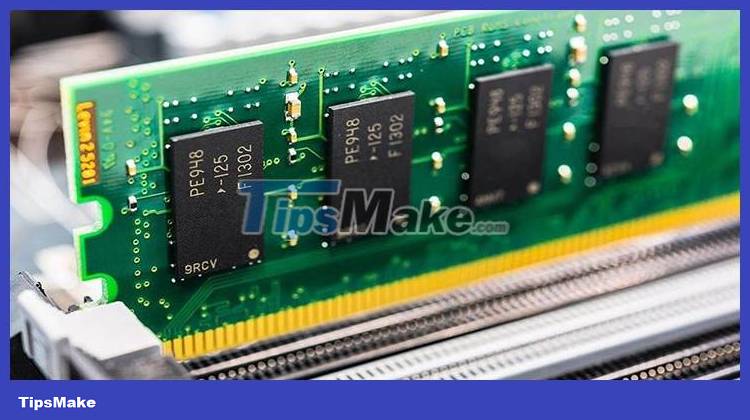
After upgrading, you will immediately feel the difference in the speed of starting up your computer and running programs