Windows Media Center 'level' as you like
Entertainment features of Windows 7 focus on Windows Media Center (WMC) with beautiful interface, fast processing capabilities, and many other special things. However, it is difficult to configure WMC at will.
With Media Center Studio software, from now on you will be able to freely customize WMC so that it brings your personal markings. This software is completely free, available at: www.adventmediacenter.com.
1. Install the new interface for WMC:
- At the Home tab of Media Center Studio, click the New button to create a new interface. At the Biography tab, you name the theme , select the theme creator name, and can write a few comment lines for the theme.
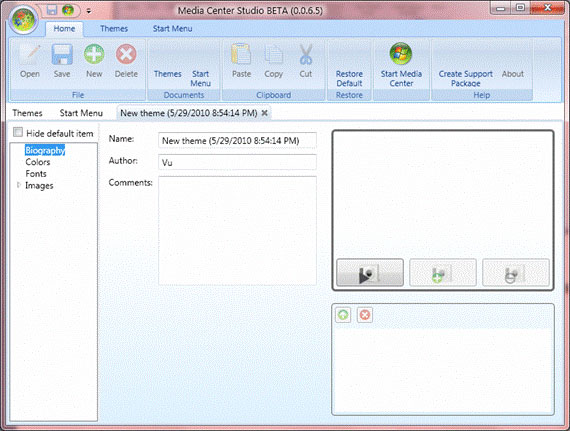
- At Colors card, the program lists details of many colors used for different operations. At each individual operation, you can adjust the sliders in the Red-Blue-Green (RGB) and Alpha modes to suit your personal preferences.
- At Fonts card, because the program is still in Beta stage, we cannot adjust the font for manipulation.
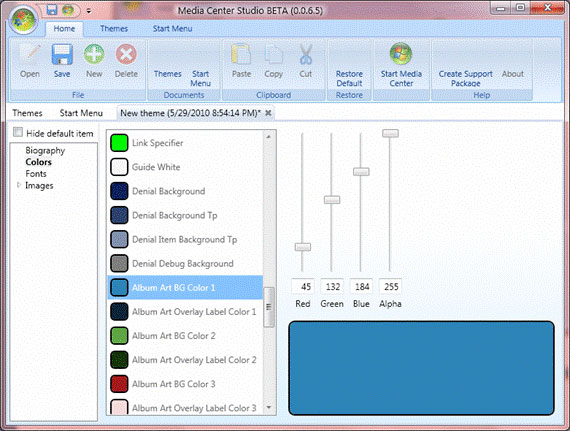
- At Images card, you have a lot of choices to change photos for operations such as: Audio, Browse, Common, Details . The first impression of the user is the background image, so we need to change the image. The background is aesthetically pleasing and suitable for personal preferences. To do this, select the Common / Background tab and select the COMMON.ANIMATED.BACKGROUND.PNG line exactly . The program will display the correct image as the background for WMC, to change it, click the Browse button and select the image you want to make the theme background. Note that the program only allows the use of PNG images, but it does not accept any other image formats.
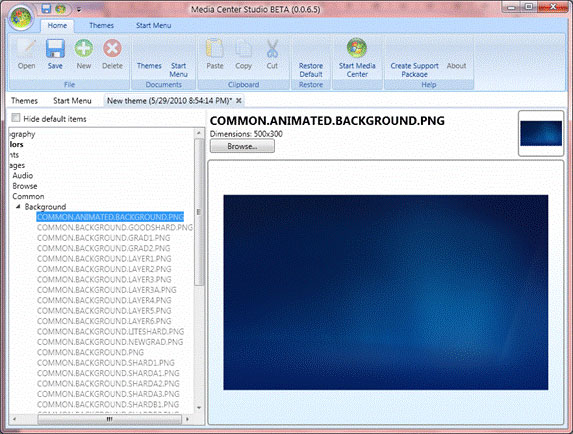
You also do the same with COMMON.BACKGROUND.PNG line.
After you have changed both values, click the Save button at the top of the toolbar. Next, move on to the Themes tab, where you click the Themes button below. Now you will see a list of themes that have been created, but you cannot see the preview image of the theme.
Select the theme you just created, then click Apply to save the changes to WMC. Now a progress bar will start to track the change process. When this bar runs out, your WMC program is ready to start.
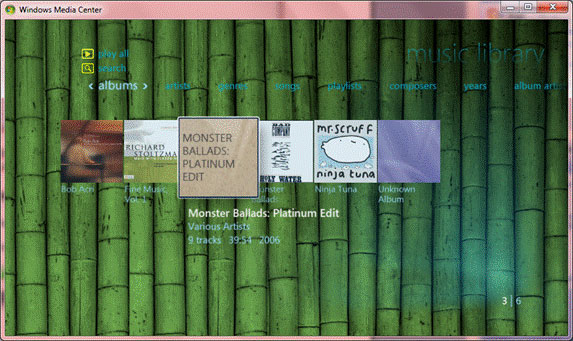
And the result of this process is that the interface of WMC has been renewed.
2. Tweaking Start Menu for WMC:
- Adjust Start Menu : When you click on the Start Menu tab of Media Center Studio, the program will open a window with a lot of buttons, which can be very confusing at first, but look closely, you can realize this is something self-arranged in WMC.
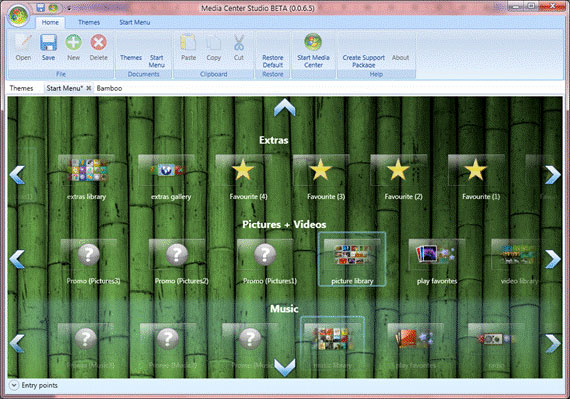
Here when you hover your mouse over the headings of the main groups such as Extras, Pictures + Video, Music . you will see two small icons on either side of the title, which is a square and a book icon. When you check that box, you will appear or hide the topic group. When you click on the notebook, you can change the name for the topic group. Besides, in the title, each topic group also has up and down arrows to change the topic order according to their liking.

Similar to topics in the topic group, we can change the name, choose hide / show, change their location by dragging and dropping elsewhere (you should drag and drop exactly to the ' + ' mark that appears). when moving. You also need to remember that after each operation, you must immediately click Save, which is quite important, because the Media Center Studio program itself is only a Beta, so it sometimes flips.
- Add menu option for Start Menu: Media Center Studio program also allows you to set up a menu of your choice, on this menu you can select the active application.
To do this, first click on the Start Menu tab at the top.

Click on the Strip Menu , now in the Start Menu adjustment window there is a new menu that appears with the default name of Custom Menu. You should rename the menu and move the menu to a reasonable position.
After that, click the Entry Points button at the bottom left of the window, some of the program's suggested apps will appear for you to choose from. You can drag and drop these applications into the menu bar you just created.
To add other applications, in the Start Menu window, click Application to open the New Entry Points tab. The pop-up window has the same interface as the image:
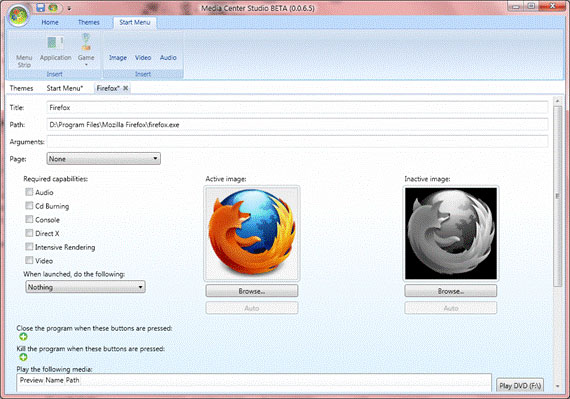
Here you enter the application name into the Title , the exact application path to the Path . Usually when the application is selected, the program will automatically recognize the application's icon as the image displayed on the menu. However, you can also select again by clicking Browse and selecting another image. In the When launched by the following box , select one of the actions that will be automatically activated by the program when you use the application from the menu.
At the two options shown in the picture, press the plus button to set the shortcut to turn off the program.
Then, click Save to complete. Similarly, do it for other favorite apps. Going back to the add-in window, you see the application is in the Entry Points list, drag and drop the application to the options menu and click Save again to accept the change.
Important note: It is very possible that when you do this step, you turn on WMC, but you cannot see the menu you have just made anywhere. This is a minor error of Media Center Studio, to fix this, we do the following:
- Turn off Media Center Studio, type the correct C: ProgramData line in the Search programs and files box when you turn on Start Menu of Windows 7.
- In the folder you just opened, you continue to access the path C: ProgramDataMicrosofteHomePackagesMCEClientU XdSM in turn.
- In the dSM directory you rename the StartResources.dll file to another name, such as StartResources2.dll
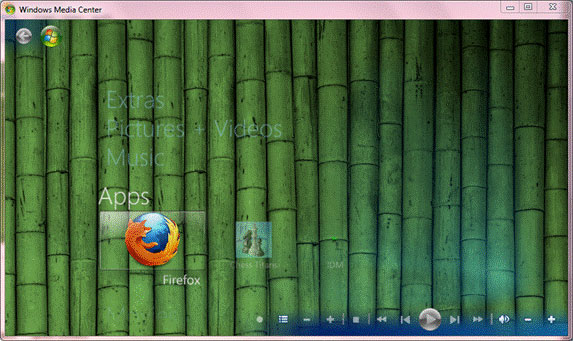
- Open WMC and witness the change.
Source Echip