Table of Contents
This practical guide explains how to disable windows mobility center on windows 11 with clear steps and useful context. It also covers common requirements, potential problems, and the details that can help you get better results.
In this article, TipsMake will show you how to disable Windows Mobility Center through changes in Group Policy or Registry.
How to Disable Windows Mobility Center Using Local Group Policy Editor
Windows Mobility Center can be a great tool if you need quick access to some key settings, but it can also take up system resources and slow down your computer's performance.
If you're looking to turn off Windows Mobility Center, you can use the Local Group Policy Editor. However, it is important to note that this tool only works with Windows 11 Professional and Enterprise editions.
In other words, if you use the Windows Home edition, you won't have access to Local Group Policy. For this to work, you must first enable the Group Policy Editor in Windows Home.
To disable Windows Mobility Center using the Local Group Policy Editor, follow these steps:
1. Open the Local Group Policy Editor.
2. Then navigate to the following path:
Computer Configuration > Administrative Templates > Windows Components > Windows Mobility Center3. Select the Windows Mobility Center folder from the left pane, then double-click Turn off Windows Mobility Center.
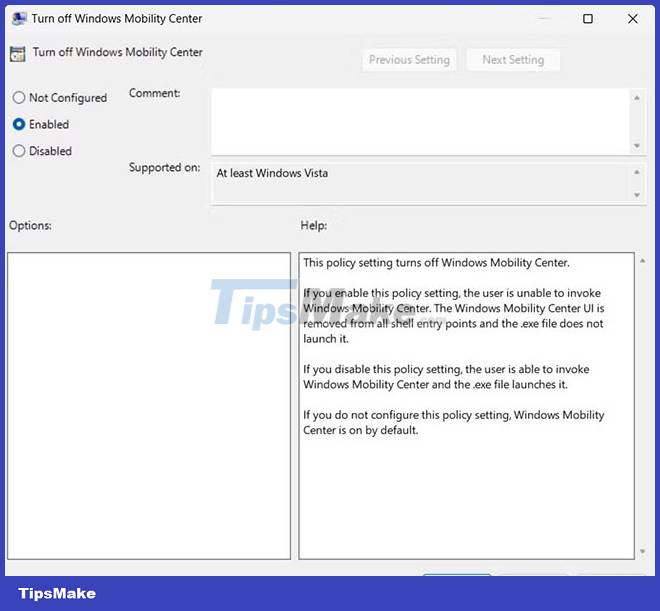
4. In the pop-up dialog box, select Enabled.
5. Once you have made the changes, click Apply > OK to save them.
After completing the above steps, restart your computer to apply the changes.
How to Disable Windows Mobility Center Using Registry Editor
Alternatively, you can disable Windows Mobility Center through the Windows Registry. The process is pretty simple, but make sure you follow the instructions carefully, because even a small mistake in the registry can lead to serious damage.
If you decide to go this route, be sure to back up your registry. Here are the steps you need to take to turn off Windows Mobility Center:
1. Open the Registry Editor.
2. Next, go to the following path:
HKEY_LOCAL_MACHINESOFTWAREMicrosoftWindowsCurrentVersionPolicies3. On the right side of the window, right-click on an empty area.
4. From the context menu, select New > DWORD (32-bit) Value .

5, When generating the DWORD key, name it MobilityCenter and save it.
6. Now double click on the key you just created and a pop-up window will appear.
7. Set Value data to 1 and Base to Hexadecimal.
8. When you're done making these changes, click OK to save them.
After completing the above steps, exit Registry Editor and restart your computer.
Conclusion
Understanding Windows 11 makes it easier to compare options, avoid common mistakes, and apply the information in this guide more effectively. Review the relevant requirements before making changes or choosing a solution.
FAQ
How do you disable windows mobility center on windows 11?
Follow the steps in this guide in order, confirm the required settings or tools, and verify the result before making additional changes.
Is it safe to disable windows mobility center on windows 11?
It is generally safe when you follow the recommended instructions, use trusted tools, and avoid changing settings you do not understand.
What should you do if the process does not work?
Recheck the requirements, restart the device or application when appropriate, and review each step for missed settings or compatibility issues.
Related Articles
 Discover Mobility Center in Windows 711 minutes read
 This Is How to Customize and Disable (Turn Off) Action Center on8 minutes read
 What Is the Microsoft Office Upload Center? How to Disable This8 minutes read
 How to Completely Disable Windows Sync Center, Stop Mobsync. Exe4 minutes read
 How to Turn Off the Notification Center on Windows 10?3 minutes read
 How to Enable / Disable Notifications from Windows Security5 minutes read
Reader Comments 0
Sign in with email or Google to join the discussion.