What is Windows Search Indexer? How to disable it?
It's no secret that Windows runs a bunch of background services to power various features. However, one of these background services is draining your battery without providing much benefit in day-to-day use..
It's no secret that Windows runs a bunch of background services to power various features. However, one of these background services is draining your battery without providing much benefit in day-to-day use.
What is Windows Search Indexer?
Windows Search Indexer, which appears as searchindexer.exe in the Task Manager window, is a background service that continuously scans files and folders to create a searchable database. This service powers the search functionality on your PC, helping you quickly find files and folders scattered across your storage drives.
By default, the service is set to index user folders, such as Documents , Pictures , Videos , and Desktop , in addition to any libraries you may have configured. However, you can expand its scope to almost any location on your PC.

This service works by cataloging file names, contents, and attributes across your entire system. All of this data is put into a database of all indexed locations and is automatically rebuilt when files change, which happens all the time on your system. And that's where the problem starts.
How to Disable Windows Search Indexer Service and Extend Battery Life
Fortunately, Windows Search Indexer is an optional service, which means you can disable it without any stability issues or other impacts to your Windows computer. The easiest way to permanently disable this service is through the Windows Service Manager, as follows:
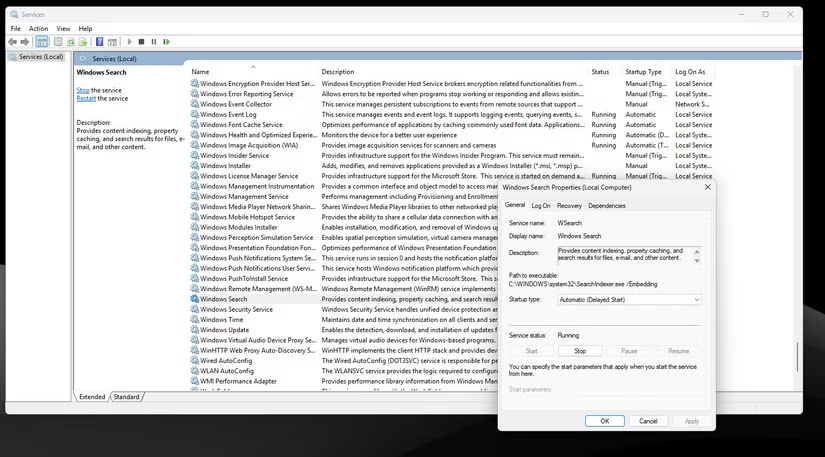
- Press Windows key + R to open the Run dialog box . Type services.msc and press Enter. Alternatively, you can search for Services in the Windows Start menu.
- Find and double-click the Windows Search service to open the service properties.
- Click the Stop button to stop the service (assuming the service is running) and select the Disabled option from the Startup type drop-down list so that the service does not run every time it starts.
- Restart the system for the changes to take full effect.
There are also temporary ways to disable the service, if you want to test it out to determine how much battery drain and performance loss it causes. Follow these steps:
- Open Windows Settings and go to Privacy & security section .
- Scroll down to find the Searching Windows option and click on it.
- Scroll down to the bottom of the page, then click Advanced indexing options .
- Click the Pause button to temporarily stop indexing.


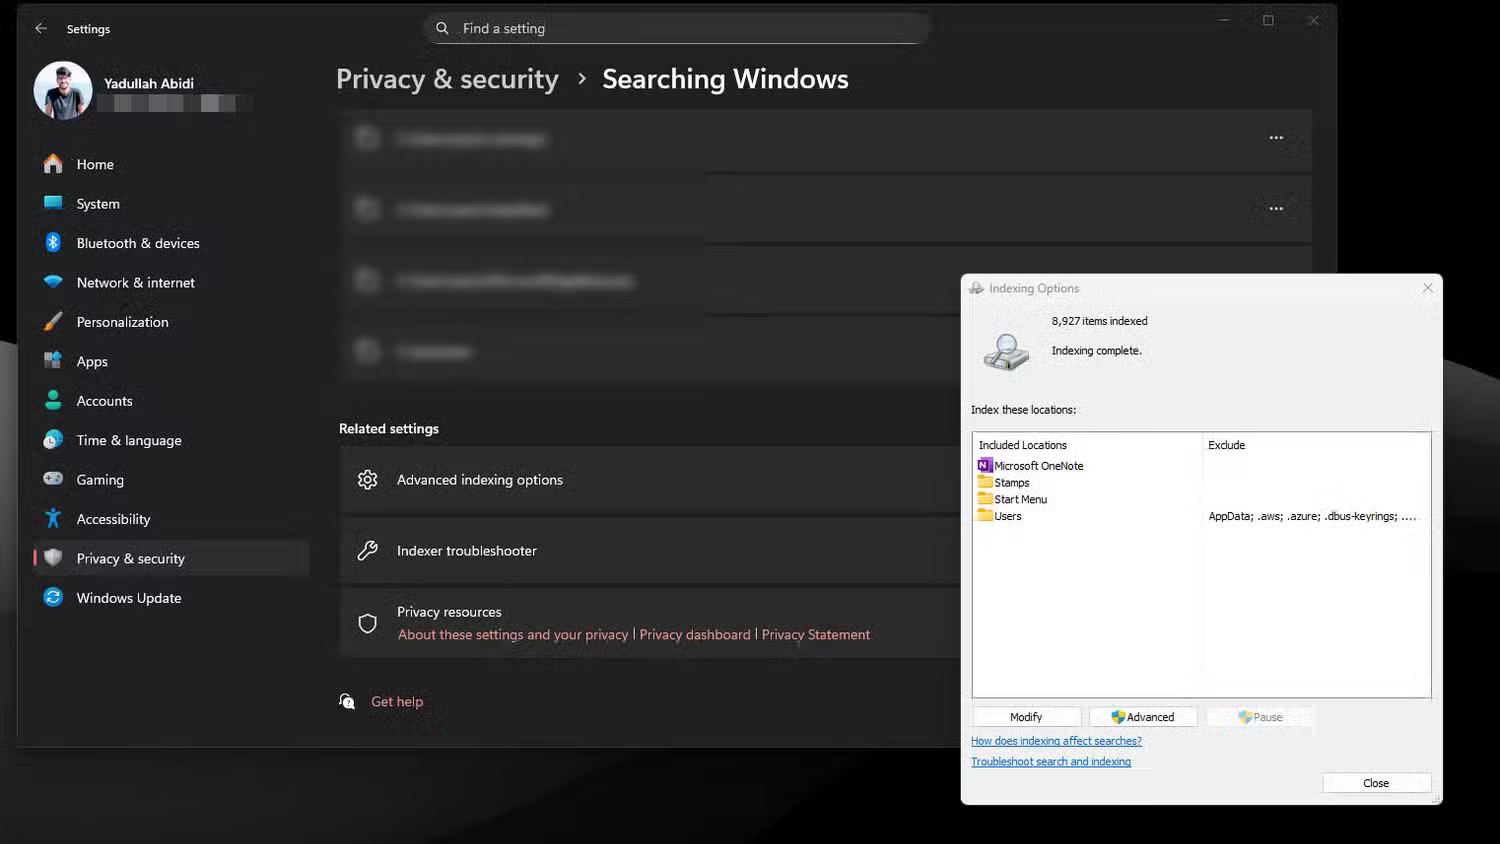
Note that you may see the Pause option greyed out. This means that indexing is not running or is already running on your system at that time. We have not been able to reliably pause indexing using this method, but your results may vary.
Last but not least, if you are comfortable making modifications to the Windows Registry, you can disable this service when your computer is running on battery. Follow these steps:
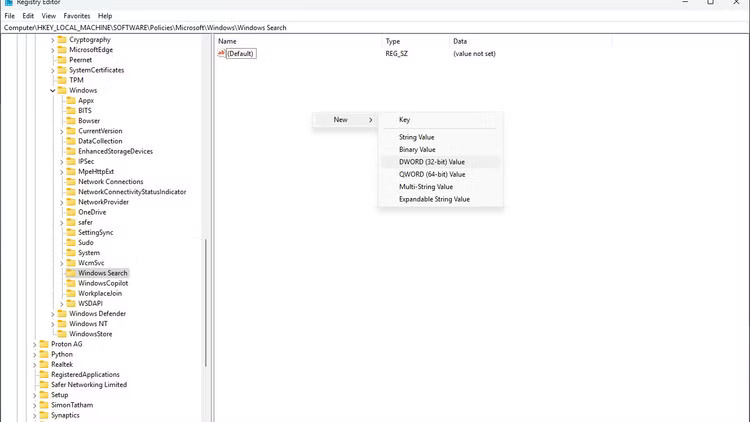
- Press Windows key + R to open the Run dialog box. Type regedit and press Enter .
- Navigate to HKEY_LOCAL_MACHINESOFTWAREPoliciesMicrosoftWindowsWindows Search .
- If you don't see the Windows Search folder (called a Key in the Registry Editor), right-click the Windows folder in the left sidebar, select New > Key , and name it Windows Search .
- After clicking the Windows Search key in the left menu, right-click in the empty space of the right window and select New > DWORD (32-bit) Value . Name it PreventIndexingOnBattery and set the value to 1 .
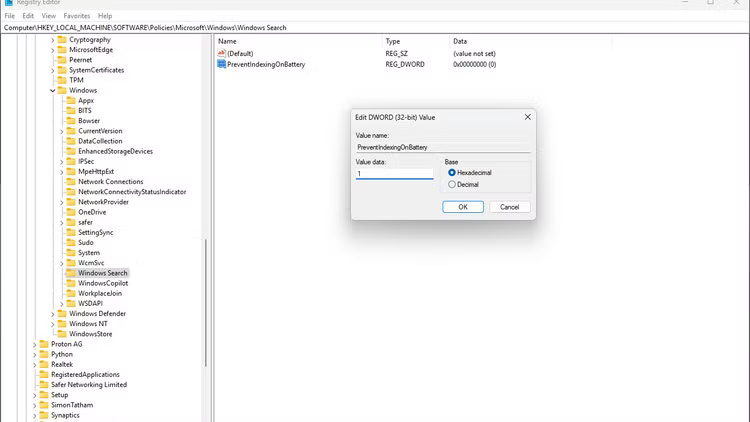
In theory, this should prevent Windows from indexing files while running on battery power. However, as mentioned earlier, we haven't been able to do this consistently, so your results will vary depending on your specific Windows 11 build. The most effective solution is to disable the service entirely.