What is WebRTC, How to disable WebRTC
1. What is WebRTC?
WebRTC makes it easier for people to communicate between browsers without installing additional software. WebRTC allows you to chat, meet online or share files with others.
However, WebRTC can also expose a device's local and public Internet address, even if you choose to hide the device's location by using a virtual private network (VPN). This phenomenon is collectively known as a WebRTC leak, as it exposes the user's personal information. Once an advertiser or web host knows a device's public Internet address, they can determine the region, city, and Internet service provider associated with that address.
If you don't need WebRTC, you may want to disable or restrict it in your browser. You can prevent a WebRTC leak in many modern browsers.
2. How to disable WebRTC in Firefox
Of all modern browsers, Firefox is the only one that allows you to completely disable WebRTC.
Step 1. Open Firefox, then type about: config where you would normally enter your web address and press Enter (or, on some other system, Return ).
Step 2. Click the I accept the risk button ! This gives you access to many Firefox configuration settings.
Step 3. In the search box at the top, type peer and press Enter.
Step 4. Double-click the media.peerconnection.enabled row . The row will display in bold, and the value will change to false , which indicates that peer connections are currently disabled.

Step 5. In the search box at the top, type media.navigator and press Enter.
Step 6. Double-click media.navigator.enabled row . The row will display in bold, and the value will change to false , indicating that device navigation is now disabled.

WebRTC will no longer work in Firefox on your device.
3. How to block WebRTC in Chrome, Firefox and Opera
You can block WebRTC with a browser extension, WebRTC Control. This extension is available to install in Chrome, Firefox and Opera.
Step 1. Open your browser and go to link here .
Step 2. Select an icon for your browser (eg Chrome, Firefox or Opera).
Step 3. You should now be on the WebRTC Control extension page for your browser. Click Add to Chrome, Add to Firefox or Add to Opera to add the corresponding extension to Chrome, Firefox or Opera.
Step 4. A prompt will be displayed for you to allow the extension to access data for all websites, as well as read and modify the privacy settings. Select Add (or Add extension ) if you agree.
Step 5. If you use Firefox or Opera, you may also need to click OK one more time, once the extension has been installed.
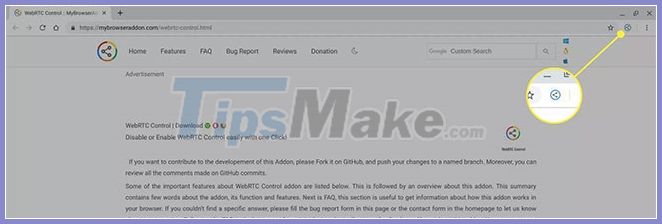
Step 6. The icon of the extension is displayed in the upper right part of the browser.

Step 7. When the circle is blue, WebRTC leak protection is enabled. Select the extension for state transitions.
4. How to block WebRTC in the new version of Microsoft Edge
Newer versions of Edge include a security feature that blocks local IP addresses over WebRTC. It's simple to activate and protect from most leaks without an extension.
Step 1. Open Edge.
Step 2. Type about: flags in the address bar and press Enter.
Step 3. Scroll down to find the Hide my local IP address over WebRTC connections option . Put a check mark in the box next to it.
Step 4. A message will appear asking you to restart your browser. Close Edge and reopen it. Rerun the browser leak test to make sure WebRTC is no longer leaking your IP.
Block WebRTC on Microsoft Edge with extensions
The new version of Microsoft Edge also supports Chrome extensions. Like Chrome, Firefox and Opera, the new version of Microsoft Edge is based on the open source Chromium code, which is why extensions work with all of them.
Step 1. Open a new version of Microsoft Edge and go to link here.
Step 2. Select the icon for Chrome, even if you are using the new version of Microsoft Edge.
Step 3. The prompt 'You can now add extensions from the Chrome Web Store to Microsoft Edge' will appear. Click Allow extensions from other stores .
Step 4. The system will display a message that the extensions from other stores have not been verified. Click Allow.
Step 5. Select Add to Chrome .
Step 6. A prompt will be displayed for you to allow the extension to access data for all websites, as well as read and modify privacy settings. Select Add extension , if you agree.
Step 7. The icon of the extension will appear in the upper right part of the browser. By default, the extension will be enabled and active after you install it.
You should read it
- ★ Chrome and Firefox can 'chat' with each other
- ★ Discovered seven extremely serious security holes in Google Chrome
- ★ Error on Chrome allows recording and video recording without users knowing
- ★ Mozilla officially launched Firefox 18
- ★ Summary of some simple ways to disable USB ports on Windows computers