What is Troubleshooting? How to use it on Windows from A to Z.
What is troubleshooting, and how to fix troubleshooting errors on Windows 10 and 11? Let's find out in detail here..
Troubleshooting has become an indispensable and incredibly useful tool in repairing and maintaining electronic devices such as laptops and PCs. So what is troubleshooting, and how do you fix troubleshooting errors on Windows 10 and 11? Let's explore this in the article below.
What is troubleshooting?
Troubleshooting is an important tool for finding and resolving problems in computer systems. Many tools support this process, helping users quickly address issues related to networking, audio, display, storage devices, and many other aspects.
These tools can automatically check for errors, saving users time. In addition, they provide useful information and troubleshooting solutions. This helps increase the reliability and performance of the computer system, while minimizing unexpected problems.
Troubleshooting helps resolve problems in computer systems.
How Troubleshooting works
Troubleshooting operates according to a basic process to identify and resolve problems. First, it begins by detecting the issue when the user selects from a list of common errors such as network connectivity, audio, or the latest operating system update.
Next, the tool gathers information about the system and devices, including operating parameters and error codes. Based on this information, Troubleshooting will analyze it to find the cause of the problem. Then, it suggests appropriate solutions such as changing system configuration, reinstalling software, or updating machine drivers.
If the user agrees with the solution, the tool will automatically perform the necessary repair steps, or guide the user through specific step-by-step instructions. After the repair is complete, the tool will re-check the system to ensure the problem has been fully resolved.
If the issue remains unresolved, users can provide feedback to help Troubleshooting improve in the future or seek further support. Through this process, Troubleshooting helps users quickly identify and effectively resolve computer problems.

How Troubleshooting works
What types of errors can troubleshooting handle?
During computer use, technical problems are inevitable. To resolve these issues, troubleshooting is always available to help find the problem more quickly.
Troubleshooting software issues may involve checking error codes, updating software, or reinstalling the operating system if necessary. For hardware, this process may involve checking components and replacing them as needed. If network problems arise, the tool will help check network configuration and identify connection errors.
Troubleshooting helps resolve technical issues.
Instructions for using Troubleshooting on Windows
After understanding what Troubleshooting is, let's learn how to fix Troubleshoot errors on Windows 10 and 11. Below, we'll guide you through the process in detail with illustrations. Follow the steps in order to use Troubleshooting effectively.
How to use Windows 10 Troubleshoot
Using Troubleshooting to fix Windows 10 errors is quite simple. Here are the detailed instructions:
Step 1: Open Search, type "Troubleshoot settings", and select this option.
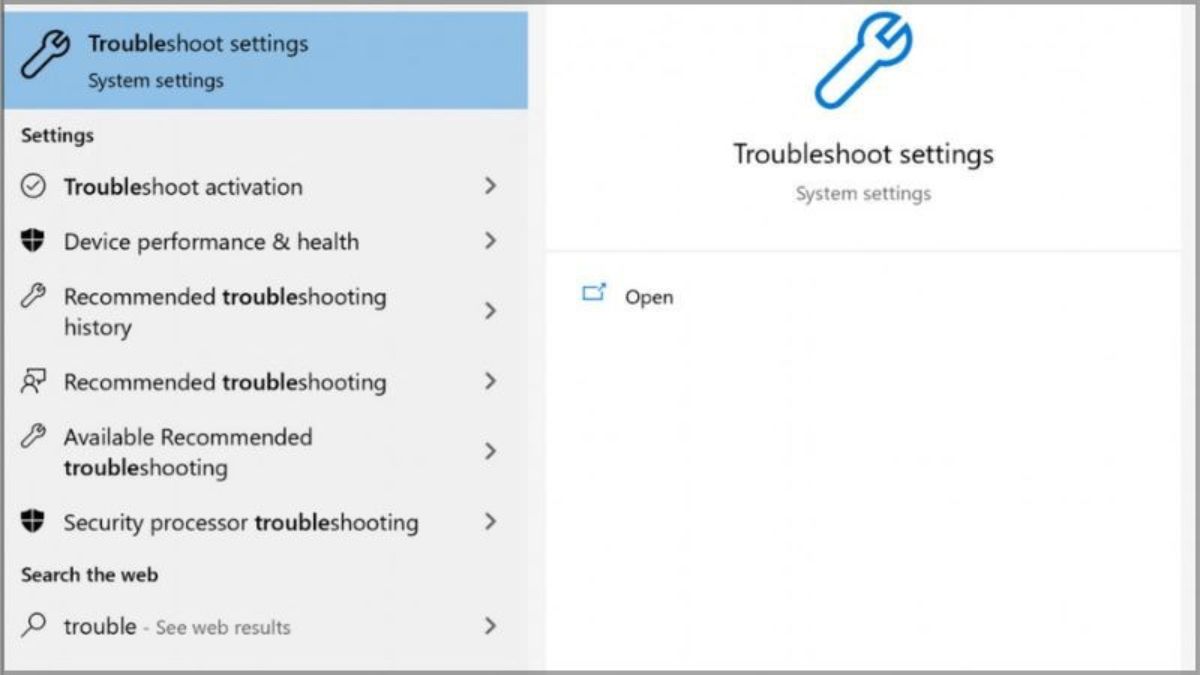
Enter Troubleshoot settings
Step 2: In the "Get up and running" section, select the option that best describes the problem the device is experiencing. Options include:
- Internet Connections: Related to network connectivity.
- Playing Audio: Sound problems.
- Printer: Printer error.
- Windows Update: Errors during Windows updates.
Step 3: Click on "Run the troubleshooter". Based on the device's problem, the troubleshooter will automatically fix the error, display instructions, or suggest skipping the fix.
Step 4: After the troubleshooter finishes, a new dialog box will appear with the link "View detailed information". Click on the link to see the errors that the system has automatically fixed.
How to use Windows 11 Troubleshooting
Similar to Windows 10, troubleshooting in Windows 11 involves the following steps:
Step 1: Press the Windows key + I to open Windows settings.
Step 2: Select "System".
Step 3: Select "Troubleshoot" on the left sidebar.
Step 4: In "Recommended troubleshooters," select the appropriate feature:
- Internet Connections: Troubleshooting network connections.
- Bluetooth: Troubleshooting Bluetooth connections.
- Power: Check and troubleshoot power-related issues.
- Program Compatibility Troubleshooter: Resolves program compatibility issues.
If your problem isn't on the list, select "Other troubleshooters" to find the right tool, then click "Run the troubleshooter".
Step 5: You need to follow the next instructions to fix the error.
What should I do when troubleshooting doesn't detect any errors?
If the problem persists after using Troubleshooting, you can provide feedback in the "Give feedback on this troubleshooter" section. Alternatively, you should seek online support for more effective and quick solutions to your issue.
However, if the problem persists, taking your computer to the nearest repair center is the last resort. This is especially important if you're not tech-savvy, as attempting repairs yourself at home could damage your computer. You should choose a reputable repair shop to ensure your computer is repaired safely and effectively.
Additionally, you can also check out some other laptop products with smooth configurations and operating systems at:
Through the above article, you have surely found the answer to the question "What is Troubleshooting?", as well as learned how to fix Troubleshoot errors on Windows 10 and 11. Hopefully, with this information, you will be able to fix errors quickly and effectively.