Ways to fix VLC Media Player not playing videos
VLC Media Player is a popular media player that can play many video and audio formats. But sometimes, it encounters unexpected problems, and not playing video is one of the problems many users face.
While it may take some time, it will be quicker to resolve this than downloading and setting up a new media player. If you are facing the same problem, continue reading this article to know some ways to fix VLC Media Player error not playing videos on Windows computers.
Check file format
VLC Media Player is compatible with many but not all video formats. If trying to play an unsupported video format on VLC, it will show a black screen or an error message.
People can visit the official VLC features website to learn about the different file formats it supports.
If VLC doesn't support your chosen video format, you can use an online video converter to turn it into the right format.
Turn off Hardware Acceleration on VLC
VLC comes with hardware acceleration that speeds up the encoding and decoding of certain types of videos. However, it can cause compatibility issues on some computers, especially those with faulty hardware drivers.
So if having trouble playing videos in VLC, disabling hardware acceleration can be a good solution. To turn off this feature, follow these steps:
- Open VLC Media Player.
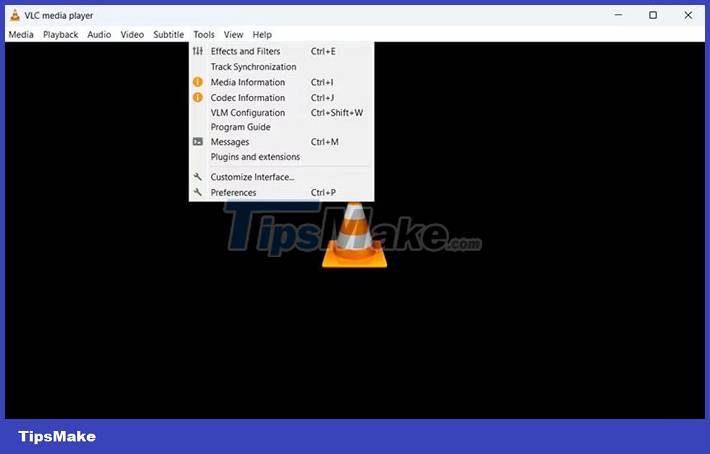
- Click Tools and select Preferences or press the keyboard shortcut Ctrl + P to open the VLC Preferences window.

- Switch to the Input/Codes tab .

- In the Codecs section , click the drop-down arrow next to Hardware-accelerated decoding and select Disable . Finally, press the Save button .
- Now, launch VLC Media Player and check if any video can be played.
Select DirectX (DirectDraw) as default video output
By default, VLC keeps the OpenGL video output mode for Windows. But sometimes, this output mode may not play certain types of videos. The solution for this situation is to set the output mode to DirectX (DirectDraw) with the following steps:
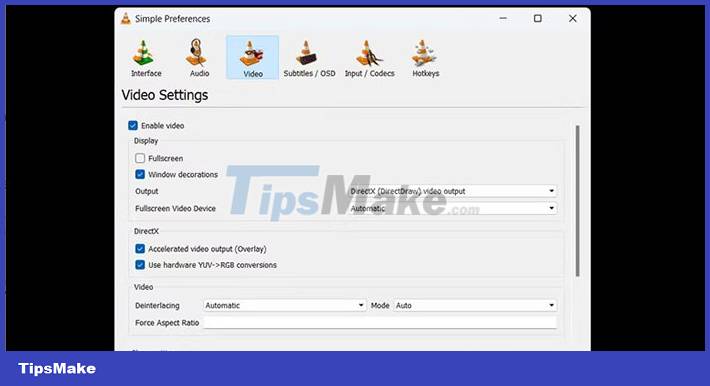
- Open the Preferences window and switch to the Video tab .

- Click the drop-down icon next to Output and select DirectX (DirectDraw) Video Output Mode .

- Click on the box Accelerated video output (Overlay) and Use hardware YUV -> RGB conversions .
- Click Save .
Reset VLC Preferences
The Preferences file stores all the important settings for VLC. If it has crashed for some reason, VLC will start to behave abnormally. It may not play the video or certain operations may not work as expected.

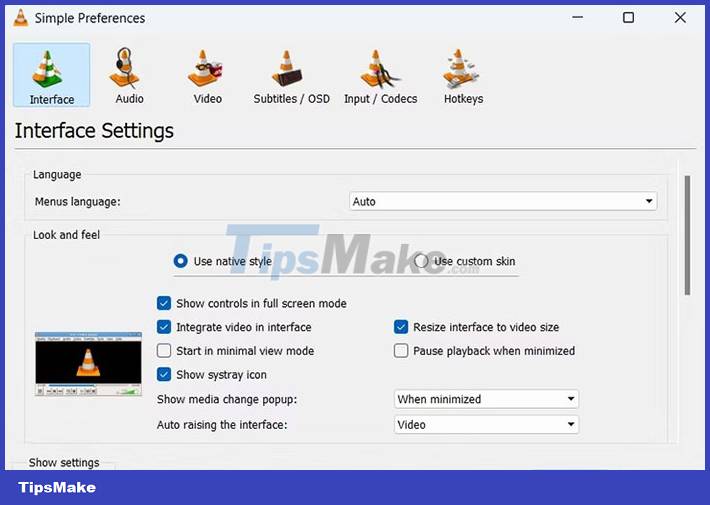
Fortunately, users can quickly bring VLC back to its original state by resetting Preferences. To do this, open the Preferences window and click Reset Preferences at the bottom of the screen. Confirm your choice by clicking the OK button when the prompt appears.
Next, restart VLC Media Player and check if the video can be played or not.