Use chat services for remote access
In this article we will show you how to use iChat or Skype to access or control another Mac..
Network Administration - In this article we will show you how to use iChat or Skype to access or control another Mac .
When you need remote access to a computer among your Macs, there are many tools that come with OS X as well as specialized software and services that help with this work.
However, sometimes users need to quickly and easily access someone's Mac - be it a friend, a colleague, or a family member, perhaps - you want to share your screen. I am with them. Two of the most widely used chat tools for Mac - iChat and Skype - will allow you to do this.
iChat
The advantage of iChat on remote access options is that it can work between any two Macs, as long as both run Mac OS X 10.5 or 10.6. This makes it really good at helping family members troubleshoot.
iChat relies on the same screen sharing technique as Back to My Mac . However, iChat offers less control than BtMM. In addition, it requires the user to be on the other end of the connection; not BtMM. In addition to the name disadvantages: You cannot share or observe the screen in iChat if the partner is using OS X version prior to 10.5; it also does not allow managing multiple monitors as well as some other solutions; you cannot copy and paste between computers; It may not work unless both terminals can access an IP address.
Set up . If you are going to connect to another Mac that has all the requirements, sharing the screen via iChat is a straightforward way: In Leopard or Snow Leopard, log in to iChat. If you can share the screen with someone, confirm that the Video option -> Screen Sharing Enabled is checked; If you just want to see someone's screen, make sure the partner with that option is selected. (If there is no built-in iSight camera or inside your Mac, that menu will be labeled with Audio title).
You can start sharing the chat screen with your friends via an account in your account list (Bonjour, AIM, Jabber) or with someone not in it. There are three ways to connect to an existing friend of yours:
- Control-click on the person's name and select Share My Screen with buddy name or Ask to Share buddy name 's Screen;
- Select a name from the list, click the Screen Sharing icon at the bottom of the iChat window, then select the appropriate option; or
- Select the name in the list, select the screen sharing option from the Buddies menu.
To chat with someone who is not on your buddy list, select File -> New Chat (or press Command-N ), select Share My Screen or Share Buddy's Screen from Type, then enter the screen name of the person there. Mac OS X will alert the person that someone is not on his list or she is trying to initiate a session.
Anyone you try to share the screen with will get a request to let you see his screen (or ask if he likes to watch your screen).
When starting a session, the remote desktop will take control of your screen; Your own desktop will shrink into a small screen. Click that small window, your desktop and the remote desktop will exchange locations. If there are multiple screens, you can drag the remote window that has been minimized into it; then the remote viewing session will display on that window.
Screen sharing of iChat will launch an audio chat connection at the same time. Both partners can switch pointers or types.
In iChat, you cannot drag or control the view of the remote system. This is a problem when the remote computer has two or more screens. IChat's screen sharing display will show all remote screens on a local display, dividing them into multiple tiny screens.
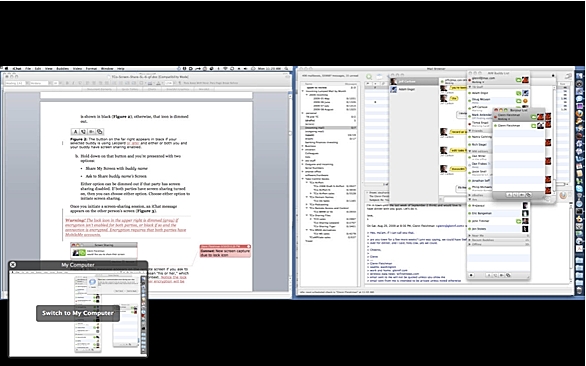
iChat puts two remote screens into a local window
In addition, all of the Screen Sharing program commands that you can run using Back to My Mac will be disabled: no copy, paste, no adequate conversion / quality, nor can size again.
Troubleshooting . iChat screen-sharing is relatively simple to set up on the Mac, it requires certain ports to be opened on the connection side. That means that at least one partner needs to have an Apple router with NAT-PMP enabled or another company's router with UPnP enabled, as well as an accessible IP address.
Skype
Skype also offers a useful but minimalistic screen sharing option. You can compare all or part of the screen with someone; Other partners can see but cannot control it. This is extremely useful for troubleshooting and demonstration.
The advantage of this method is that you can reach any Skype user; along with other things, it means that it can work between computers running Mac OS X and Windows. And Skype gives you an option to choose which part of the screen the sharer can see.
On the downside, Skype does not allow you to control a remote system, you cannot share multiple screens at the same time and cannot share one screen with multiple partners.
Set up . Before you start, you need a Skype account (free registration) and Skype client (also free). You must have a higher version 2.8 or a version to share the screen; If the system on the other end is using an older version, it may still be able to observe your screen.
After logging in, select a contact in your main Skype window. Then initiate a call or a chat window and select an option from the Share menu, or select Call -> Share Screen , then the option you want to select.
You have the option to share the full screen, choose from a screen, or one of your screens (if there are multiple screens). Choosing to share a screen option will reduce bandwidth and keep other parts of the screen that you don't want to share to be blocked.