The easiest way to start digital painting
It may seem overwhelming to get started and create beautiful results, but with these tips, you'll find the easiest way to get started and create stunning digital paintings.
Table of Contents
Choose a digital drawing app
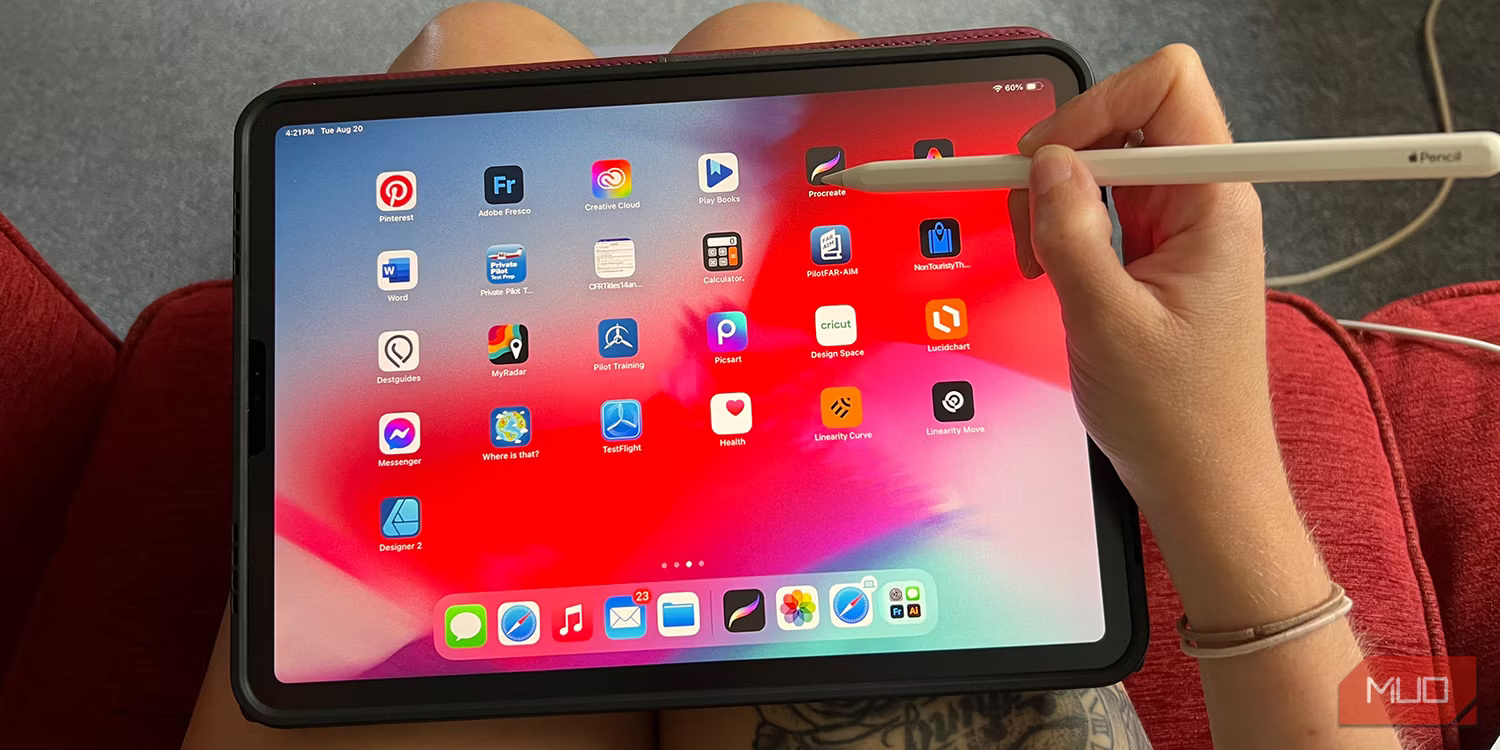
There are many iPad apps to help improve your drawing skills, and most of them are also great options for digital drawing. Procreate has an easy-to-navigate user interface. This app is designed for use exclusively on iPad and with Apple Pencil.
Adobe Fresco can be used as an alternative to Procreate - Fresco offers vector drawing and live painting options for new textures in your digital painting process, but the interface is more complex than Procreate. If you're new to digital drawing, this is a great time to explore different application options.
Before you start painting digitally, decide whether you want to print your artwork or keep it digital - you'll need to set your Procreate canvas to the correct color settings before starting. The process is the same for other apps, although some apps may let you switch color profiles midstream. Procreate does not.
Find reference images
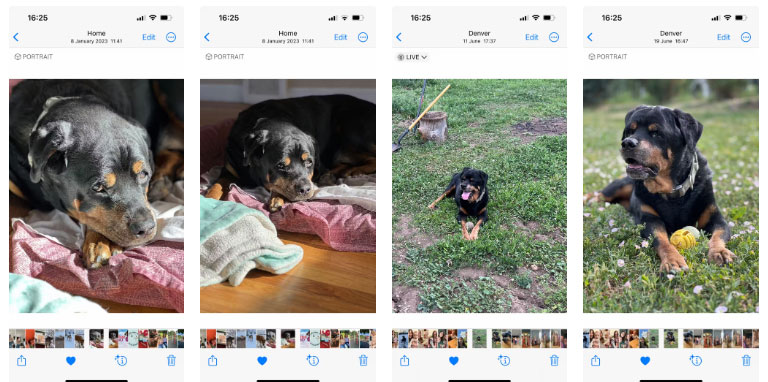
A general rule of thumb is to find or shoot an image with a large depth of field instead of a shallow depth of field to keep the subject more in focus. Depending on the color of the subject you choose, high-contrast images will usually yield the best results.
If you're drawing a person or animal that means something to you, find an image that depicts the subject's uniqueness - such as specific markings on the pet, a characteristic facial expression, or just plain simply an image that depicts them in a recognizable way.
Import reference images
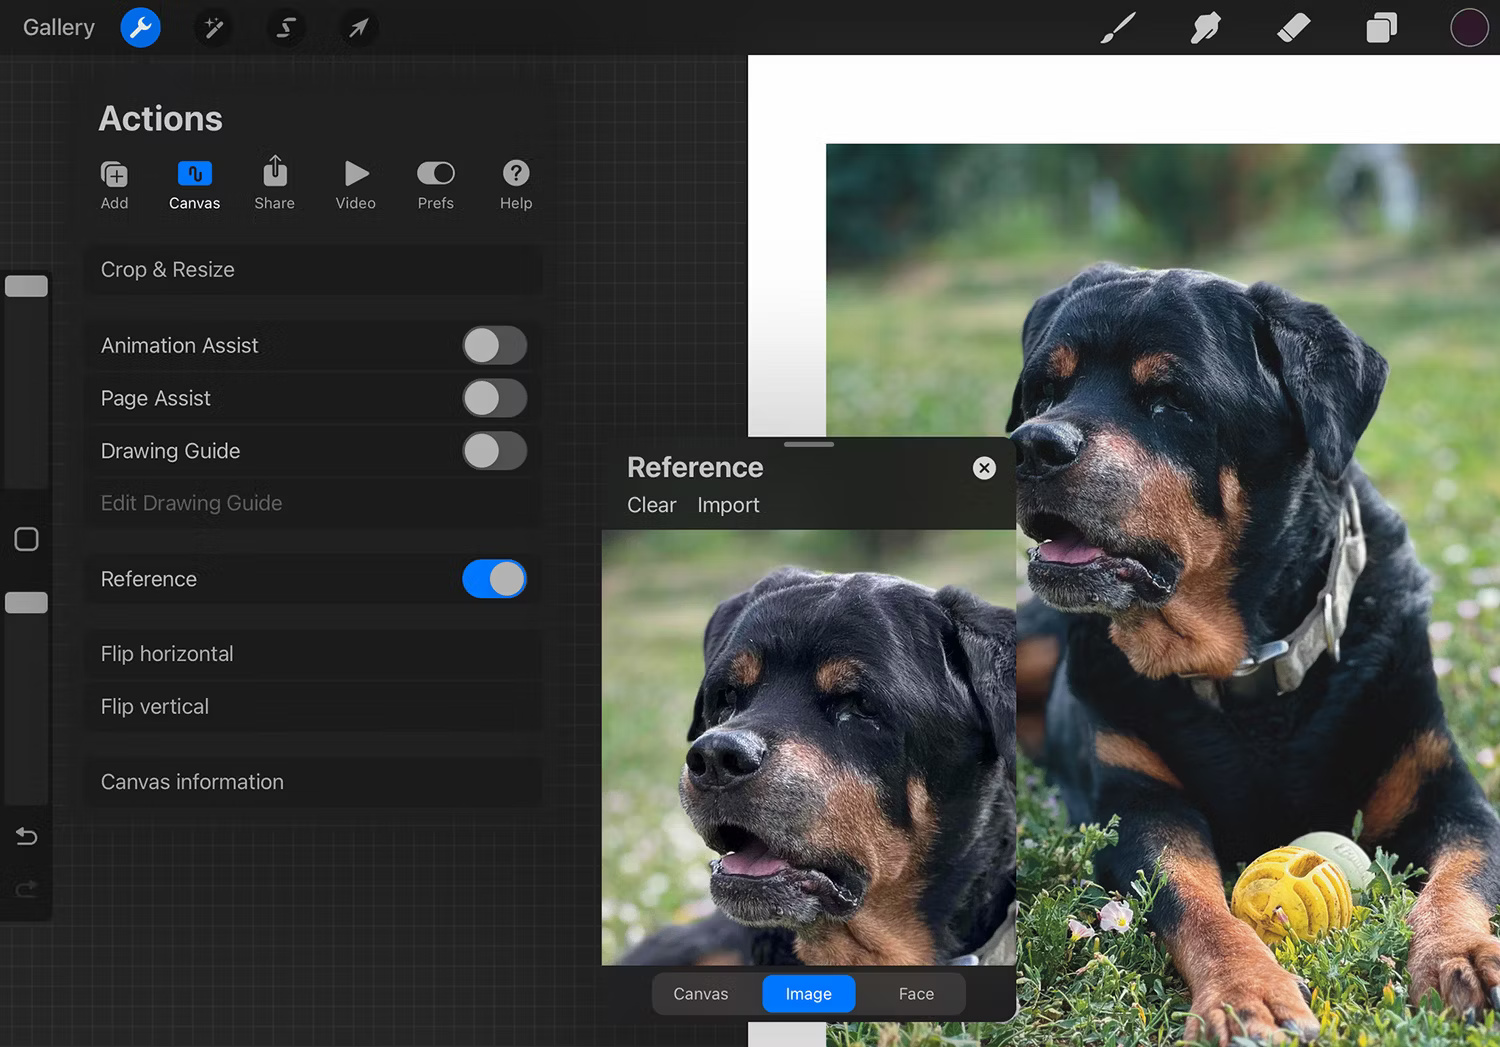
Upload the reference image or composition of your choice as a new layer in the drawing application and move it to the background layer. This serves as a constant reference throughout your drawing exercise, which can be viewed or hidden at any time.
In Procreate, you can set up a floating reference image that has the ability to zoom in and out, move the canvas, and preserve color and opacity for reference. Set up a reference image by clicking Actions (wrench) > Canvas and turning on Reference. Then, select Image to upload the image. You can resize and move the reference window as you like.
Sketch the image
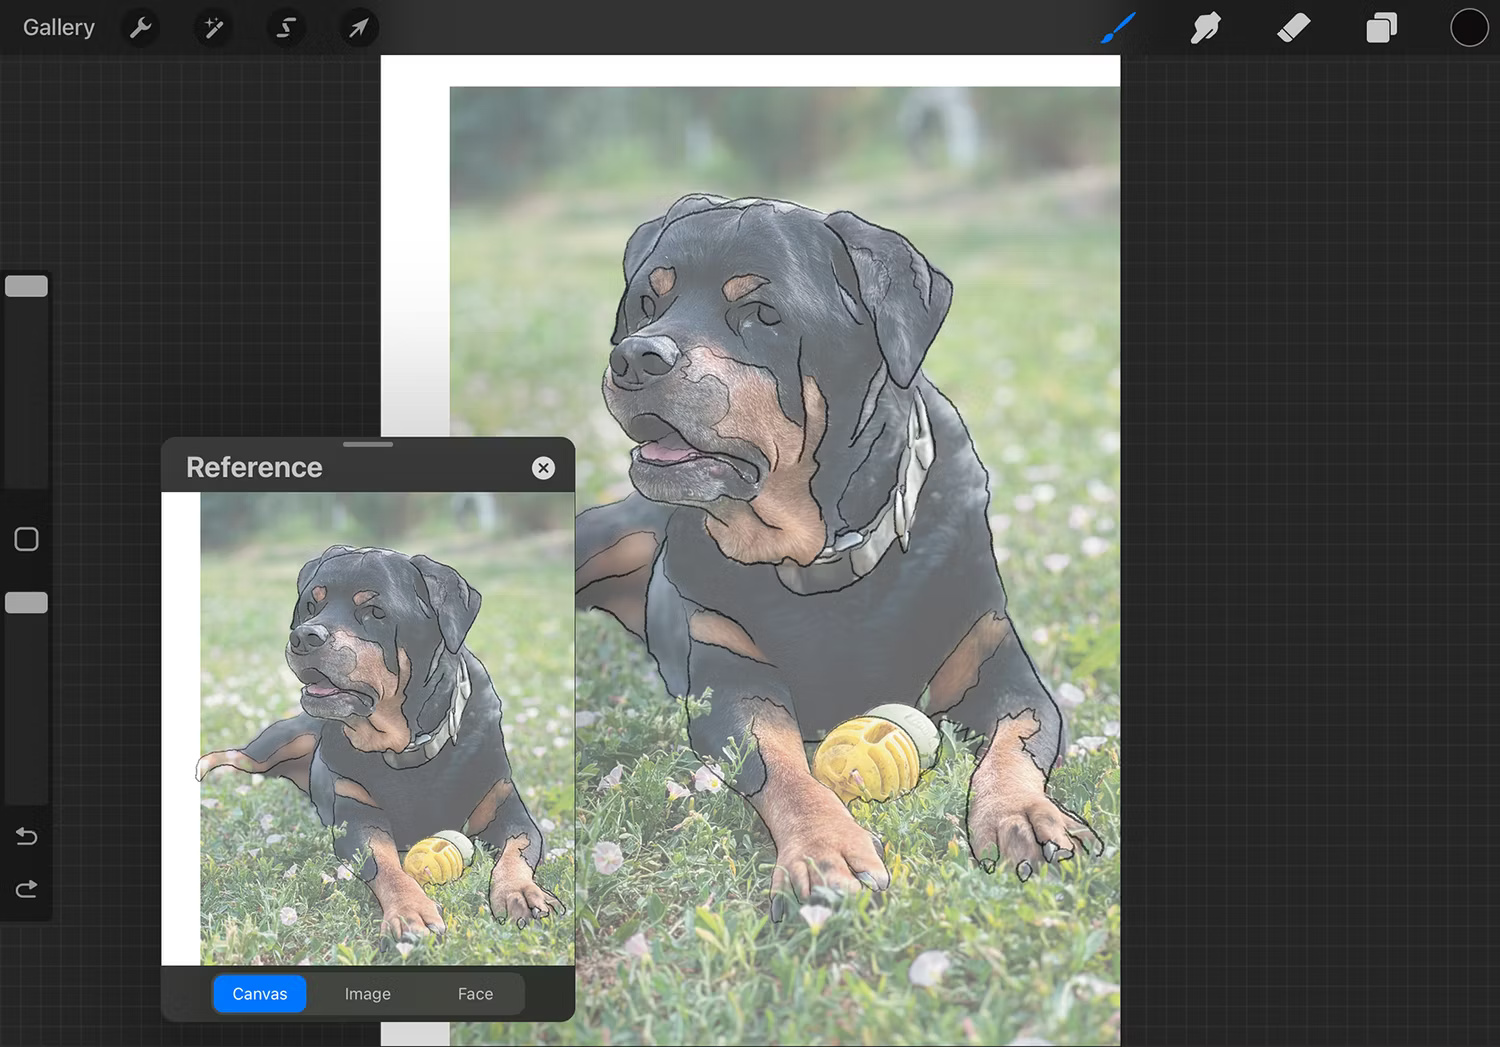
All good paintings start with a light sketch. You can keep your rough drawing in a separate layer and delete it when the painting is complete.
This may be a controversial step for some artists, but you, or especially new digital artists, should draw directly onto your reference image. If you don't want to draw directly on the reference image, you can also implement a grid system on both the reference image and canvas, or just draw a rough sketch by visual reference - all of which are options. valid choice and depends on personal preference.
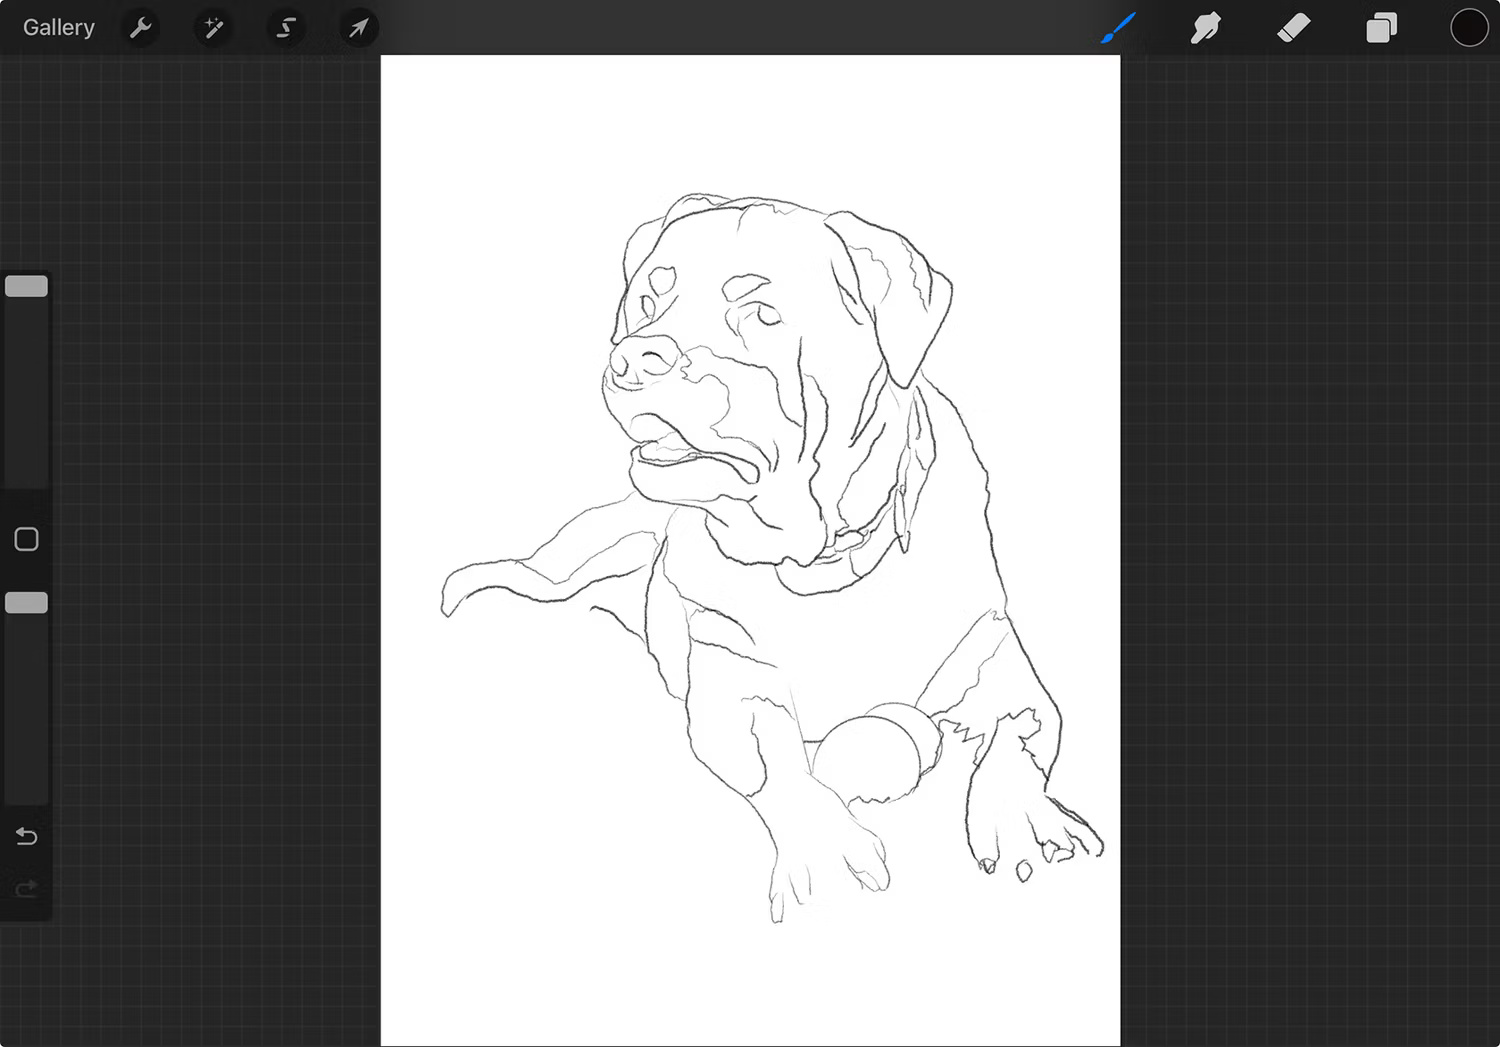
Once you've completed your sketch, you can turn off the visibility of your reference layer. Then start drawing in the sketch, using the reference layer only when you need to check more precisely.
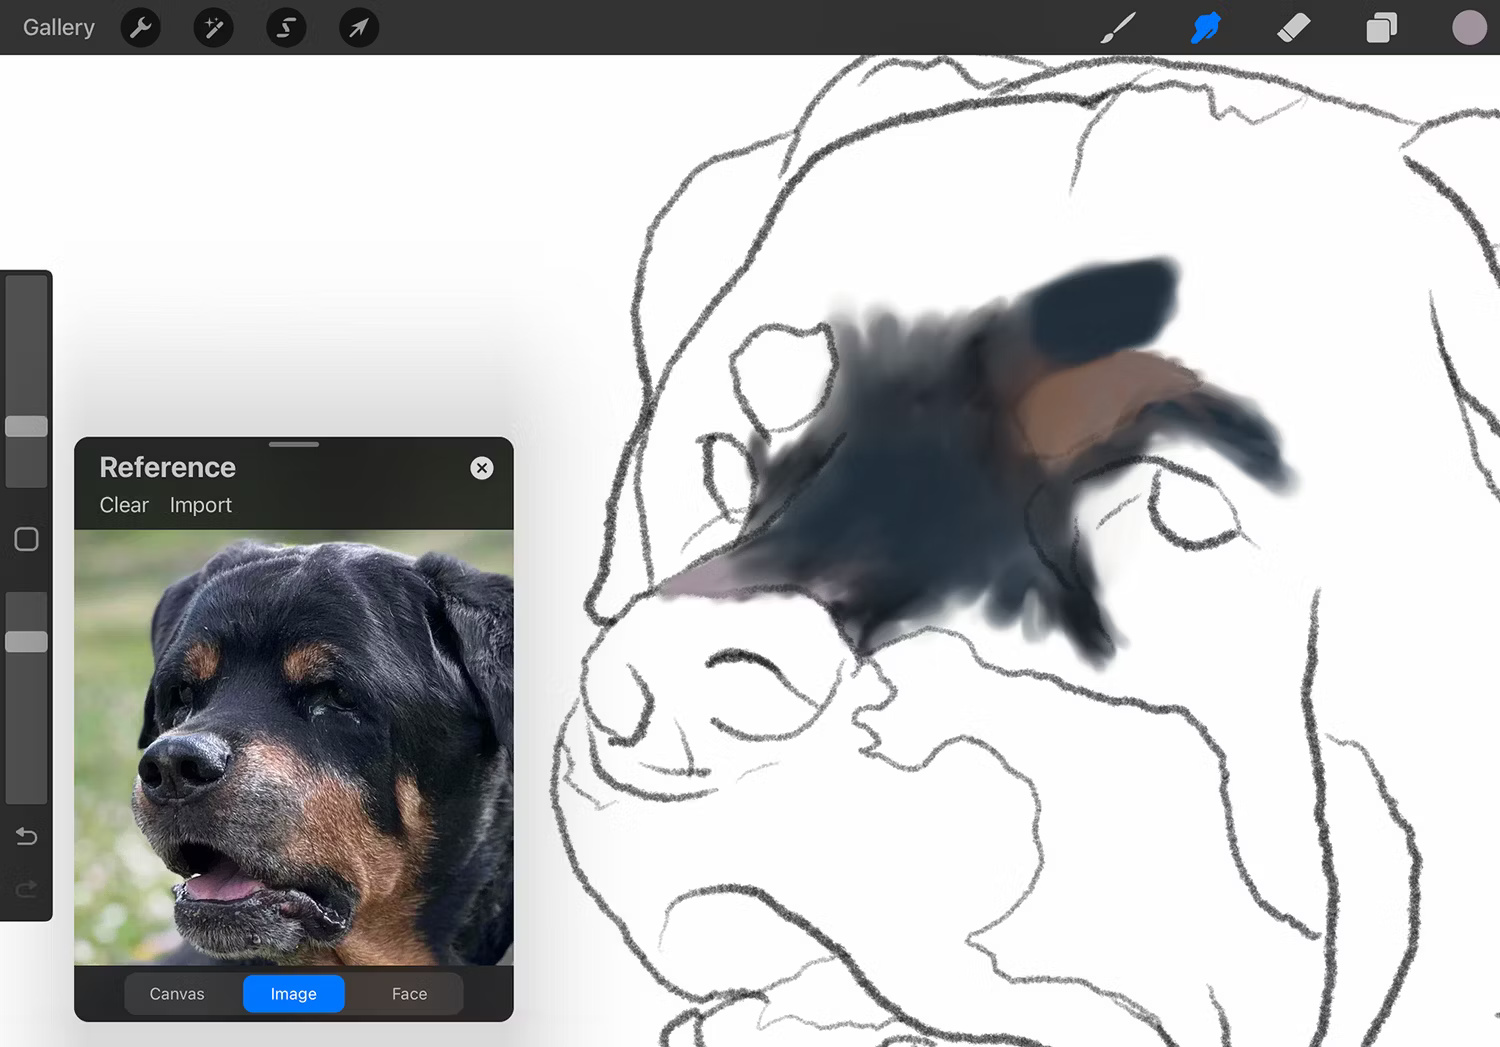
Choose a digital brush and start drawing
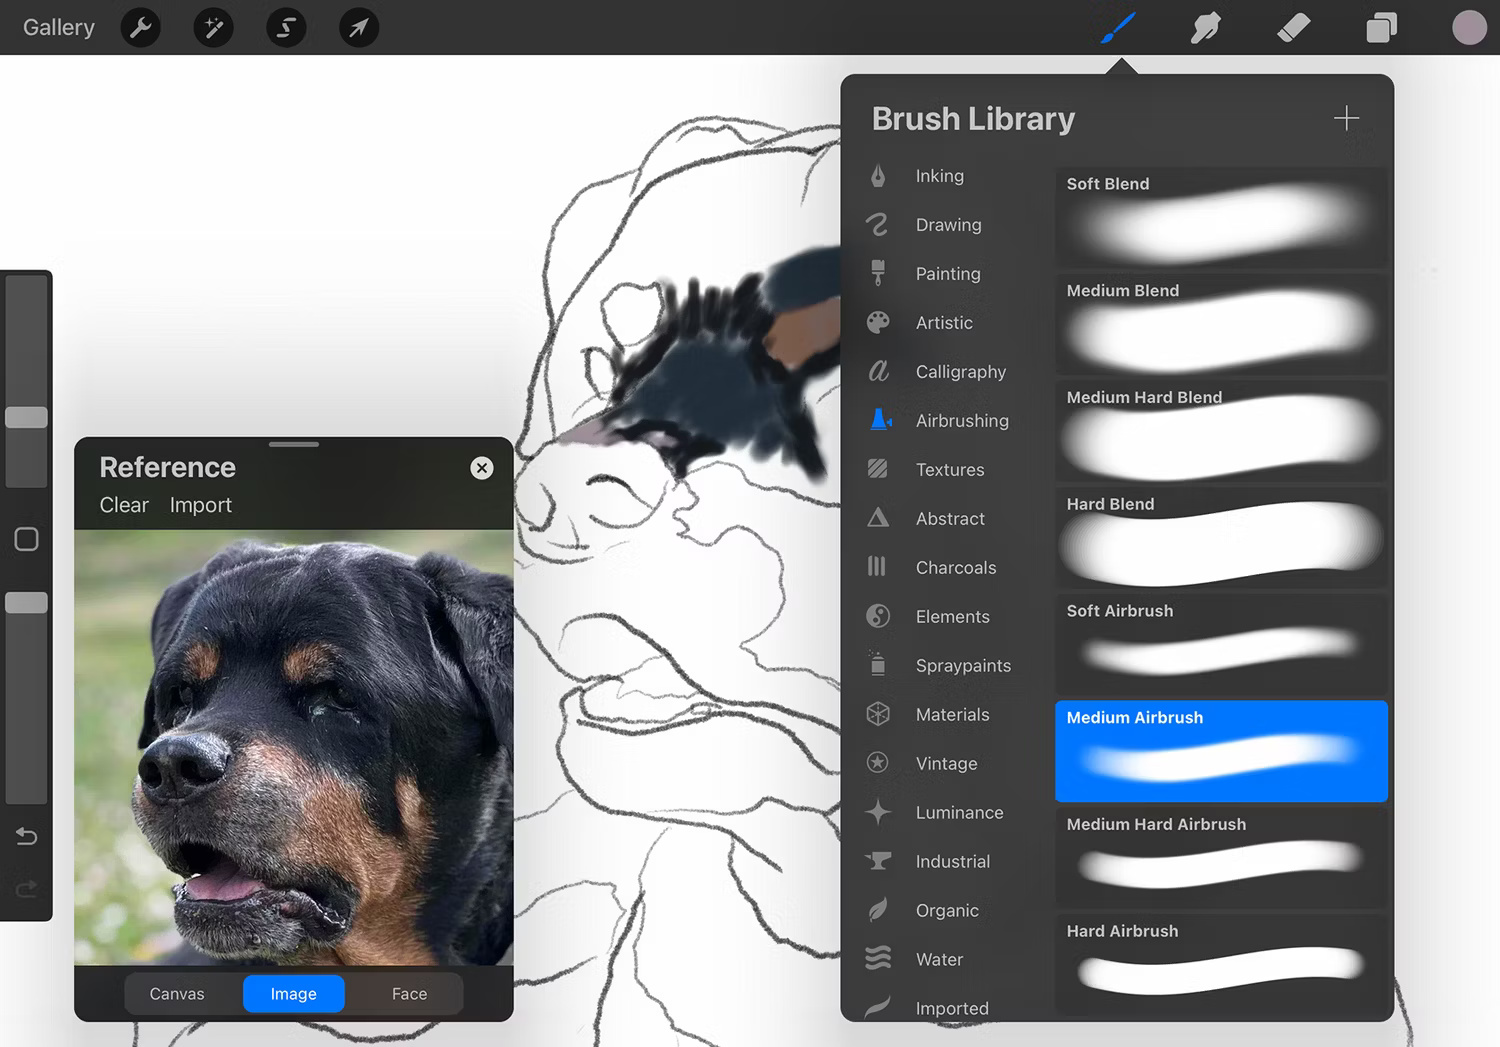
Procreate's brush library has tons of options for brushes with different textures and uses. You can also download some great Procreate brushes from third-party sites. However, you don't need anything special to create an authentic digital drawing look.
After initially using Procreate for digital illustration, learning how to draw was a new experience. The Medium Airbrush in Procreate's Airbrushing library is perfect for painting.
Use a variety of sizes to paint digitally, as well as a variety of opacity for multi-layered results. You can use Color Picker to get colors from reference images or find your own colors in the Colors tab . Feel free to do all of your painting on one layer - above the reference and outline layers - or use the layers further by keeping each color or image element on its own layer.
Color mixing
Procreate's Smudge tool is a good tool to use before starting to draw digitally. After creating the stroke, click on the Smudge tool and choose the same brush to blend. Change the size, opacity and Smudge brush, giving you more control over how your colors blend.
Add subtle details
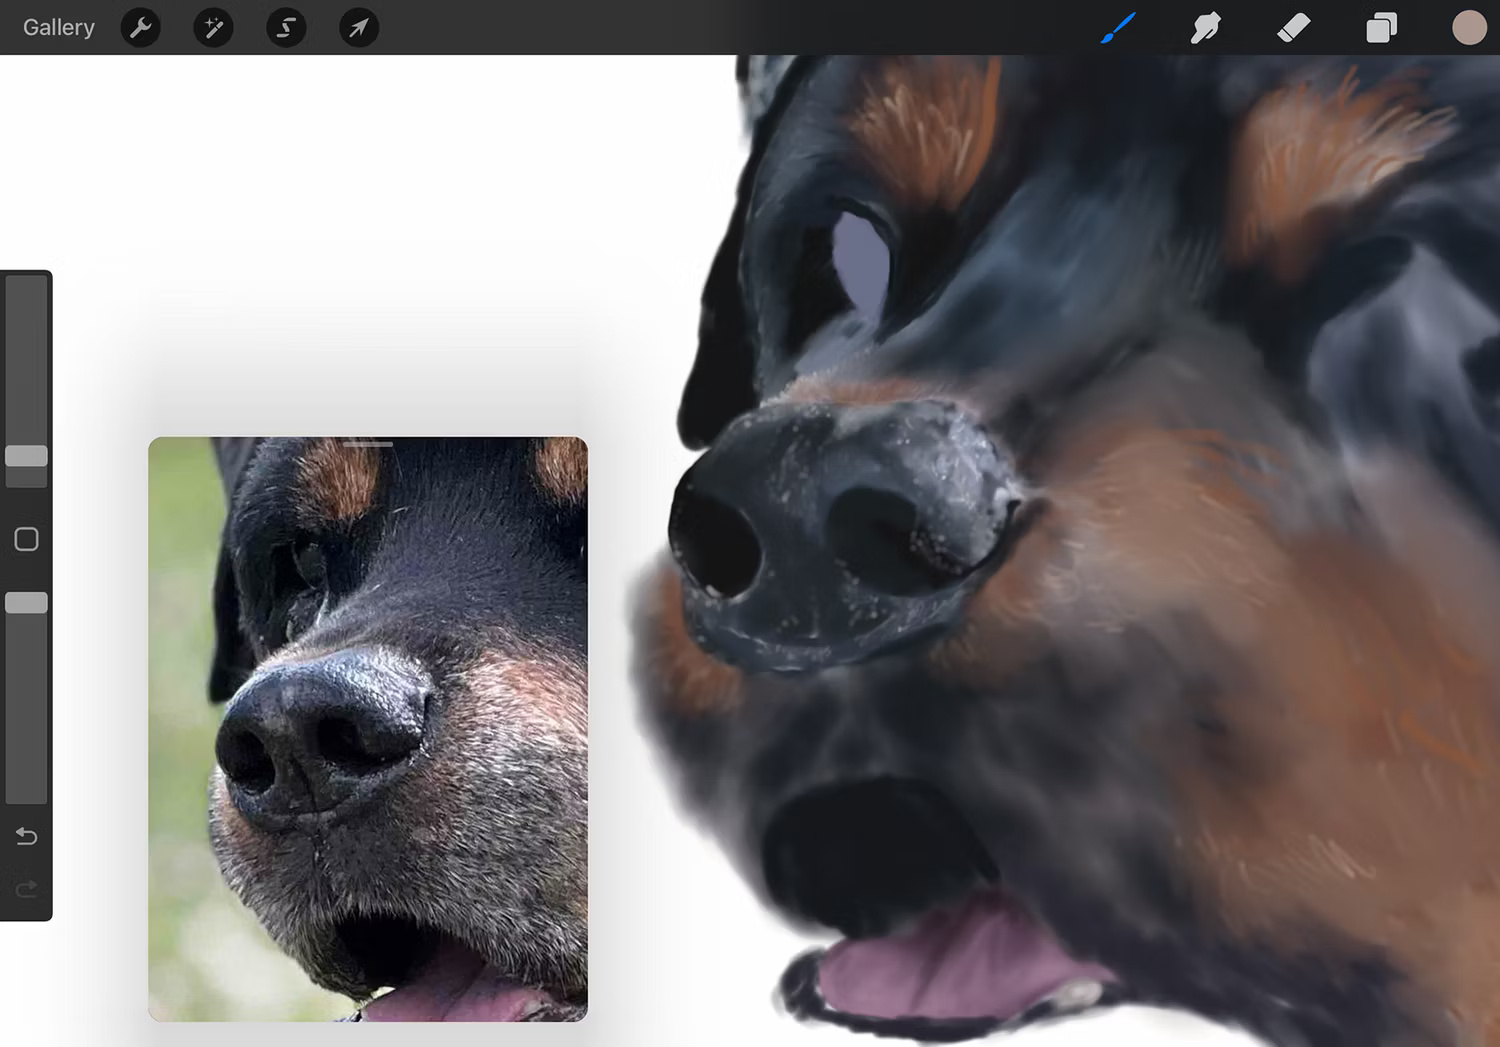
As with most drawing styles, the background is often blurred and less subtle. Once you've completed the background, you should add any subtle or precise details to complete your painting.
Choose a brush that is more precise than the one you are using; you can also continue to use the Medium Airbrush at a much smaller size. Draw delicate details like feathers or strands of hair, eyelashes, or spots that reflect light on shiny areas like eyeballs.
Tip : If you're painting large areas of fur or hair, using one of the hair brushes in Procreate's Materials library is a good choice, such as the Short Hair or Fine Hair brush.
Complete the digital painting
While an artist's work is never truly finished, there are some things you can do to bring your digital painting to the point where it can be considered "finished."
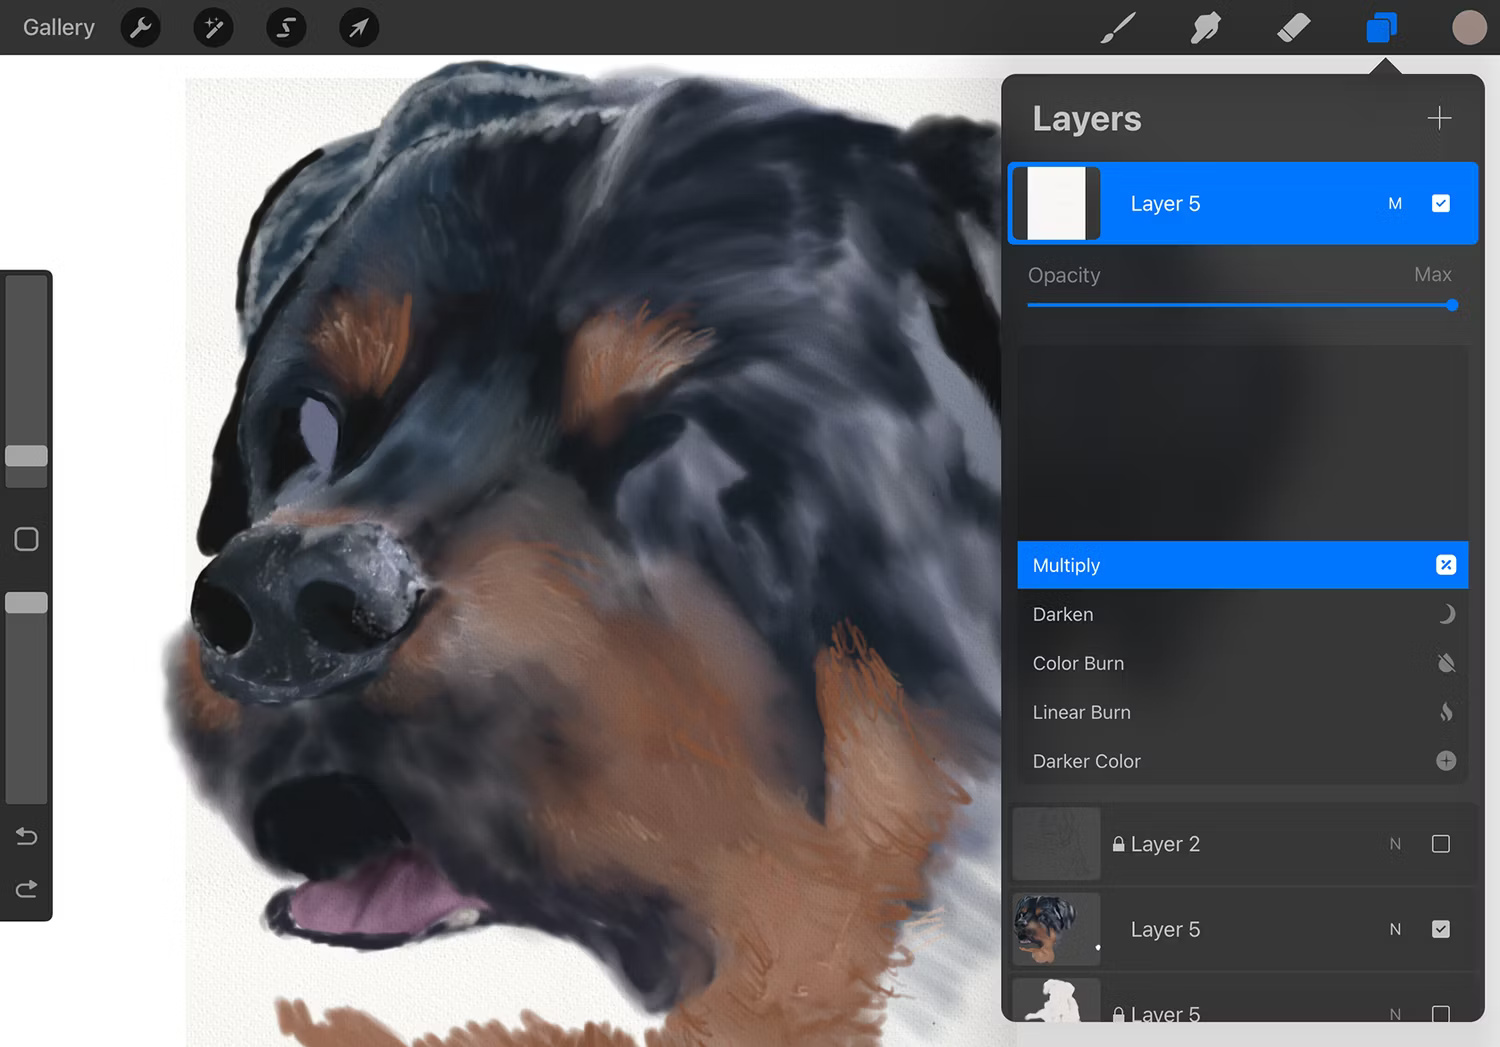
First, you can add a paper or canvas-like texture to your digital work. This is a great choice if you're creating an RGB piece that will be viewed digitally in the final product. Add the paper texture to a new layer, then choose Multiply from the blending modes. The result is a delicate texture.
Once finished, don't forget to add your signature to your Procreate artwork before sharing or printing the painting.
Was this article helpful?
Your feedback helps us improve.
Related Articles
 What is FireAlpaca? What can you do with this tool?6 minutes read
 A guide on how to paint your house yourself, following the correct procedure and standards.13 minutes read
 How to Sign a Painting6 minutes read
 Things to know about Light Painting techniques in photography5 minutes read
 How to Make a Limited Palette in PD Howler2 minutes read
 Instructions for using Wechat to draw detailed AI pictures4 minutes read
Reader Comments 0
Sign in with email or Google to join the discussion.