Things to know about Light Painting techniques in photography
Light Painting is a technique that uses a portable light source to add light to a dimly lit subject when taking long exposure shots. Some scenes or objects can be highlighted with a light source.
Table of Contents
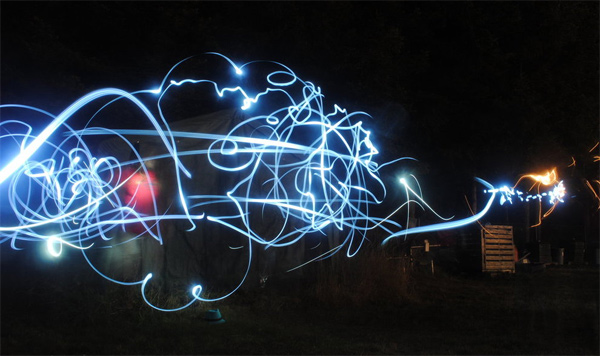
Light Painting is a photographic technique when the camera records other light sources such as flashlights, LEDs, . and is painted on a dark background. Images after shooting will create unique light strokes and unique. Although this is not a new technique, many people still do not understand this Light Painting technique.
1. What is Light Painting technique?
Light Painting is a photography technique taken with a long exposure time of the camera to light sources (flashlights, LEDs, glowing objects .) painted in dark space. Therefore the drawings must be done during the exposure time of the machine to be captured in that frame.

This photography technique relies on the contrast between light and dark environment so it can be created very richly depending on the photographer and create impressive, fanciful, focused images when looking at.
There are two types:
- One is that shooting with a light source is a moving object (light brush) while the camera is fixed - this is a normal form when it comes to Light Painting technology.
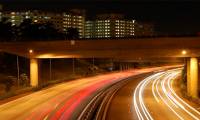
- Second, the camera will be moved while the light source is fixed. This form is suitable for capturing fixed light sources such as streetlights or light from the moon, stars.
2. Equipment for taking photos Light Painting:
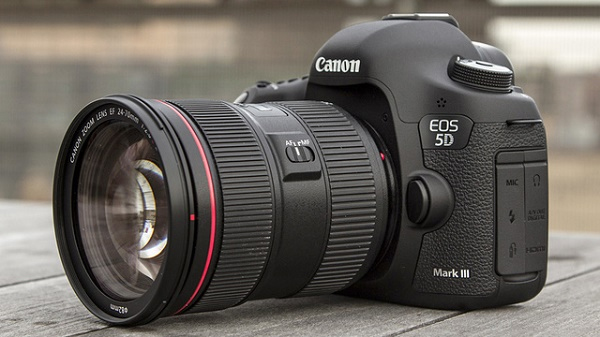
- A DSLR camera for adjusting shutter speed or shooting Bulb mode.
- Tripod: to help the device stay in a fixed state to avoid blur when exposure for a long time of up to 30 seconds or more.
- Light-emitting device: to draw and shape with light. It could be a flashlight, LED or glowing glow bar.
3. Set the camera to capture Light Painting:
- Image format: RAW (best for editing with support tools).
- Focus: try to lock focus or adjust manually. It is possible to use a spotlight on the drawing point and focus and lock it again.
- Manual shooting mode to customize the settings for speed, aperture or Bulb mode: the shutter is closed depending on the press of your shutter button.
- ISO: lowest possible to limit noise.
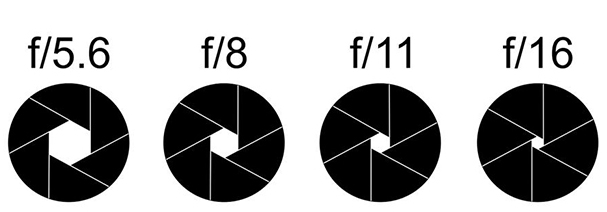
- Aperture of 5.6 or more to ensure the depth of field.
- Shutter speeds of 60 seconds or less to ensure a long exposure time.
4. Beautiful Light Painting techniques:
- Take a picture in advance to check the frame, review the overall background.
- Set the camera with ISO parameters and low shutter speed, close the aperture to achieve depth of field and less noise.
- Creative thinking and ideas help you create beautiful works
- The photographer needs to define the layout in the image to make sure the strokes are in the frame. Focusing in the middle of the frame where the image to be displayed is displayed, a flashlight can be used to illuminate a point in that area to focus with manual focus mode (MF - Manual Focus).
- The photographer signaled that the drawing began to draw so that the operations had to take place and ended during the shutter opening and closing.
- Should be taken in the evening or where there is a dark space, simple background, the same color. If shooting outside, it is necessary to avoid places like streets with lots of moving light that will create blur spots on the image.
- The lighting operator (pictured) should wear a dark outfit so that it is not visible in the picture after shooting, making post-processing (when needed) simpler.
- The person drawing the picture needs to stand in the frame, behind the light in the hand and perform the drawing to calculate the appropriate time of the picture.
- Drawers try to move smoothly, fast enough for the light to be created evenly and less captured by themselves in the photo.
Refer to the following articles:
- 10 simple photography techniques for impressive photos
- 9 basic rules of composition in photography
- 9 tips to create a "glitter" selfie photo
Hope this article is useful to you!
Was this article helpful?
Your feedback helps us improve.
Related Articles
 Night photography techniques for beginners5 minutes read
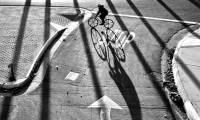 Photographic tips that cast shadows in photography7 minutes read
 5 types of photos ideal for those who like to travel5 minutes read
 5 'very toxic' tips help improve photography skills in just 1 minute2 minutes read
 7 camera settings for low-light photography7 minutes read
 The harsh truths in photography5 minutes read
Reader Comments 0
Sign in with email or Google to join the discussion.