1. Close Unnecessary Tabs
When you open too many Chrome tabs, the browser "discards" inactive tabs. This will release them from physical memory to free up RAM for active tabs. To give Chrome more memory resources, try closing all the tabs you don't need and see if that helps.
You can bookmark necessary tabs for later use. And if you have bookmarked many of them, you can use the bookmark organizer extension to manage and find them more easily.
2. Restart Google Chrome
If the tabs still reload automatically even though you don't have many tabs open, it may be a temporary error. Restarting Chrome may help fix this problem.
So close Chrome, but before restarting, open Task Manager on Windows or Activity Monitor on macOS and close any background processes the browser is still running.
If that doesn't work, you should update Chrome (in case Google has fixed the bug and improved performance) and then restart. Chrome will automatically update if an update is available. Then, click Relaunch on the About Chrome screen to restart the browser. Hopefully, that will fix the problem.
3. Check Out Google Chrome Extensions
While extensions enhance the browsing experience on Google, some extensions can affect Chrome's tab management. There are also some extensions that use a lot of RAM. All of these can cause Chrome to automatically refresh some tabs.
To fix it, try closing all extensions. You can use the built-in Task Manager to find the culprit. To access, click the three-dot icon in the upper right corner of the screen and select More Tools > Task Manager .

In Task Manager, select the extension you suspect is interfering with Chrome or consuming too much RAM and click End process .

You can also try turning each extension on and off to identify the problematic one. To do that, click the three-dot icon in the upper right corner and select Extensions > Manage Extensions .

To enable the extension, click the toggle button in the bottom right corner of the card (it turns blue when enabled). Once you're sure the extension isn't causing the problem, click the toggle again to disable the extension.

This can be time consuming if you have a lot of extensions, but it is likely to fix the problem.
4. Use a Tab Management Extension
If your system has enough resources, you can install the Tab Auto Refresh extension and let it manage your tabs. Tab Auto Refresh allows you to set the exact time the extension will reload the tab. This can help stop certain tabs from reloading for long periods of time, or reloading every few seconds if you're waiting for an update or big announcement.
To do that, open the extension on the tab you want it to manage. Then, select or enter the time you want Tab Auto Refresh to reload the tab and click Apply .
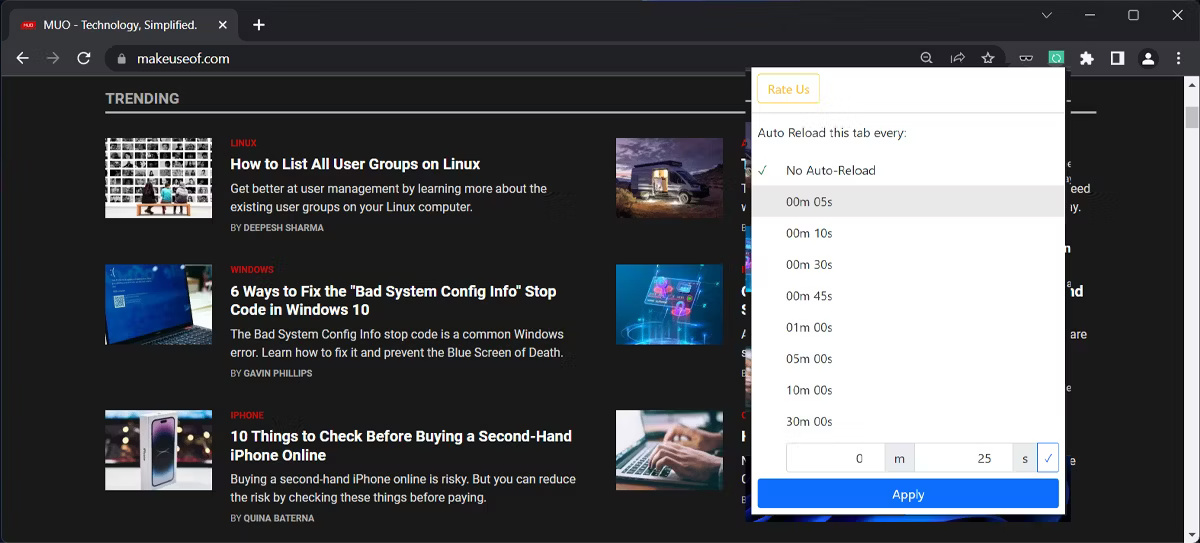
- (Free of charge)
5. Turn Off the Automatic Tab Cancellation Feature
If you believe your system has enough resources but don't want to install another extension, you can try turning off automatic tab destruction. This will prevent Chrome from automatically reloading tabs.
To do this, enter chrome://discards in the address bar and press the Enter key to see the table of active tabs. By default, each tab will have a check mark in the Auto Discardable column. To turn off auto-unfreeze for a specific tab, click the Toggle link below the check mark (it will become an X).
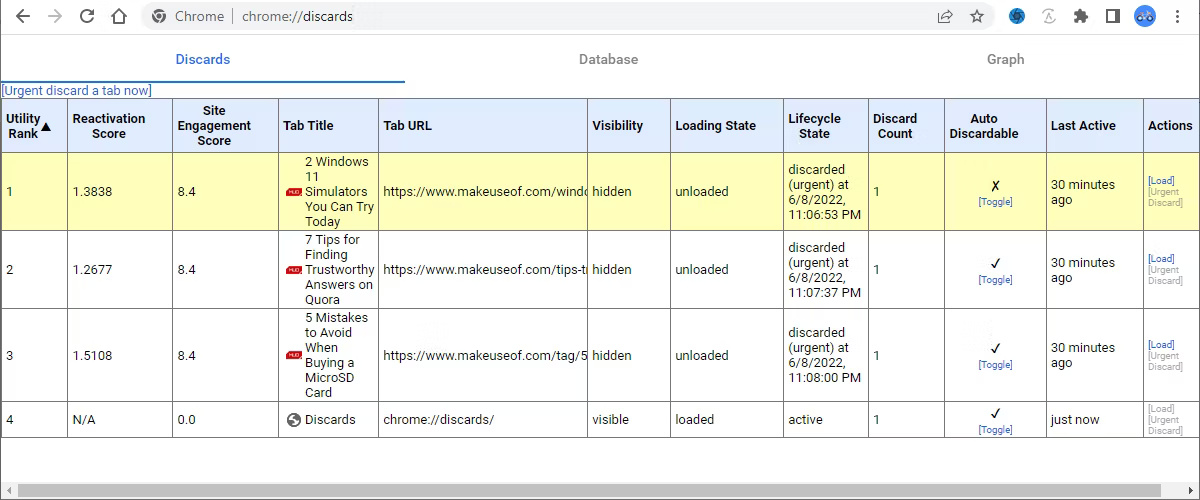
Remember that this is not a permanent solution. If you close a tab and reopen it, you will have to repeat the steps above to prevent the tab from refreshing.
6. Turn Off Chrome's Memory Saver
Chrome's Memory Saver is a feature that unloads tabs you don't use. Disabling this feature will prevent tabs from being destroyed. However, this means that Chrome will work without worrying about memory management.
To turn off Memory Saver, click the three-dot icon in the upper right corner and select Settings .
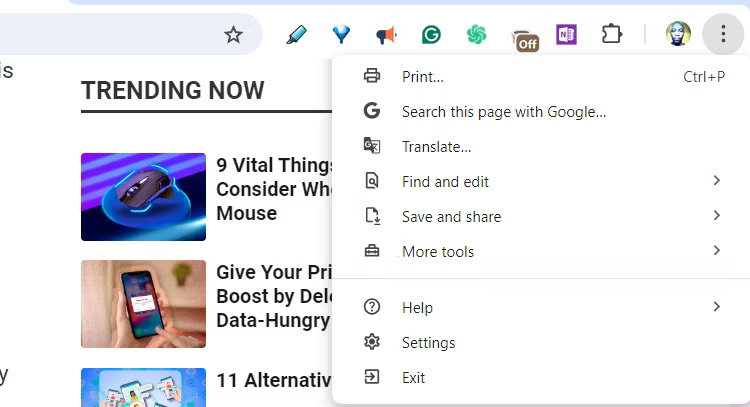
In the left pane, click Performance and turn off the toggle next to Memory Saver .
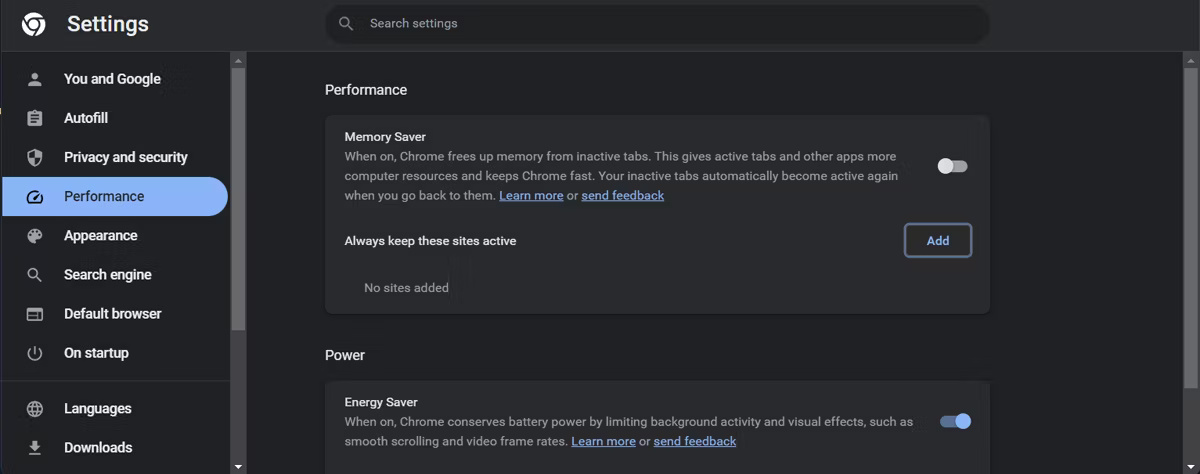
If you still want to use Memory Saver, you can keep it as is and create a list of websites that Chrome must keep active at all times. To do that, click the Add button next to Always keep these sites active .
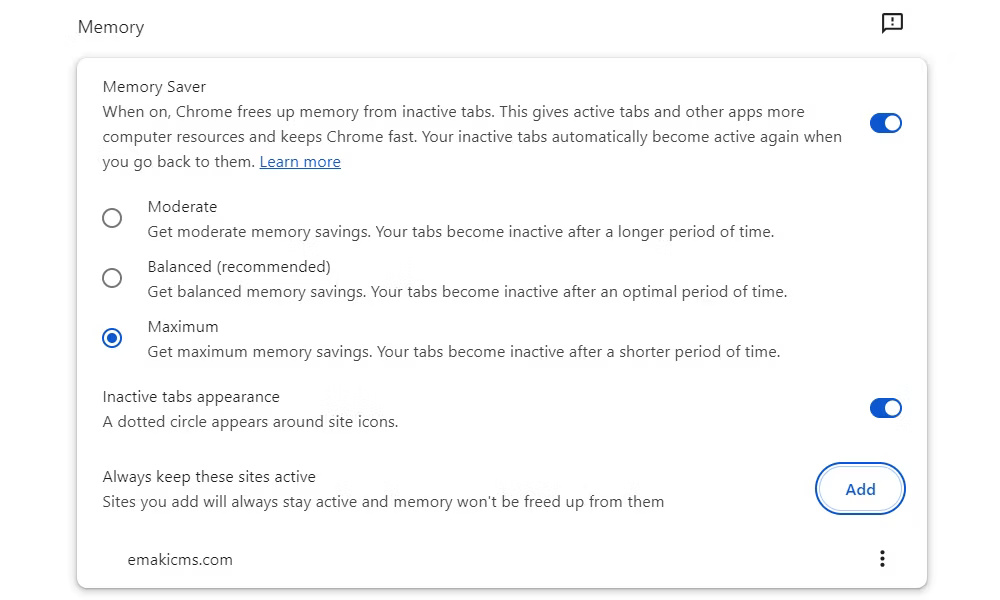
In the Add current sites tab, you can select one of the opened tabs. Alternatively, you can select the Add sites manually tab and enter the URL of an alternative site. Then click Add .
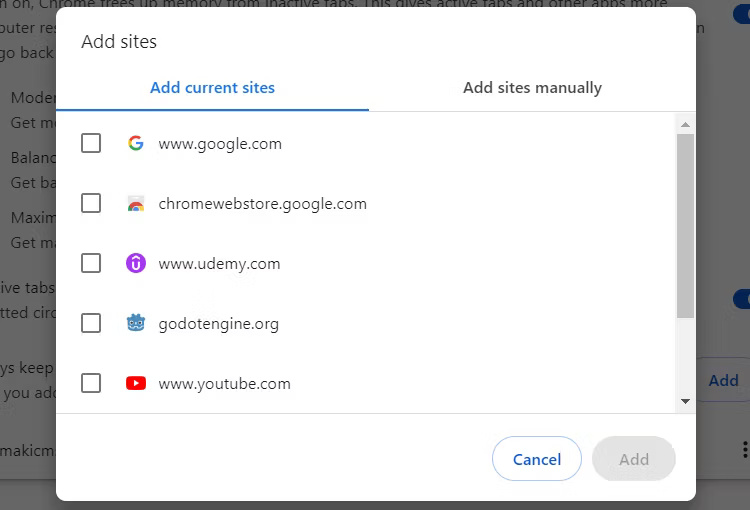
To maintain active domains and subdomains, enter your website's main domain. For example, if you type google.com , Chrome will preserve its subdomains, such as https://maps.google.com , even if you're running low on memory.
Additionally, you can use an asterisk to tell Chrome which tab to keep active. The asterisk acts as a wildcard, and you can add an asterisk to keep a particular website's tabs active. If you enter Twitch.com/* , Chrome will preserve any active Twitch tabs.
7. Reset Google Chrome
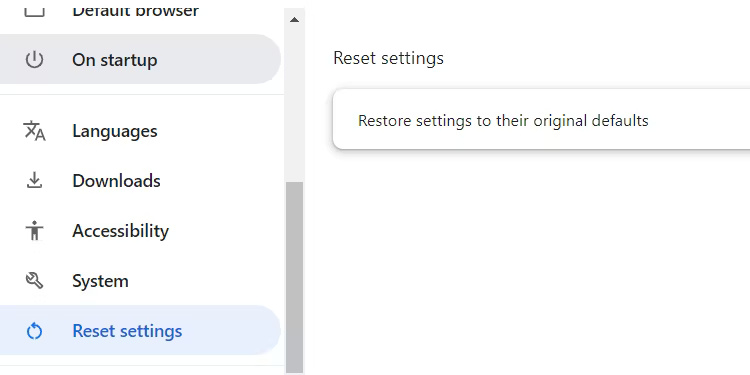
If the previous solutions don't work, you can try resetting Chrome. But before you do, remember that this will return Chrome to default settings, disable all extensions, and clear cache and cookies. Some data, such as history, bookmarks, and passwords will remain intact.
8. Add RAM
If the problem persists or you want to open as many tabs as you want without worrying about Chrome's memory management, you can increase the amount of RAM on your computer. This will provide more memory to keep your tabs open while running other applications on your computer smoothly.
If you tend to let tabs pile up, you should try some tab management tips for Chrome. Not only does this improve your browser's performance, but it also makes you more organized and productive.



Reader Comments 0
Sign in with email or Google to join the discussion.