Steps to delete Block in AutoCAD
Delete blocks in AutCAD - In this tutorial, let's learn how to delete blocks in Cad.
Table of Contents
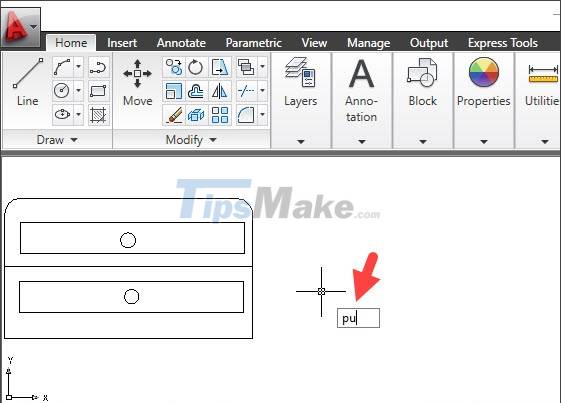
1. Using the PU . command
Step 1: You enter the PU command => press Enter.
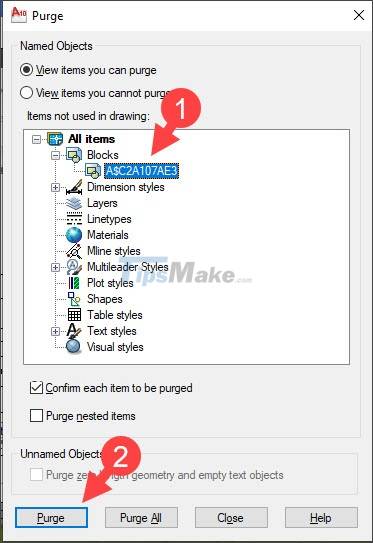
Step 2: You tick and select the block you want to delete (1) => Purge (2).
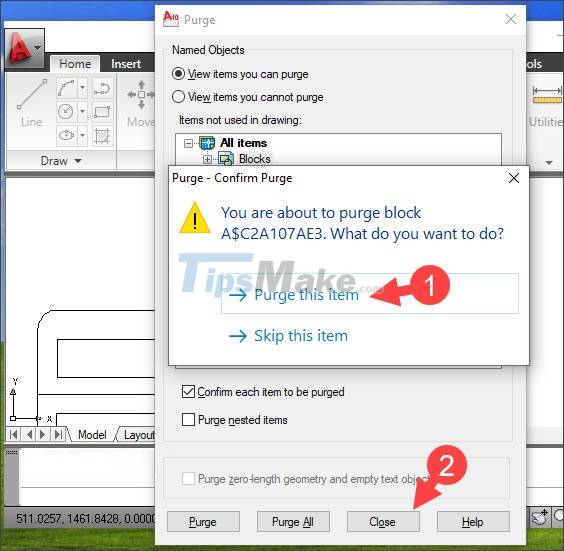
Step 3: You choose Purge this item (1) => Close (2).
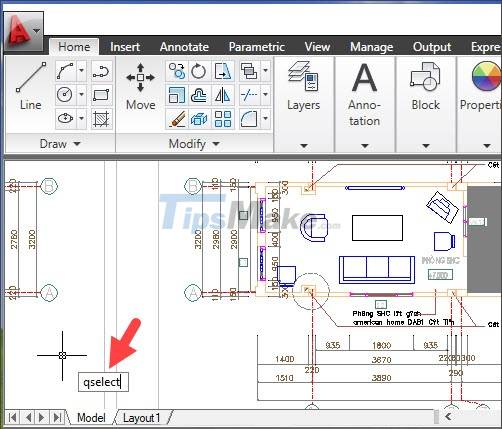
2. Locate the block to delete
Sometimes, you will see some unknown block names and don't know what the function of this block is? With the quick select command, you can determine where the block is before deciding whether to delete it or not?
Step 1: You enter the command qselect => Enter.
Step 2: You set the parameters as follows:
- Apply to: Entire drawing (1) => the search area is the entire drawing.
- Object type: Block Reference (2) => the object to look for is Block.
- Properties: Name (3) filter the block list by name.
- Operator: = Equals (4) the search method is equal, exactly.
In the Value (5) section, select the block to be determined (6).
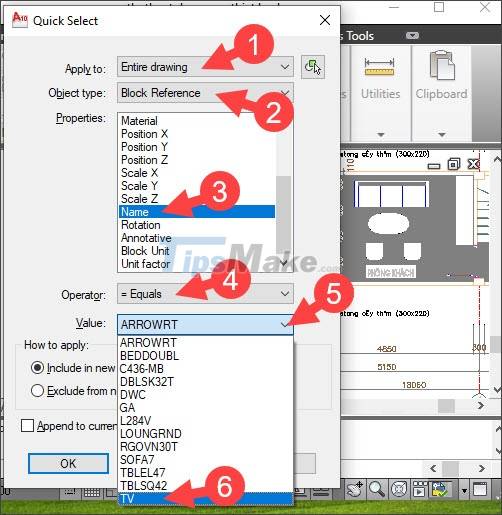
Next, click OK to start searching for blocks by name.

Step 3: After the setup is complete, you will see the selected block number listed in the Command section. In the image below, you can see 3 selected blocks (1). When shrinking the drawing, you will see the position of the 3 blocks above at position (2) including block 1, 2 and position (3) including block 3.

With the instructions in the article, you will see how to delete blocks in Cad very quickly and simply with a few easy steps. Good luck!
Was this article helpful?
Your feedback helps us improve.


Reader Comments 0
Sign in with email or Google to join the discussion.