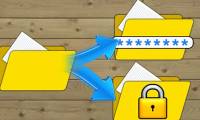
Share files and folders between Mac OS X and Windows 7
In daily life, work, data file sharing requirements are huge. And with the following article, we will cover the basic steps to share system resources between Mac OS X and Windows 7 ...
QuanTriMang - In daily life, work, data file sharing requirements are huge. And with the following article, we will cover the basic steps to share system resources between Mac OS X and Windows 7.
Share files on Mac OS X with Windows 7:
It sounds simple, but many people often confuse this setup process. First, select System Preferences> Sharing on Mac computer:

Choose File Sharing and click Options :

Select Share files and folders using SMB (Windows) , then click Done :

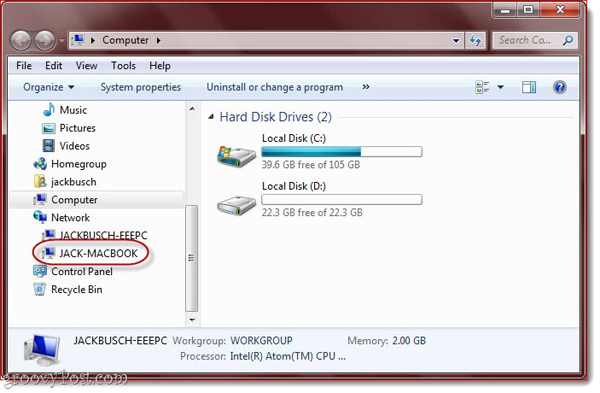
Here, the user can assign more or less, assign permissions to each account in the system using the +/- button under Folders and Users . Next, on a Windows-based computer, the Mac will be fully displayed in the Network section as shown below, click and that to connect and use the features as usual. The process is the same as when connecting 2 Windows computers together, you need to have an account that was initialized, depending on the level of permissions set accordingly:
Share Windows data with Mac OS X:
To perform this process, on Windows 7 computer, select Start> Control Panel> Network and Internet> Network and Sharing Center> Change Advanced Sharing Settings:
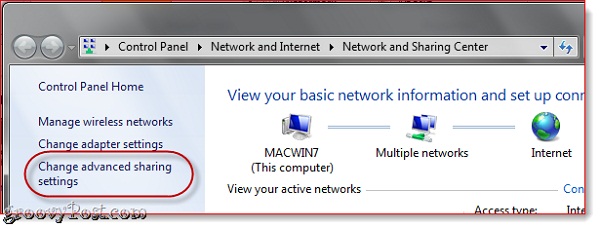
Scroll down, until the File and printer sharing section , select Turn on file and printer sharing and Turn on sharing compared to the access network can read and write files in the Public folders in the next section:

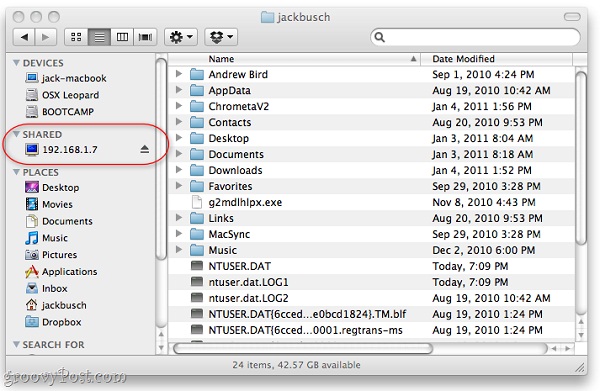
After selecting the settings above, you click Save Changes to save the changes. Next, on a Mac OS X computer, use the Finder , and the system will display the Windows 7 computer in the left window under Shared :
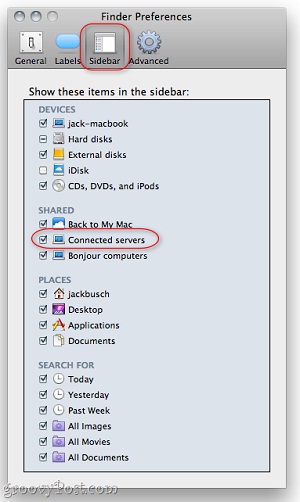
In case you do not see the Windows computer, it may be due to the following two reasons. First, users who have not enabled the shared server feature in the Finder , please check again in Finder> Preferences> Sidebar and make sure that the Connected servers box is marked:
If you apply the above method and still don't solve the problem, try logging in directly to Windows manually. In the Finder section, select the menu Go> Connect to Server or press Command - K :
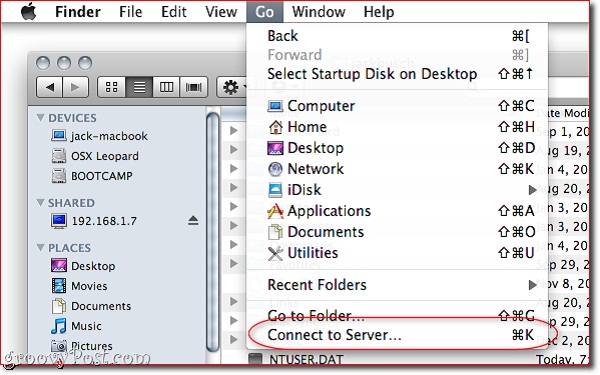
And type the SMB: //192.168.1.7 address or the IP address of the Windows 7 machine, click Connect and account information to login.
Change Workgroup in Windows 7 and Mac OS X:
For some systems, changing the Workgroup to a single standard makes it easier to share data files and folders. By default, both Windows 7 and Mac OS X use workgroup as the standard name.
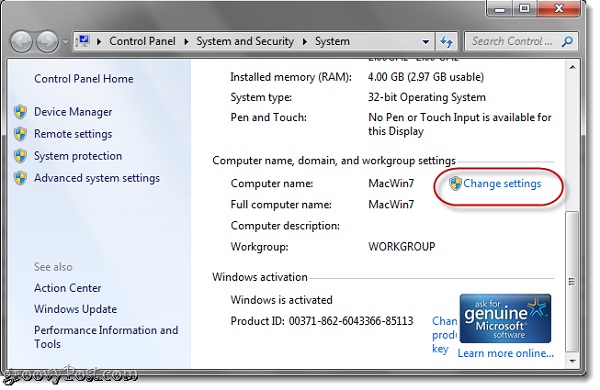
To change the workgroup in Windows 7, click Start Menu , right-click the Computer> Properties icon, scroll down to the Computer name, domain, and workgroup settings> Change settings :
At the Computer Name tab, click Change :

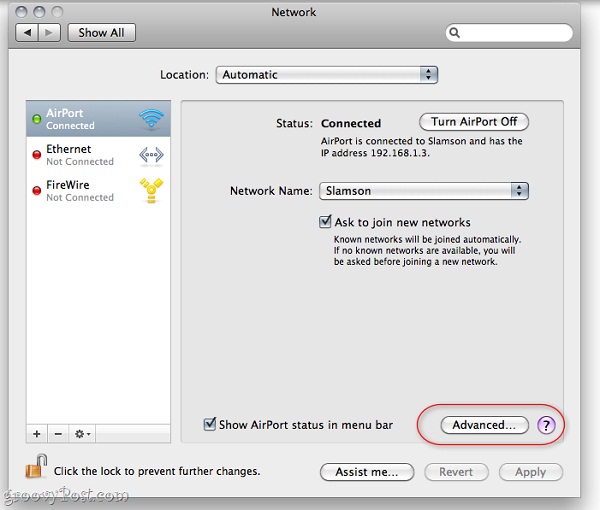
To do this in Mac OS X, select System Preferences> Network , select Internet connection protocol like wired or wireless network . and Advance :
Select the WINS tab, and enter the workgroup name, then click OK and Apply to save the change:

When you have completed the above steps without problems, we have finished sharing the file or folder sharing process between two Windows 7 and Mac OS X computers.
Was this article helpful?
Your feedback helps us improve.
Related Articles
 How to share a folder (folder) via LAN on Windows 103 minutes read
 How to share files and folders in Dropbox6 minutes read
 5 ways to share files and folders from OneDrive in Windows 108 minutes read
 Instructions for setting password to protect files and folders in Windows7 minutes read
 Share users and folders on the LAN in Windows 86 minutes read
 How to share files and folders on Google Drive2 minutes read
Reader Comments 0
Sign in with email or Google to join the discussion.