MS Word - Lesson 15: Numbering at the beginning of lines
Automatic numbering allows you to format text as a list with numbers, dots, borders, and many other customizations that users can apply to their Word documents. This article will guide you on how to number documents in Word in various ways..
Word provides users with many tools to edit and format Word documents in various content styles. With separate Bullets and Numbering features, we can quickly add bullet points to paragraphs, making the content easier to read and manage when dealing with multiple sections.
In Excel, cell numbering is automatic, while in Word, users are forced to use the Bullets and Numbering tools. Automatic numbering allows you to format text as a list with numbers, bullet points, borders, and many other customizations and settings that users can apply to their Word documents. This article will guide you on how to number cells in Word.
- Complete Guide to Word 2013 (Part 10): Bullets, Numbering, and Multilevel Lists in Microsoft Word
- How to number pages in Word 2007
- Word 2016 Complete Guide (Part 8): Creating Lists
- How to sort names alphabetically in Word
Video on creating bullet points in Word 2007
8
1. How to use Bullets in Word 2007
Step 1:
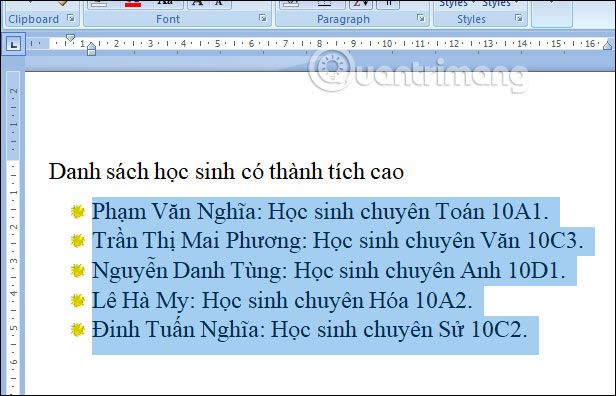
Users highlight the content they want to create a list for. Then, they click the Home tab and select Bullets. In this list, you will see several available ordering styles to apply to the content.
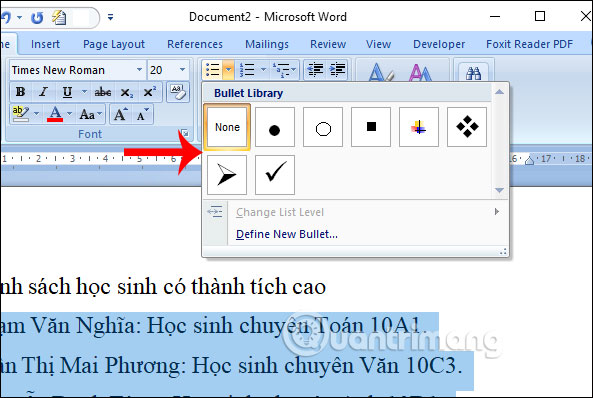
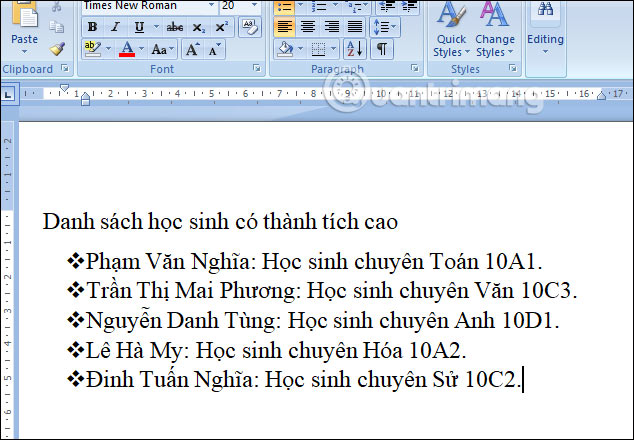
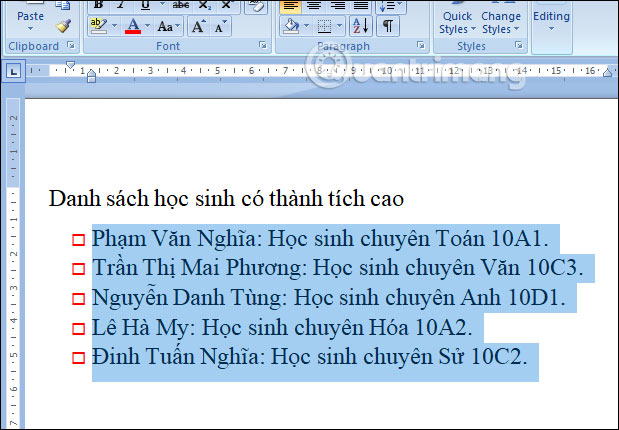
Users can immediately use one of these bullet point character styles. The result will be a numbered list like the one shown below.
Step 2:
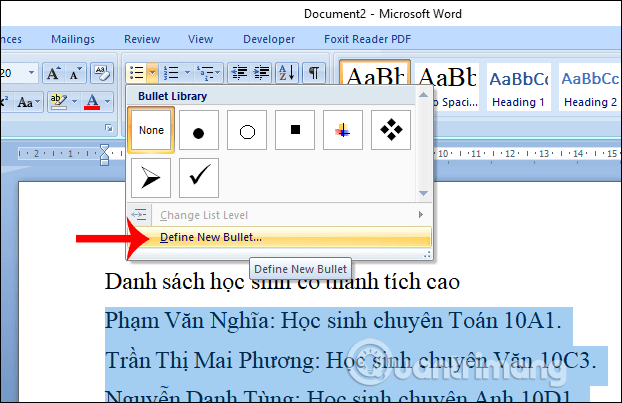
If you want to customize the order, select the "Define New Bullet" option below.
Step 3:
A new interface is displayed with settings for numbering in Word. In this panel, users can select the numbering method.
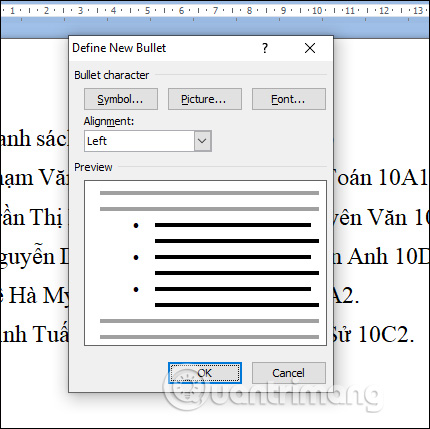
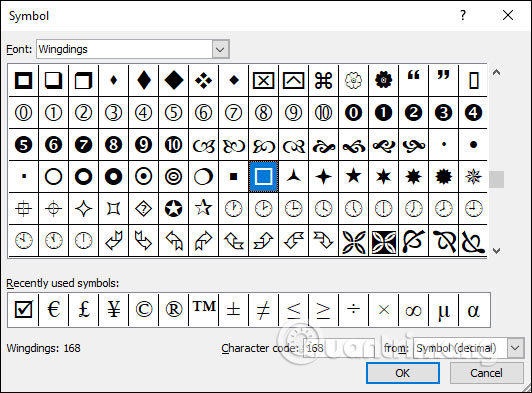
With Bullet character , you have three options to set for the list style. First, click on Symbol… to see the interface of symbols that you can change for the list symbol style.
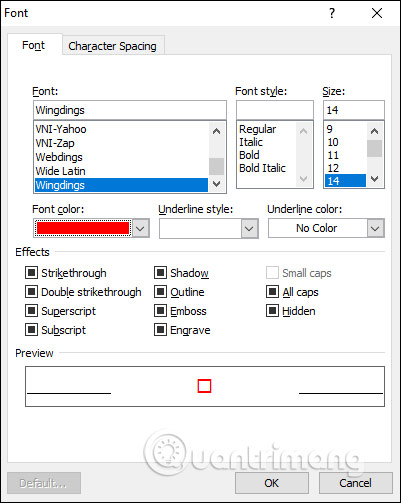
Next, click the Font button to select the size, color, and other formatting for the chosen icon style. Click OK to apply that numbering style to your Word document.
The result will be a numbering scheme that matches the icon style the user has set.
Step 4:
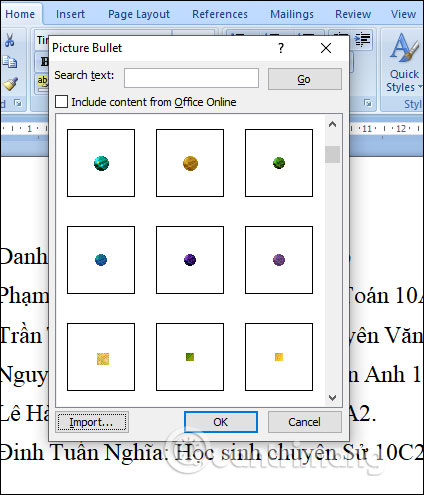
If you want to use images instead of bullet points, click Define New Bullet. Then click Picture . A selection of available images will appear. You can also click Import to add images from your computer.
As a result, we also get a new list creation method.
2. Instructions for using Numbering in Word 2007
Step 1:
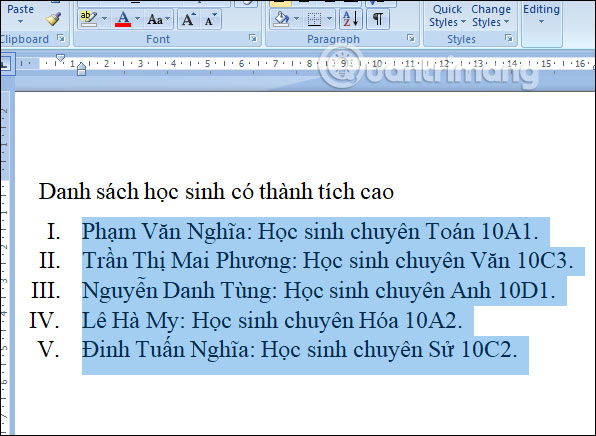
Users can also highlight the content they want to number and then click the Numbering icon . You will then see various numbering styles. Choose a pre-made numbering style to apply to your document.
The list will then be numbered sequentially as shown below.
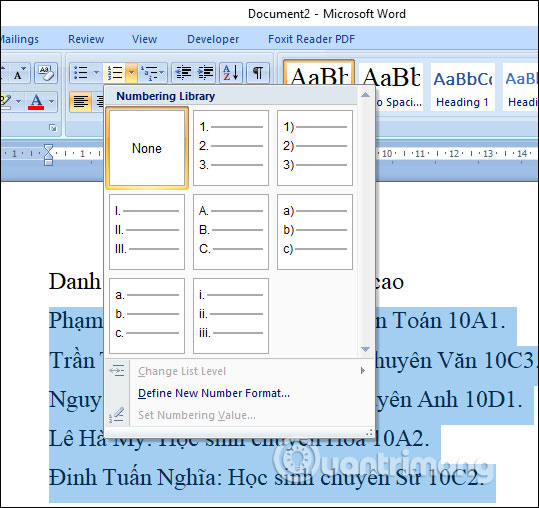
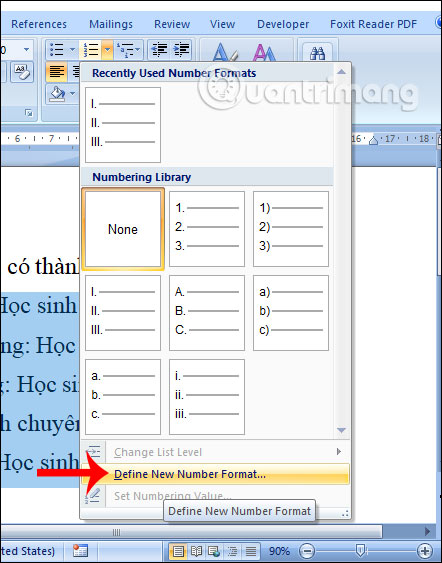
Step 2:
To create a new numbering style, select Define New Numbering Format from the list.
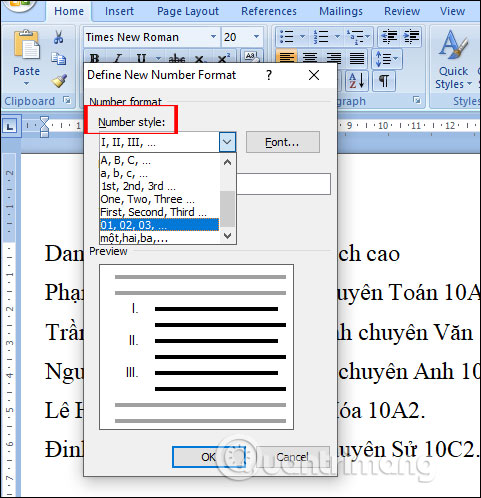
Step 3:
It also displays an interface for users to set the numbering style. In the Number Style section , select the desired bullet point numbering style for the document.
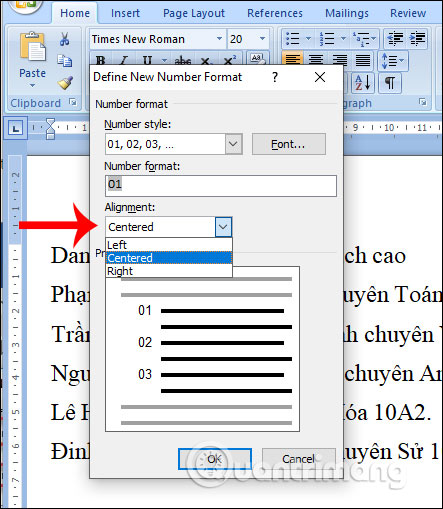
The Number Format option allows you to remove other characters, leaving only the numbers. For example, with the numbering style shown in the image, you can remove the period.
The Alignment section will select the Centered alignment format.
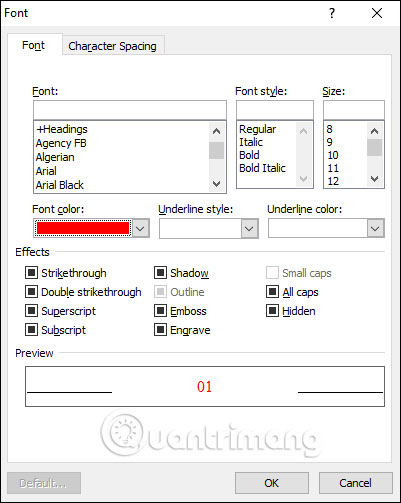
Step 5:
Additionally, users have the option to change the font to customize the numbering style. Press OK to save.
The result is a numbered sequence like the one shown below.

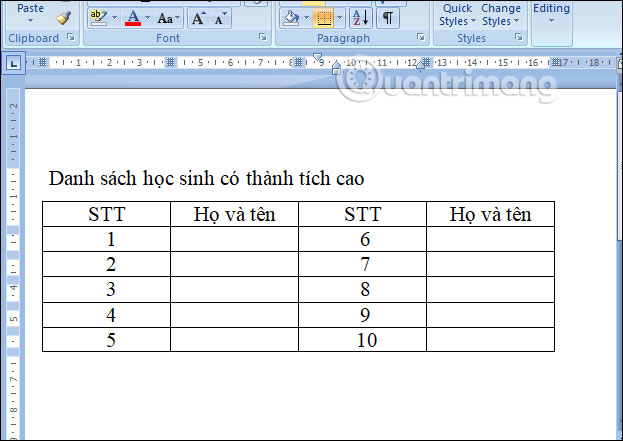
If you have a table with two columns of non-consecutive serial numbers, you need to perform a few more steps to make the numbers contiguous. First, you need to select the numbering style for both columns. This will ensure the serial numbers in the two columns are not consecutive.
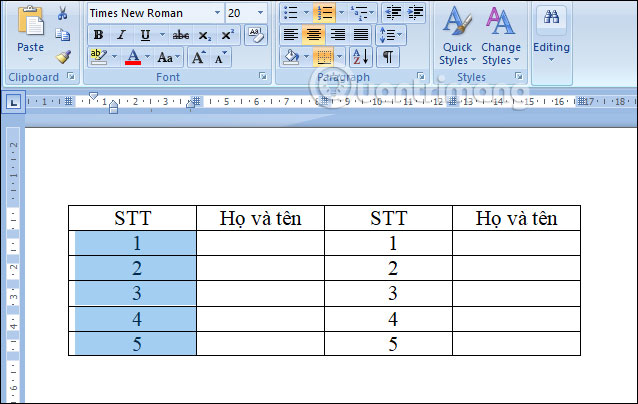
We just highlight the number in the second column , right-click, and select Set Numbering Value .
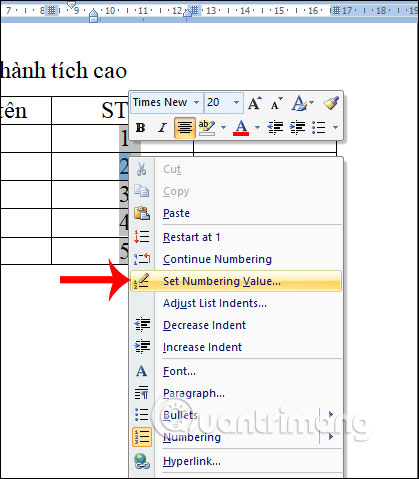
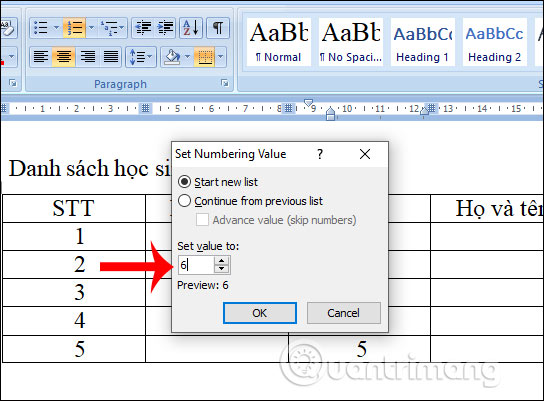
This displays an interface where we can enter the next number after the last number in the first column in the "Set Value to" section .
Then the second column will display the sequence number consecutive to the first column.
Above is a complete guide on how to use the Bullets and Numbering tools in Word 2007. The settings for Bullets and Numbering will differ, allowing you to create unique numbering styles.
Good luck with your project!
Next lesson: MS Word - Lesson 16: References and Citations