Table of Contents
Page formatting controls how a Word document is arranged on screen and paper. In Word 2007, the main settings are under Page Layout, while cover pages, headers, footers, and page breaks are under Insert. Decide the paper size first, then set orientation and margins before fine-tuning borders or recurring page elements.
The screenshots show Word 2007. In newer desktop versions, Page Layout is usually named Layout, and page borders may appear under Design.
Set orientation, paper size, and margins
Choose portrait or landscape
Open Page Layout > Orientation and choose:
- Portrait: the page is taller than it is wide; suitable for most letters, reports, and essays.
- Landscape: the page is wider than it is tall; useful for wide tables, charts, or images.
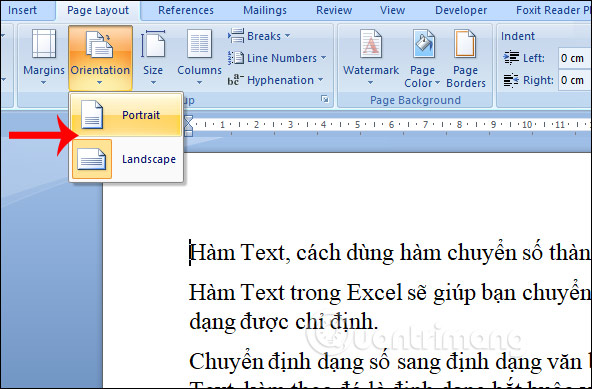
The choice normally applies to the whole document. To change only part of a document, create a section around that content before changing its orientation.
Choose the paper size
Select Page Layout > Size and choose the paper installed in your printer, such as A4 or Letter. Word’s default depends on regional and printer settings, so check the selected size instead of assuming it.
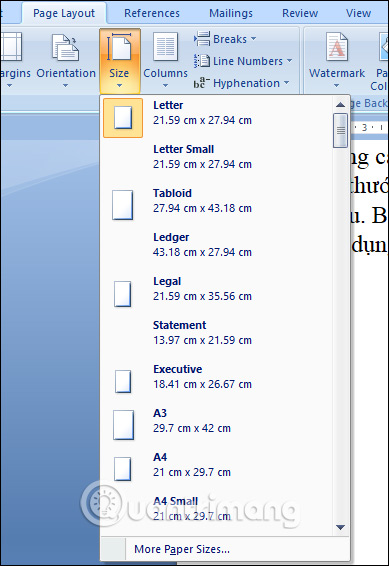
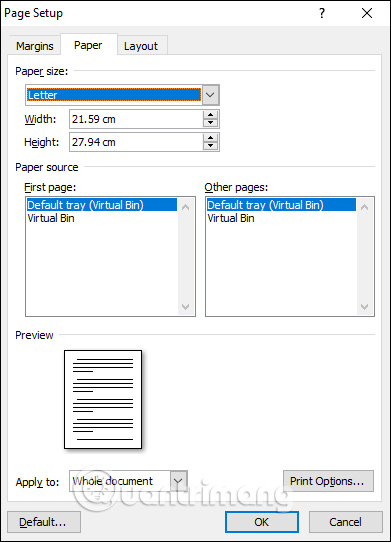
For a nonstandard sheet, select More Paper Sizes, enter the width and height, and verify that the printer supports them.
Set the margins
Select Page Layout > Margins to apply a preset. If the document has a style guide or binding requirement, choose Custom Margins.
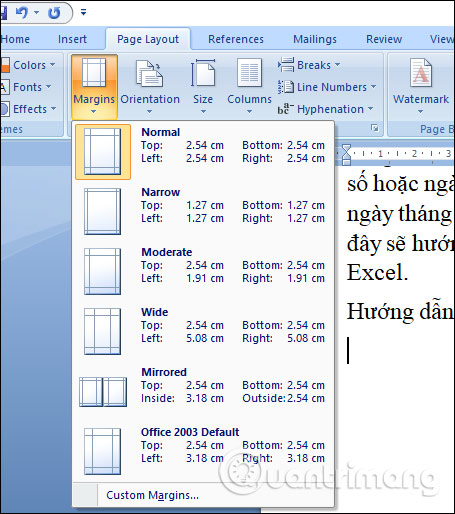
In Page Setup, enter the Top, Bottom, Left, and Right margins. Use Gutter only when extra space is needed for binding. Check the Apply to setting before confirming so an intended section-only change does not alter the entire file.
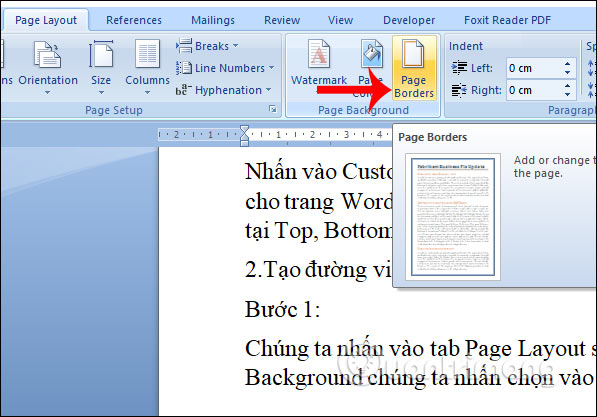
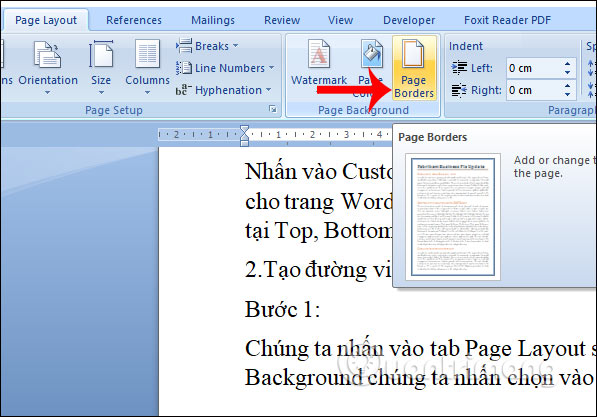
Add a page border
Open Page Layout and select Page Borders in the Page Background group.
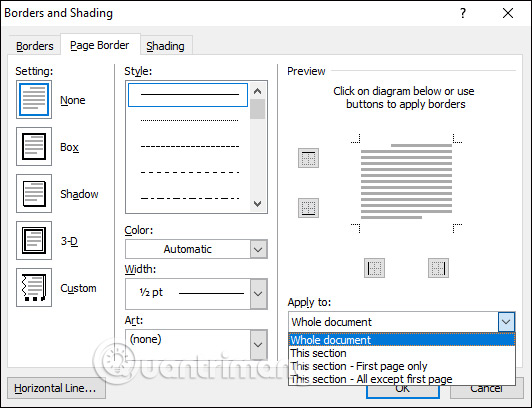
On the Page Border tab, configure only what the document needs:
- Setting: None, Box, Shadow, 3-D, or Custom.
- Style, Color, and Width: define the appearance of a line border.
- Art: replaces the line with a decorative pattern; reserve this for informal documents.
- Apply to: controls whether the border appears throughout the document, in the current section, on its first page only, or on all pages except its first.
Select Options in the dialog if the border is clipped when printed; increase its distance from the page edge or measure from the text instead. The preview should show the same sides you intend to print.
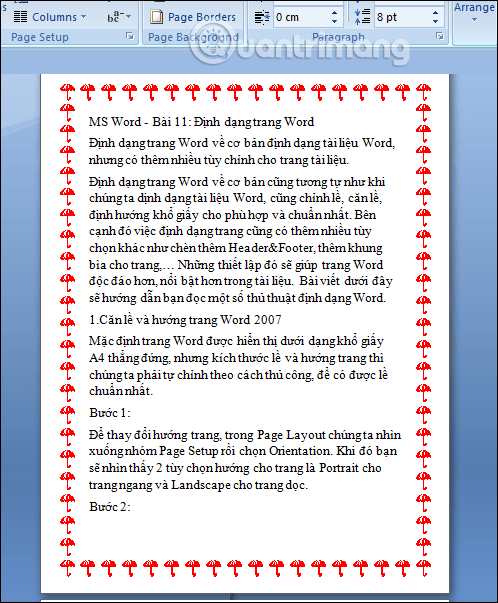
For more variations, see the guide to creating frames in Word 2007 and later.
Insert or build a cover page
Select Insert > Cover Page, choose a built-in design, and replace every placeholder with the document title, author, organization, date, or other required details. Remove unused placeholders instead of leaving sample text in the file.
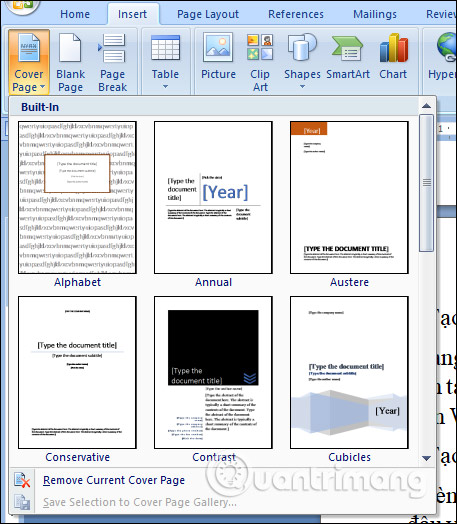
A formal submission may require a custom layout rather than a gallery template. The separate step-by-step Word cover-page guide covers both template and custom approaches.
Add headers and footers
Use Insert > Header or Insert > Footer to add information that repeats on pages, such as a document title, chapter name, page number, or version. Keep these elements brief; contact details belong there only when the document’s purpose requires them.
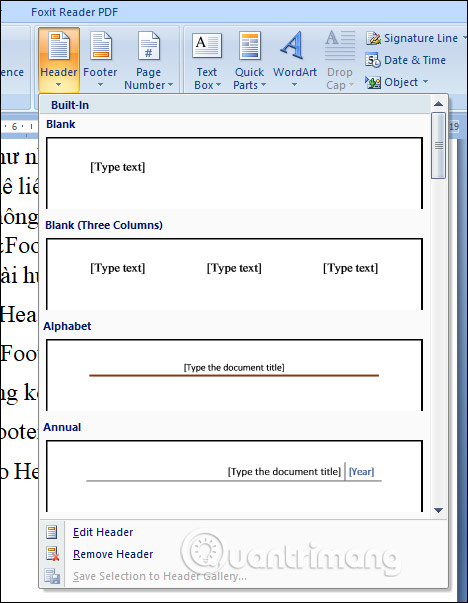
While editing the header or footer, use options such as Different First Page or Different Odd & Even Pages when the layout calls for them. To use a different header in another chapter, insert a section break and turn off Link to Previous in that section. See how to create different headers and footers for a worked example.
Use page breaks and section breaks correctly
Page break
Place the cursor where the next page should begin, then select Insert > Page Break, or press Ctrl+Enter.
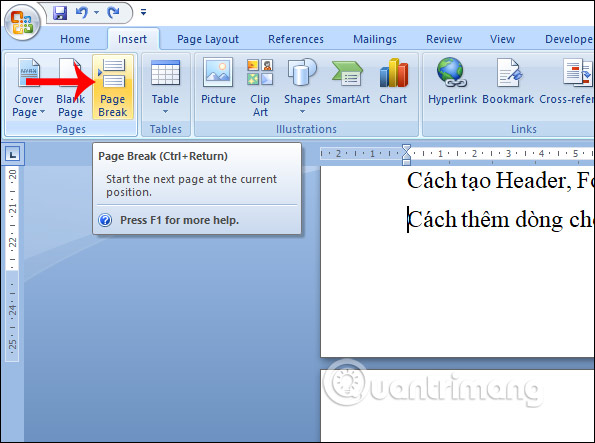
A page break moves following content to a new page without changing its page formatting. It is more reliable than pressing Enter repeatedly because it stays attached to the content when earlier text changes.
Section break
Select Page Layout > Breaks when the content after the break needs different margins, columns, orientation, headers, footers, or page numbering.
- Next Page: starts the new section on the next page.
- Continuous: starts a new section on the same page.
- Even Page / Odd Page: starts the section on the next even- or odd-numbered page, which is useful for book chapters.
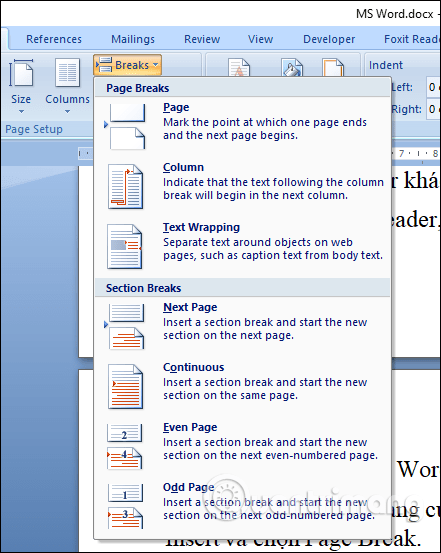
Turn on formatting marks with Ctrl+Shift+8 when troubleshooting breaks. Deleting a section break also removes the boundary between the sections and can cause the earlier section to adopt the formatting of the section that followed it. Microsoft’s section-break documentation explains the current behavior.
Insert a blank page
Select Insert > Blank Page to add a full blank page at the cursor. Use Page Break when you only need existing content to start on the next page. Do not create a blank page by adding many empty paragraphs; those paragraphs can shift as the document is edited. If an unwanted page remains, follow the checks in How to Remove a Blank Page in Word.
Check before printing or sharing
- Confirm the paper size matches the printer and the submission requirement.
- Use Print Preview to find clipped borders, unexpected blank pages, and rotated sections.
- Check the Apply to choice for every margin, border, and orientation change.
- Update headers, footers, and page numbering after adding or removing sections.
- Save a copy as PDF if recipients only need to read or print the finished layout.
Related Articles
 MS Word - Lesson 7: How to Use Styles7 minutes read
 MS Word - Lesson 14: Create Web Pages: Microsoft Word 20072 minutes read
 How to Start Page Numbers on Any Page in Word12 minutes read
 MS Word - Lesson 6: Format the Text: Microsoft Word 20074 minutes read
 How to Delete White Pages in Word Is Easy: Delete Word White Pages3 minutes read
 Control Formatting When Pasting Text in Word24 minutes read
Reader Comments 0
Sign in with email or Google to join the discussion.