How to Install and Use Ansible on Debian 10
Today, TipsMake will introduce the Ansible installation process on Debian 10.
Installing Ansible on Debian 10
To install Ansible on Debian 10, you need to do three simple steps:
Step 1: Update your Debian system 10
Before installing Ansible on Debian 10, you must update it using the command shown below:
sudo apt updateAfter updating your Debian 10 system, you should see information as shown in the following image on the Terminal:

Step 2: Install Ansible on a Debian 10 system
After the system update is finished, you can install Ansible on Debian 10 using the command shown below:
sudo apt install ansibleDuring the time this command is executed, you will see a message asking if you want to continue the installation on Terminal. You have to type Y in order for the installation to continue running smoothly.
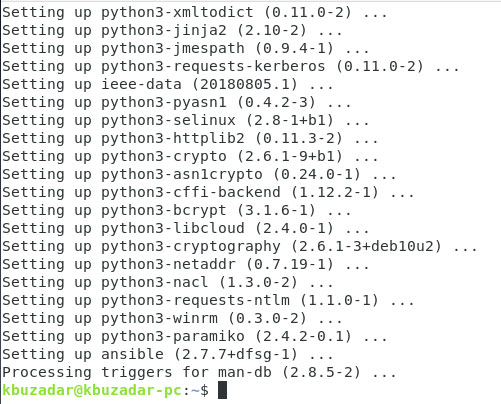
When Ansible is successfully installed on a Debian 10 system, Terminal will generate some message on it similar to the one shown in the following figure:

Step 3: Confirming Ansible installation on a Debian 10 system
Installing Ansible on a Debian 10 system is so simple that it should complete in the two steps above. However, you can still verify if it was successfully installed on your Debian 10 system. This can be done by checking the Ansible's version with the following command:
ansible --versionThe version of Ansible installed on a Debian 10 system in the example is 2.7.7.
Edit the file host / etc / ansible / hosts to add the system you want to manage with Ansible.
sudo nano /etc/ansible/hostsPlease add the following:
[TestClient] node1 ansible_ssh_host=192.168.0.12And save the file.
Use Ansible
First, you must configure the SSH Key for the client node because Ansible is using the SSH protocol to pass commands to the client system.
Use this command to generate SSH key and key-based authentication:
ssh-keygenOutput:
Generating public/private rsa key pair. Enter file in which to save the key (/root/.ssh/id_rsa): Enter passphrase (empty for no passphrase): Enter same passphrase again: Your identification has been saved in /root/.ssh/id_rsa. Your public key has been saved in /root/.ssh/id_rsa.pub. The key fingerprint is: SHA256:gTHiTCK.... root@debian10 The key's randomart image is: +---[RSA 2048]----+ | . . . | +----[SHA256]-----+The next step is to copy the newly created key to another system. Run this command:
ssh-copy-id -i ~/.ssh/id_rsa.pub root@192.168.0.2The IP 192.168.0.2 in the above command should be replaced with the IP address of the system you want to manage with Ansible.
Output:
/usr/bin/ssh-copy-id: INFO: Source of key(s) to be installed: "/root/.ssh/id_rsa.pub" /usr/bin/ssh-copy-id: INFO: attempting to log in with the new key(s), to filter out any that are already installed /usr/bin/ssh-copy-id: INFO: 1 key(s) remain to be installed -- if you are prompted now it is to install the new keys root@192.168.0.2's password: Number of key(s) added: 1Now that it's time to do the first test, log in to another machine using this SSH command:
ssh root@192.168.0.2The login should now work without a password.
Test run Ansible
Installation is complete, now you can start testing Ansible
Run this command to test the connection:
ansible -m ping TestClientOutput:
node1 | SUCCESS => { "changed": false, "ping": "pong" }In case you have defined multiple clients, you can check all connections with the following command:
ansible -m ping allNow, it's time to run a command on the remote system and fetch the results. For this example, the df command will be used.
ansible -m shell -a 'df -h' TestClientOutput:
node1 | CHANGED | rc=0 >> Filesystem Size Used Avail Use% Mounted on udev 957M 0 957M 0% /dev tmpfs 195M 21M 175M 11% /run /dev/sda1 38G 11G 25G 31% / tmpfs 974M 0 974M 0% /dev/shm tmpfs 5.0M 0 5.0M 0% /run/lock tmpfs 974M 0 974M 0% /sys/fs/cgroup /dev/sda15 121M 130K 120M 1% /boot/efi tmpfs 195M 0 195M 0% /run/user/0The results show the use of the hard drive on the remote system. You can execute any Linux shell command like this using Ansible and also create a complete script to set up and maintain the server.