Table of Contents
This guide provides a clear overview of nonolive, including Instructions to Livestream on Nonolive Using PC, Setup Steps. Use it to understand the topic, compare the available options, and make a more informed decision.
If you are intending to start with streamer work, everyone can refer to Nonolive to fulfill their wishes. This article will show you how to livestream on Nonolive using PC.
Instructions to Livestream on Nonolive Using PC
First, everyone needs to download OBS Studio, which is suitable for your PC's operating system.
OBS Studio supports the following operating systems:
- Windows: Windows 7 or later; DirectX 10.1 compatible GPU.
- MacOS: Intel CPU (no PPC support); OpenGL 3.2" compatible GPU
- Linux/Unix: OpenGL 3.2 compatible GPU; X Windows System.
Setup Steps
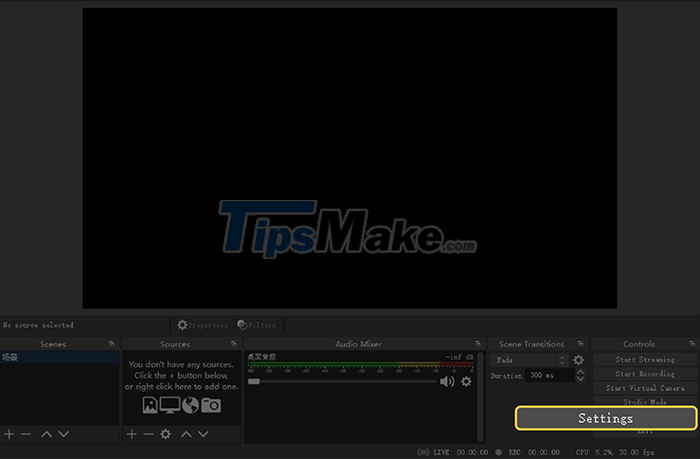
Step 1: Open OBS Studio and click the Settings button at the bottom right of the main screen.
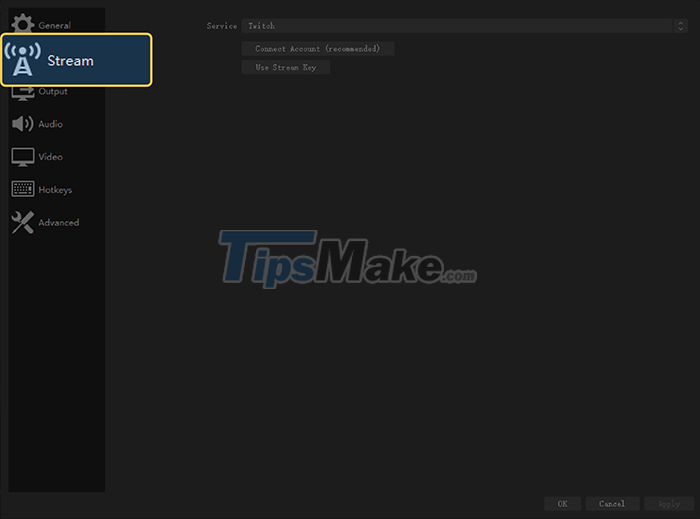
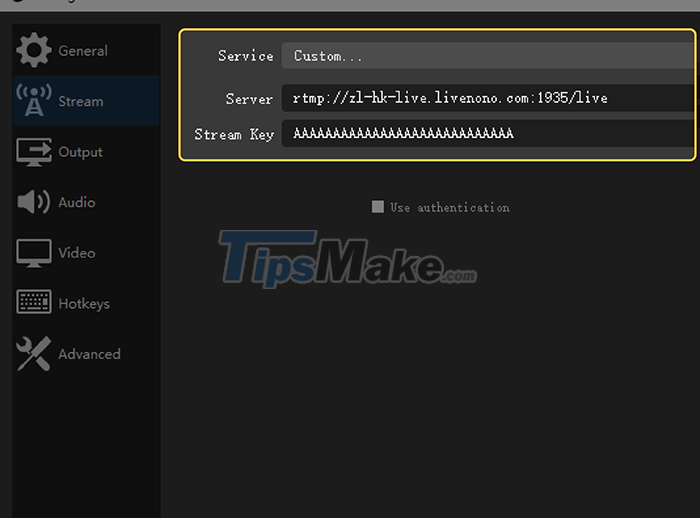
Step 2: After opening Settings, click Stream.
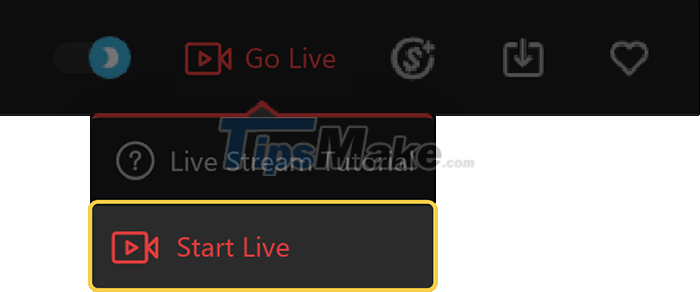
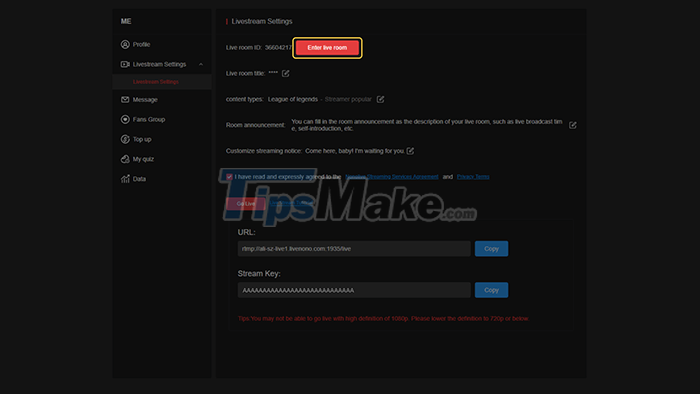
Step 3: Start the browser, visit the official website of Nonolive, then log in and click the Start Live Broadcast button.
If you haven't created an account, people won't be able to access your live stream settings, so sign up for a new account.
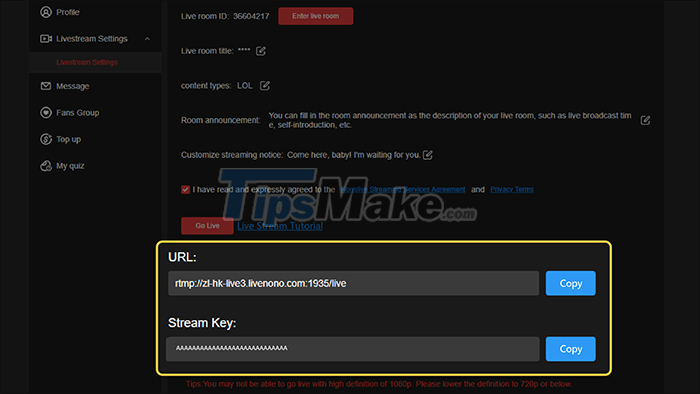
Step 4: Fill in information about the stream (stream content, introduction.).
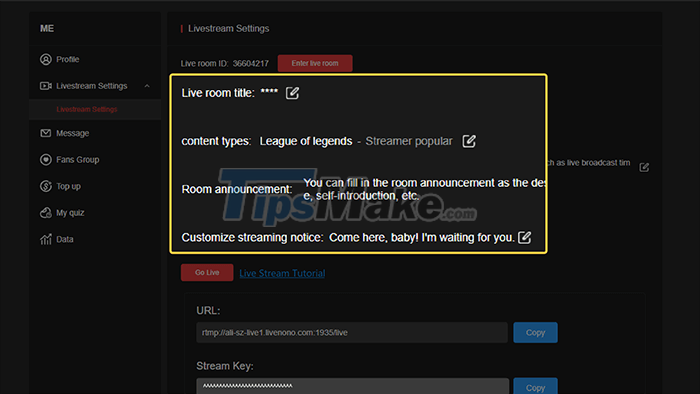
Step 5: Copy the URL and Stream Key respectively and paste them into Settings/Stream of OBS Studio.
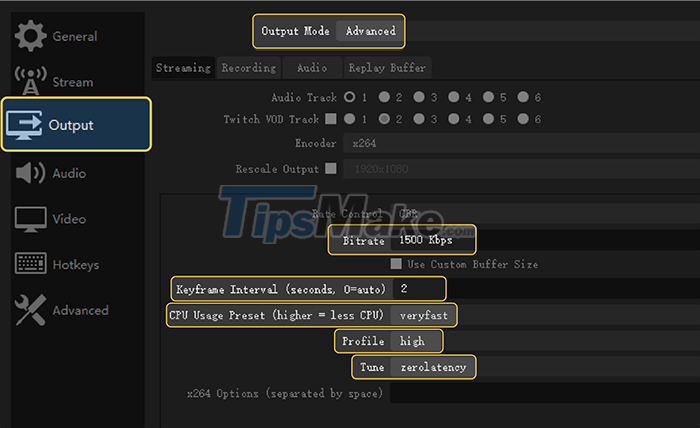
Step 6: Click Output and select Advance in Output Mode, then set as shown in the image below.
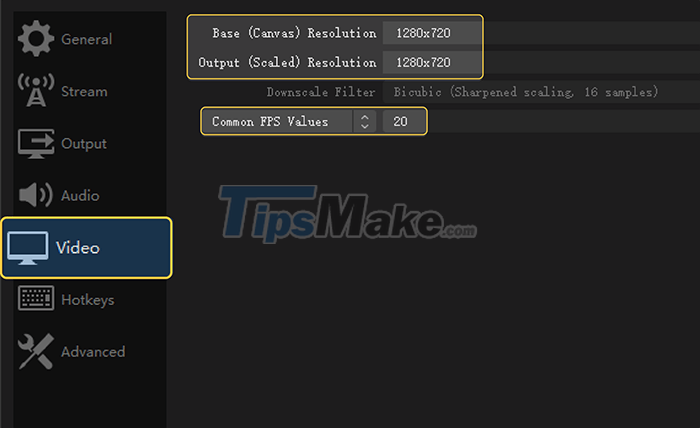
Step 7: Select Video and then set as shown in the image below.
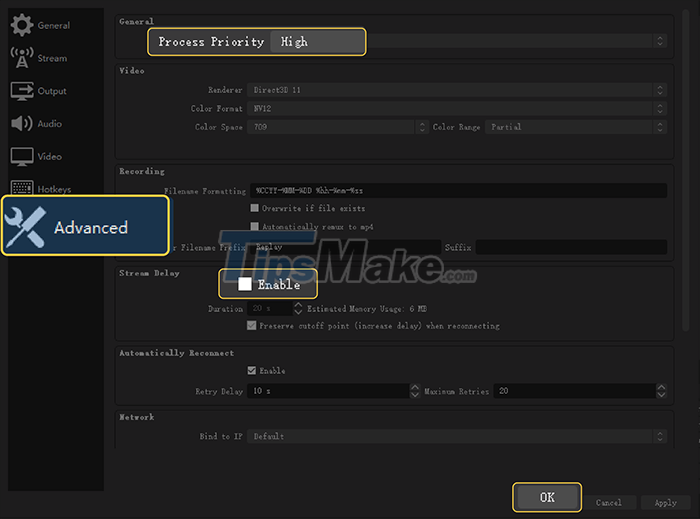
Step 8: Click Advance, then set Process Priority to High; next, make sure that the Stream Delay box is unchecked; After completing the installation, click the OK button.
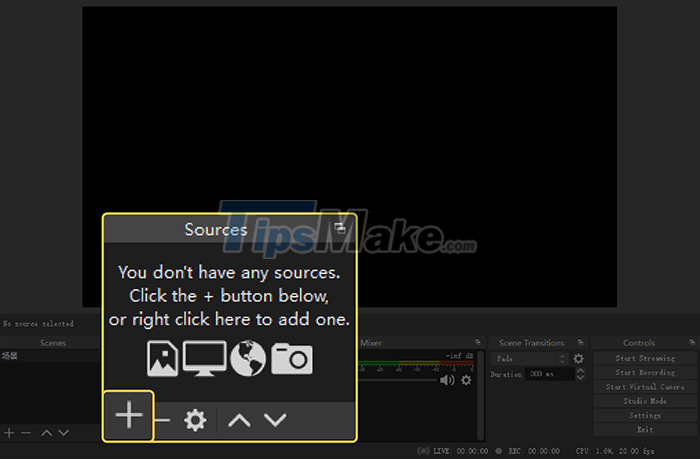
Step 9: Go back to the main screen, add a source and click the + button.
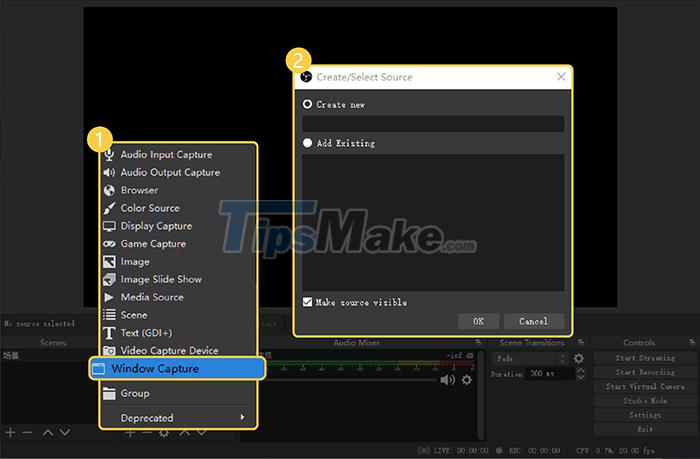
Step 10: Select Window Capture and click the OK button on the new screen that appears.
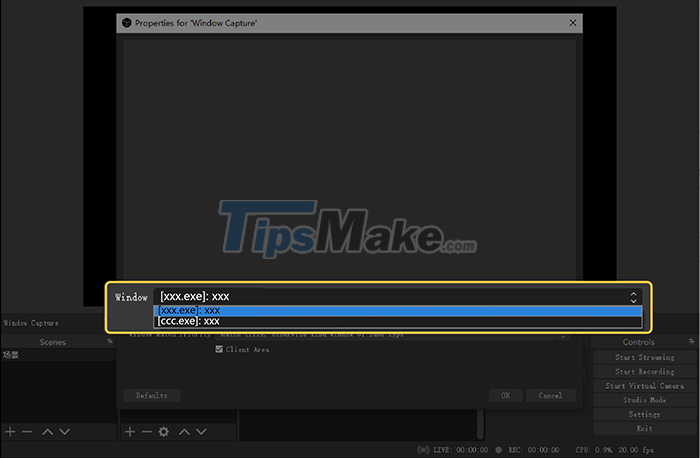
Step 11: Click the arrow button on the right side of the window option, then select the window you want to use, select Match title, otherwise find the same type of window in the Window below, then click the OK button.
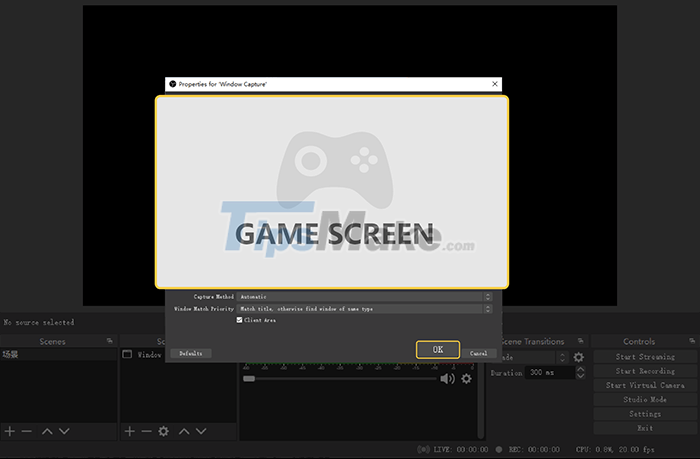
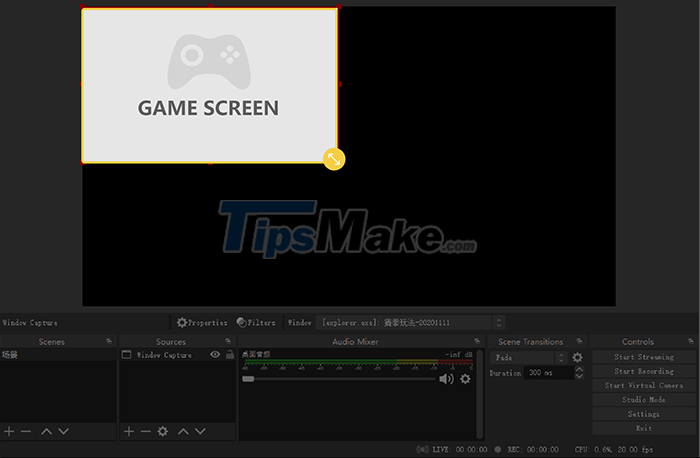
Step 12: Adjust the selected window, click on a corner of the window, then drag it to enlarge. After the adjustment is complete, move the livestream screen to the upper left.
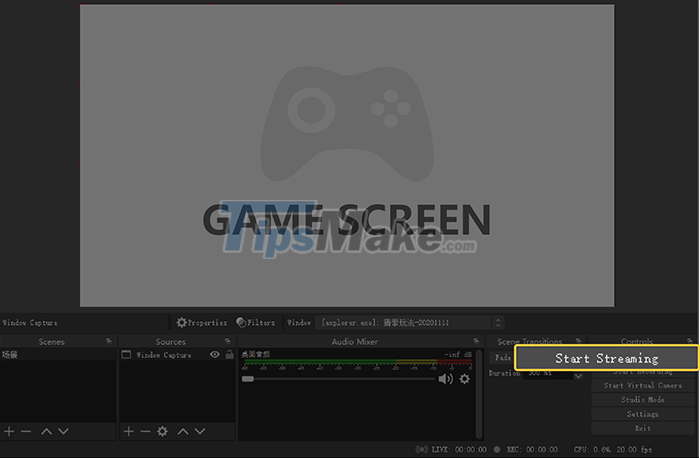
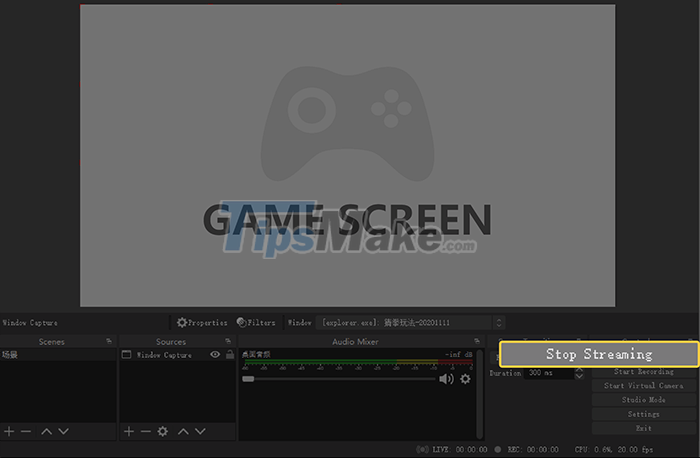
Step 13: Click Start Streaming to start the livestream.
Step 14: Click the Stop Streaming button at the bottom right of OBS Studio to end the livestream.
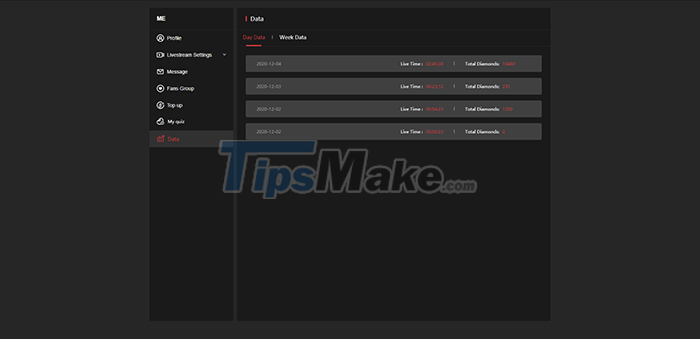
Step 15: If you want to see the data about the livestream after it ends, click on the data in the Personal Center.
How to Set Up the Camera
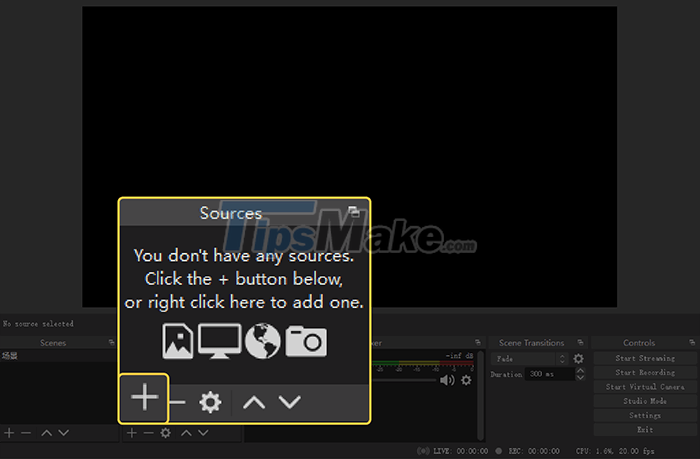
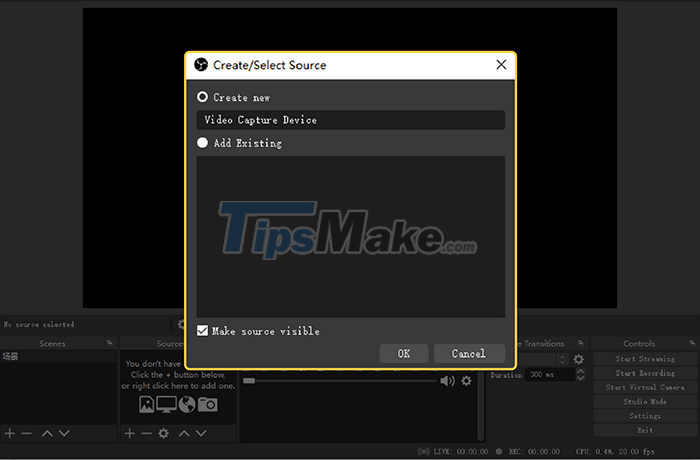
Step 1: Click the button + home screen.
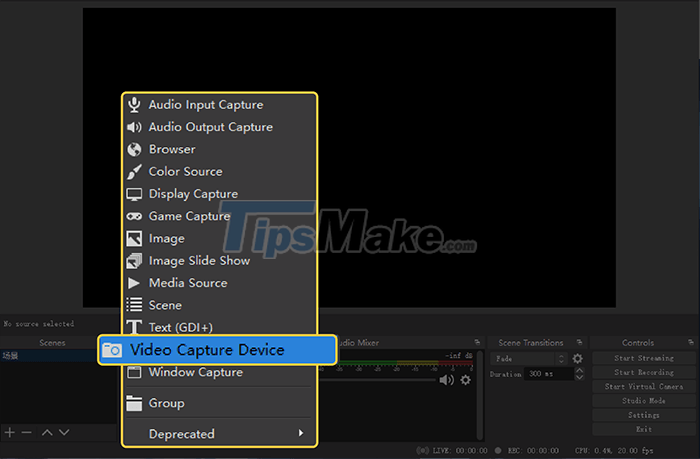
Step 2: Select Video Capture Device.
Step 3: On the newly created window, give it an arbitrary name, then click the OK button.
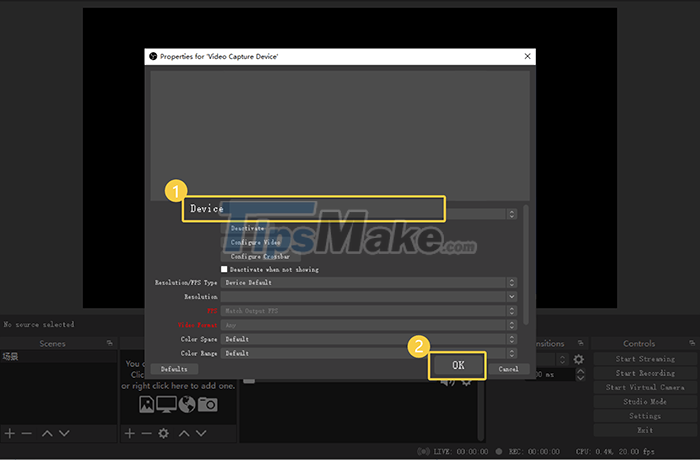
Step 4: Click the arrow button to the right of the device option, then select the device related to the camera. After confirming that the image is displayed, click the OK button.
Conclusion
Understanding Nonolive makes it easier to compare options, avoid common mistakes, and apply the information in this guide more effectively. Review the relevant requirements before making changes or choosing a solution.
FAQ
What is Nonolive?
If you are intending to start with streamer work, everyone can refer to Nonolive to fulfill their wishes.
Why is Nonolive important?
Understanding Nonolive helps you evaluate features, compatibility, performance, and potential limitations before you choose a product or follow a procedure.
What should you consider when using or choosing Nonolive?
Consider your specific goal, compatibility requirements, available features, cost, security, and the practical recommendations described in this guide.
Related Articles
 Instructions for Using Cubetv on the Phone: Livestream5 minutes read
 How to Live Stream on YouTube: Step-by-Step Guide5 minutes read
 Chat and Have Fun with 6 Fun Imessage Games5 minutes read
 How to Installing Wtfast to Reduce Ping When Playing Online Games5 minutes read
 Pros and Cons of Playing Games on Emulators11 minutes read
 How to Create and Insert Livestream Frames for Books8 minutes read
Reader Comments 0
Sign in with email or Google to join the discussion.