Instructions to disable the Protected View feature in Office 2010
Currently, the Protected View feature has a text protection function when sending and receiving via Email. But sometimes this feature makes us bothersome and unnecessary. The following article will guide you to disable this feature on Office 2010 .
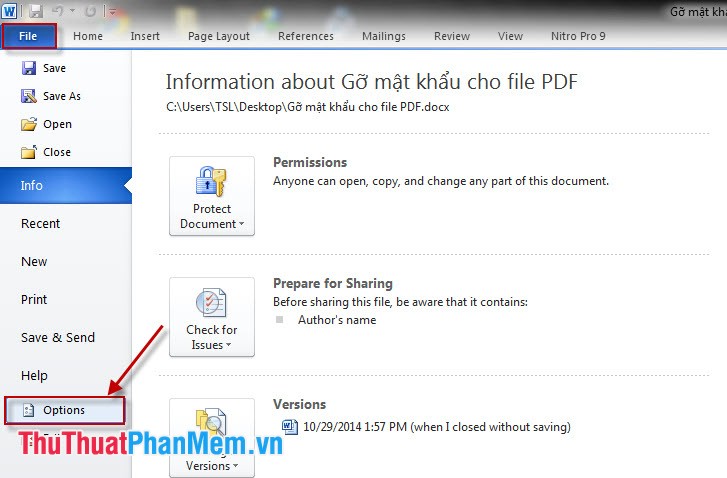
Step 1: Open the Word 2010 file , click on File then select Options .

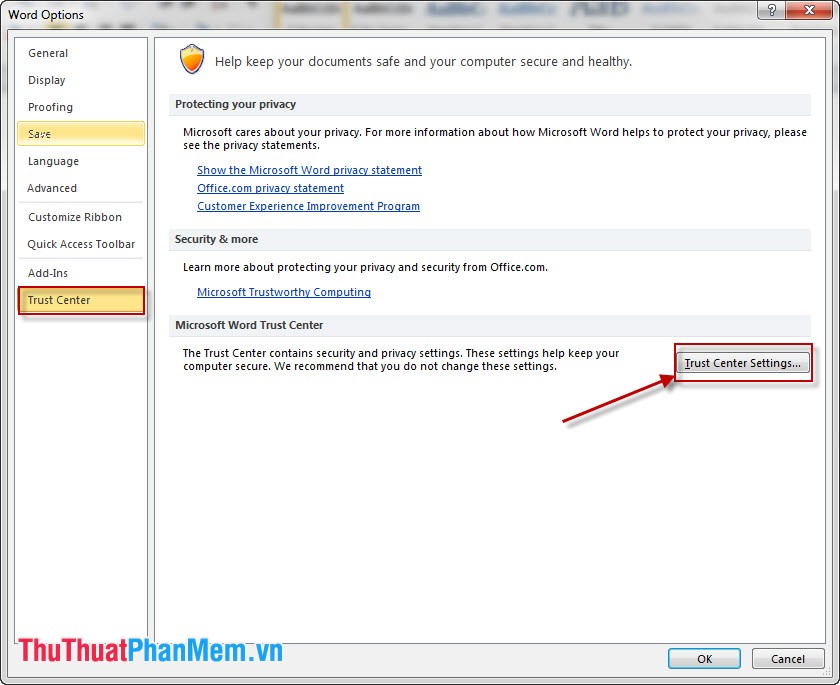
Step 2: The Word Options window opens, choose Trust Center and then click on Trust Center Settings in the Microsoft Word Trust Center section .

Step 3: In the Trust Center dialog box, click Protected View and then clear all the check boxes starting with Enable . Then click OK to finish disabling the Protected View feature .

So we have disabled the Protected View feature in Word 2010 , similarly we do the same with Excel , PowerPoint . in the Office 2010 suite .
You should read it
- ★ Disable the Protected View feature in Word
- ★ How to turn on/off the Protected View feature on Microsoft Office
- ★ Turn on and off the Protected View feature in Office 2010, 2013
- ★ How to disable Wi-Fi Protected Setup (WPS) on the router
- ★ Turn off the Protected View feature when opening Word or Excel documents